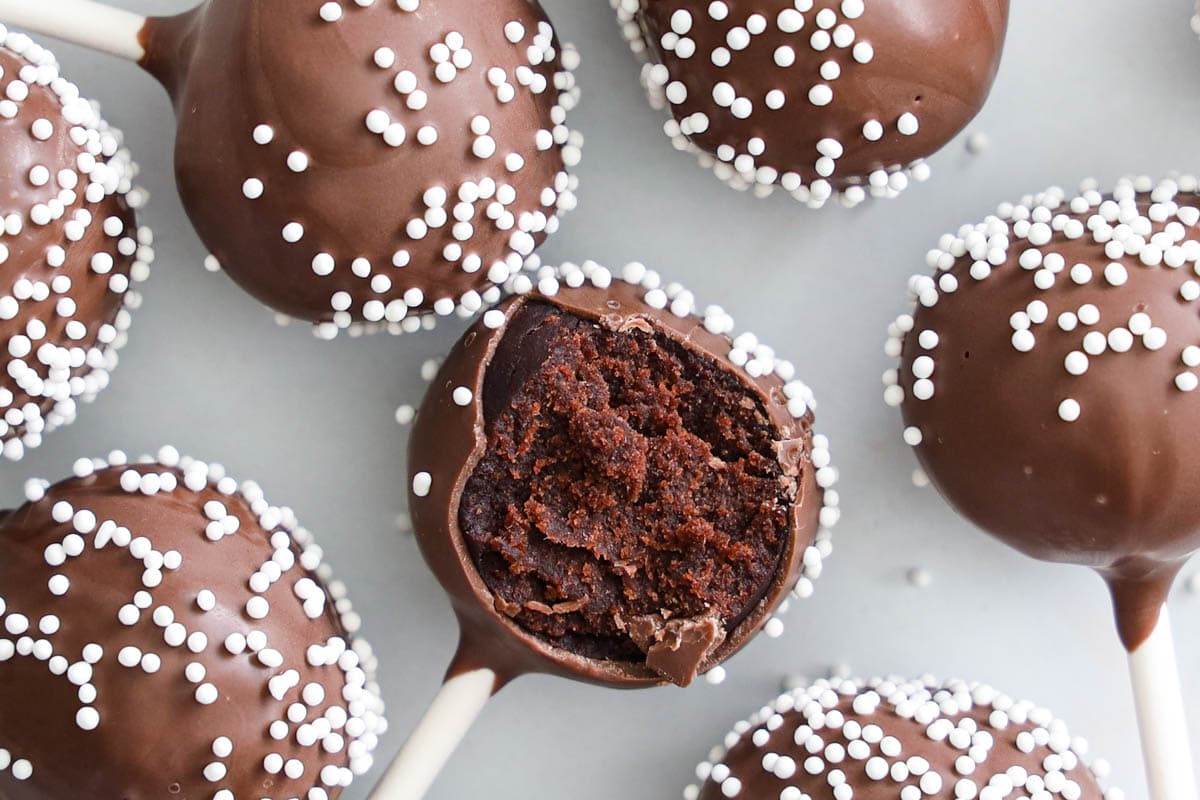
Moist, fudgy cake wrapped in a chocolate candy shell, these Chocolate Cake Pops are sinfully delicious. Satisfy your chocolate craving with these handheld sweet treats.
Love cake pops? You have to try these Starbucks birthday cake pops and red velvet cake pops, and this ultimate cake pop guide.
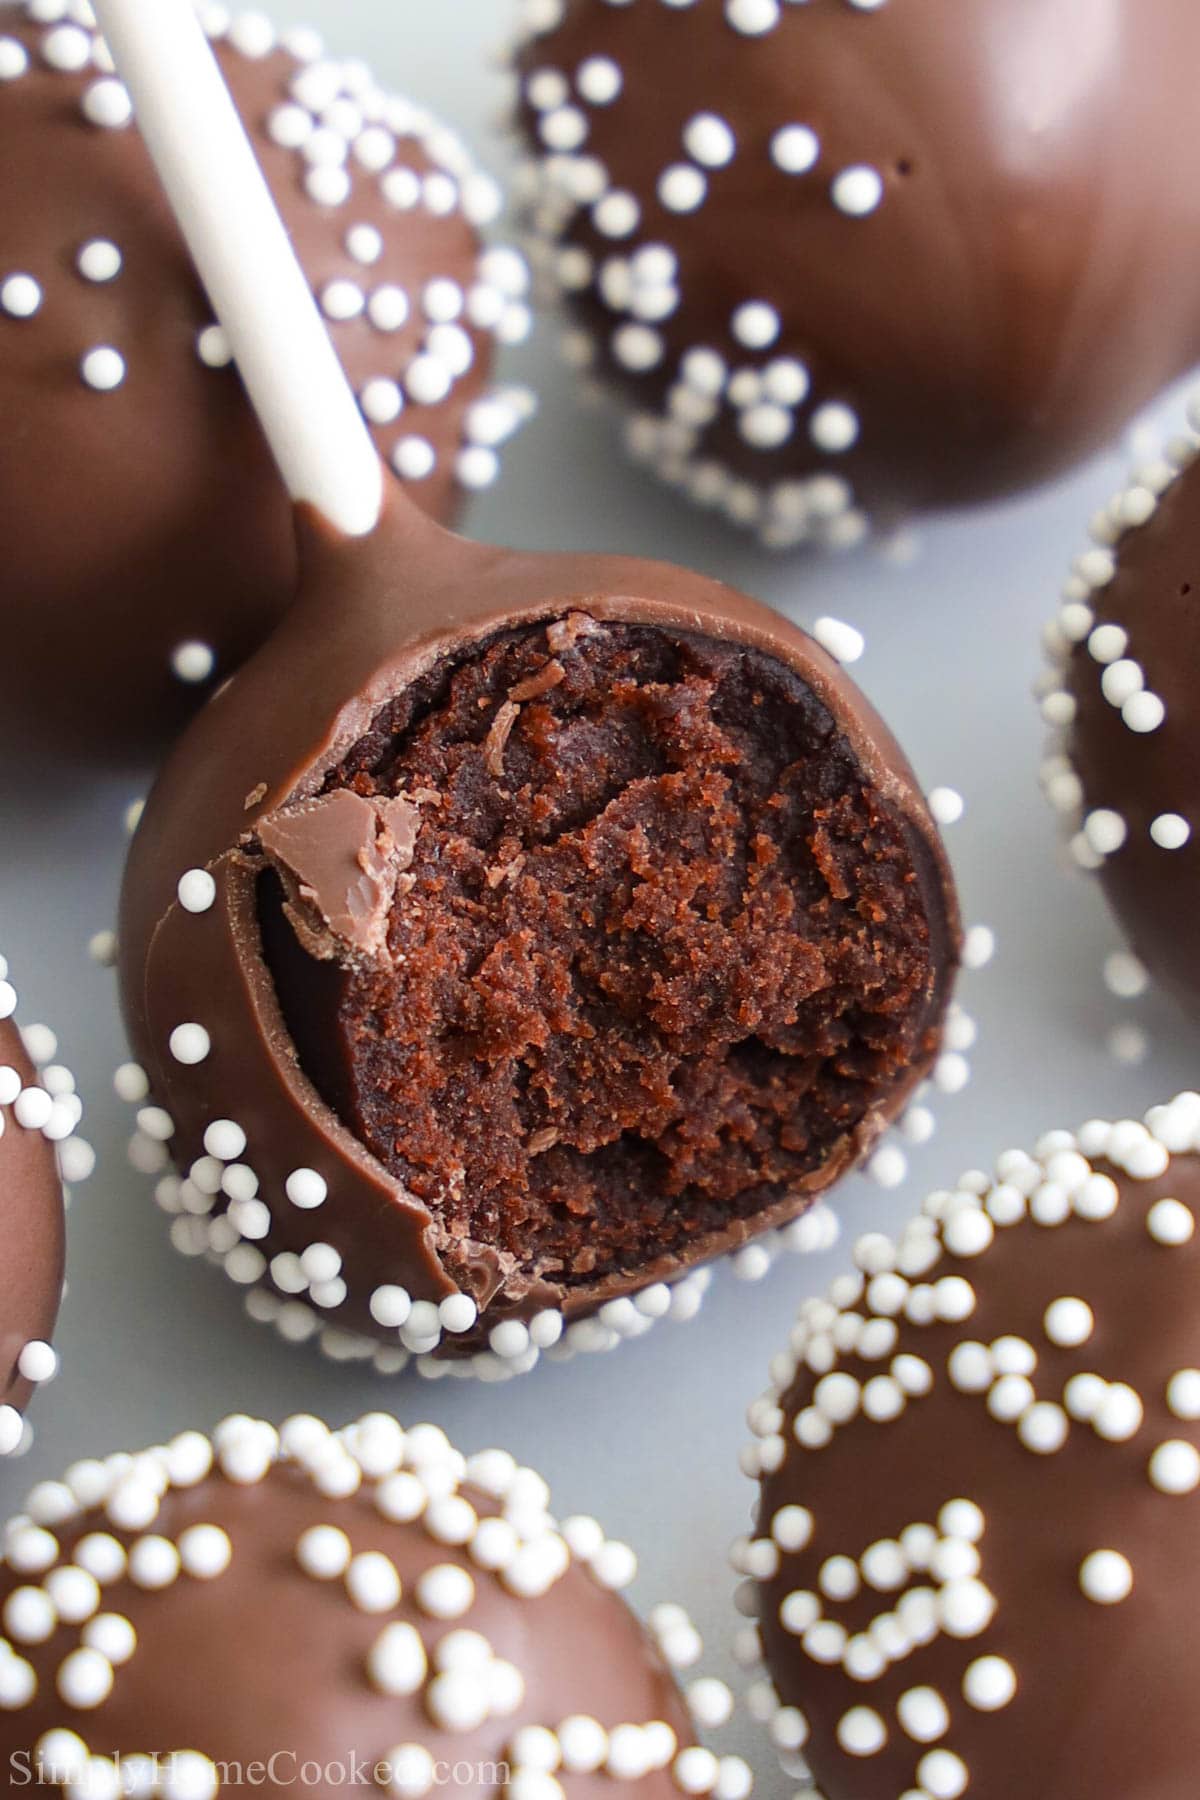
Table Of Contents
Chocolate Cake Pops Recipe Details
These homemade chocolate cake pops are everything you love about Starbucks’ chocolate cake pops, but better, and a lot cheaper!
- TASTE: Intense and rich chocolate flavor throughout the cake pop and outer candy shell.
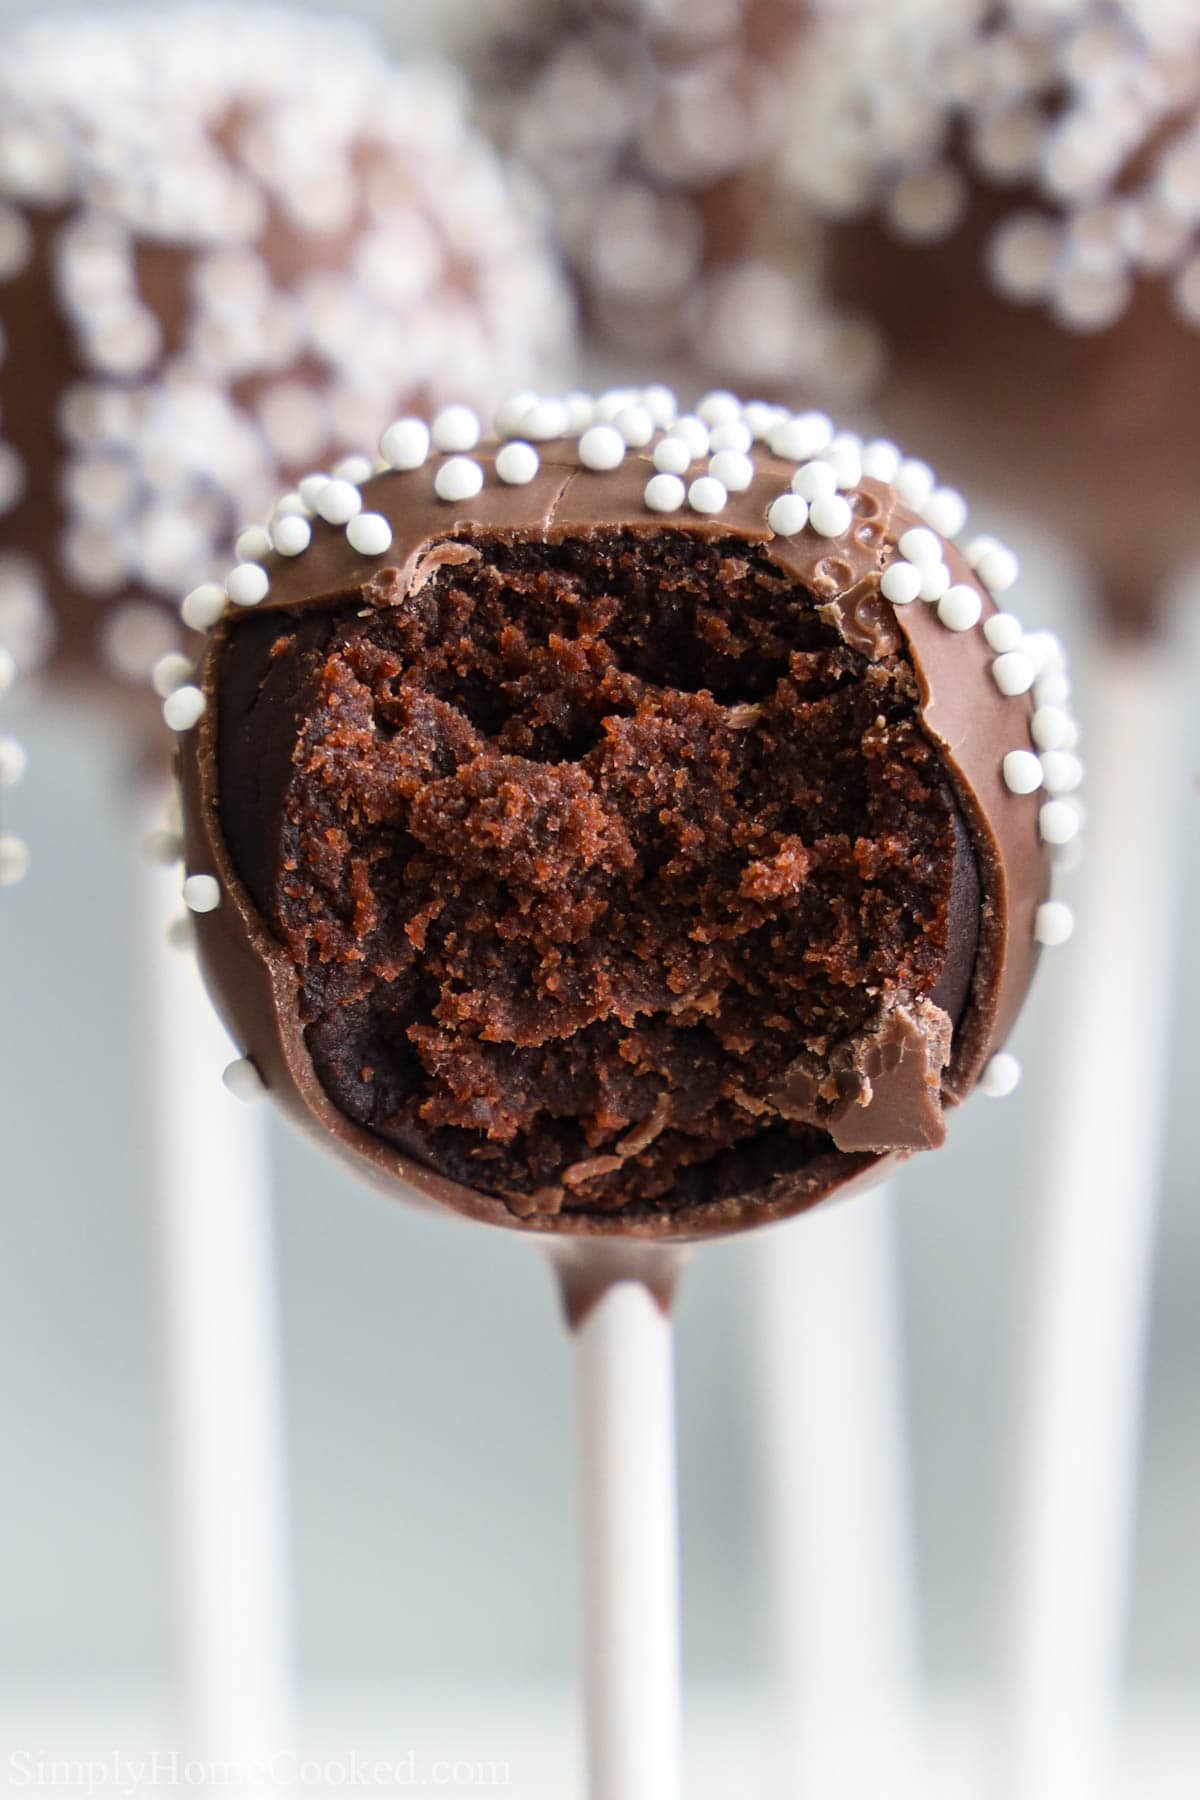
- TEXTURE: You get the satisfying crack of chocolate from the shell and the soft and moist fudgey cake inside.
- TIME: The bake time alone will take at least 35 minutes, but you need to make sure to add another additional hours for forming and dipping the cake pops.
- EASE: This takes a little bit of practice, but if you follow all the tips in the post, you can become a pro from the first time!
What you’ll need
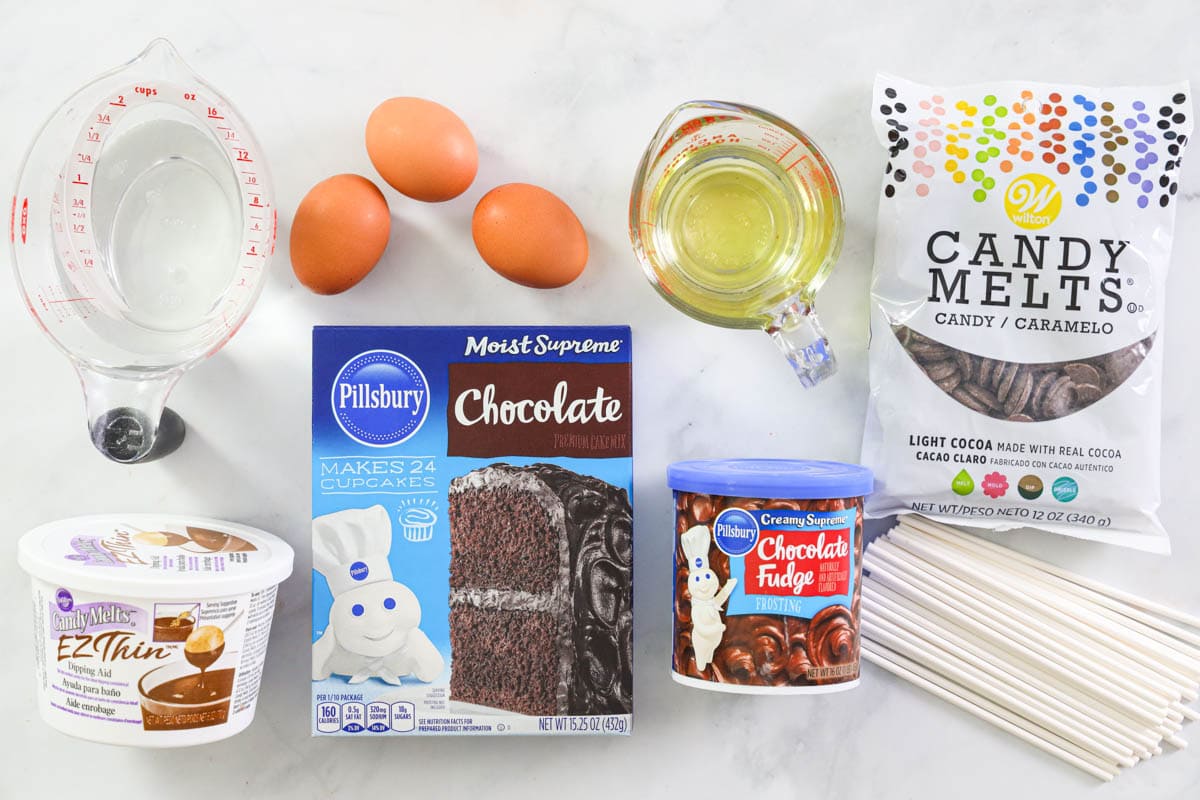
- Cake pop ingredients- Chocolate cake mix, Vegetable oil, Eggs, Water, and Pillsbury creamy chocolate fudge frosting
- Candy shell ingredients- Wilton chocolate candy melts (brown), EZ Thin Melting aid, and White nonpareils
How to Make Chocolate Cake Pops
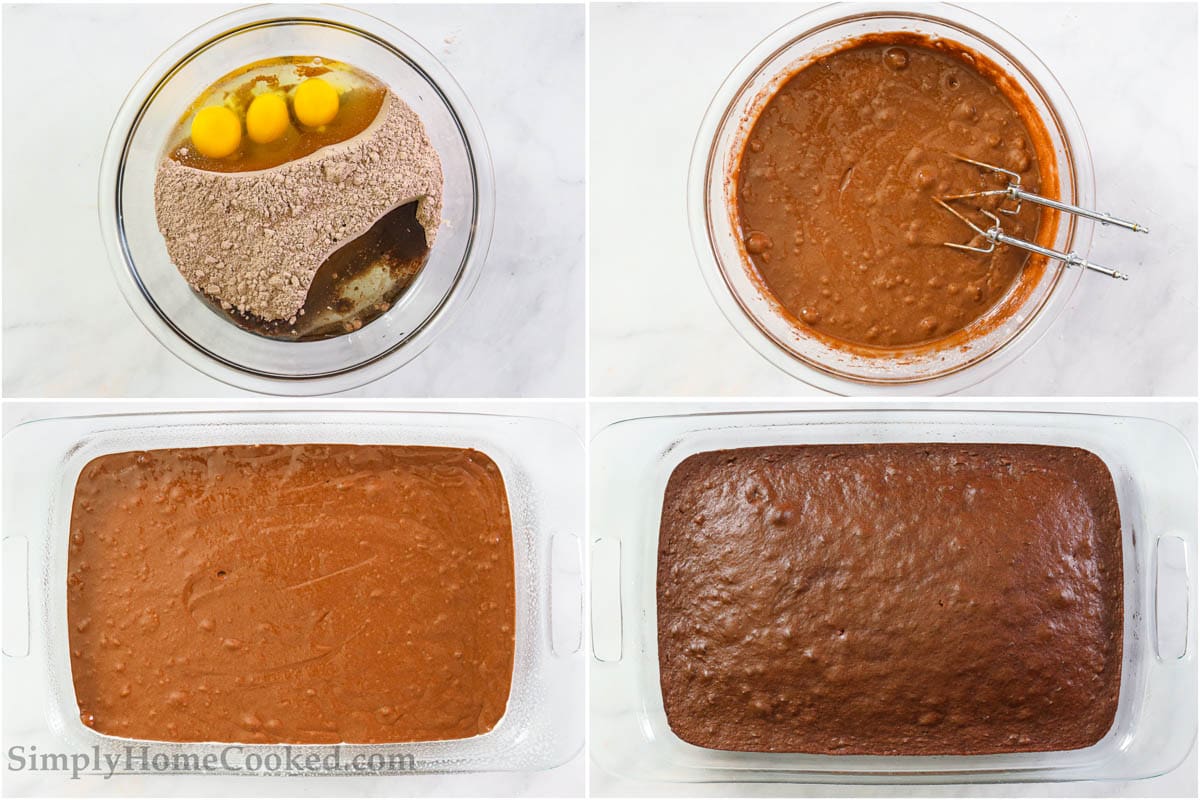
- Mix cake ingredients. Add the cake mix, water, oil, and eggs to a large bowl and combine with an electric hand mixer.
- Bake the cake. Spray a 9×13 inch baking pan with cooking spray and pour the batter in. Then bake it at 350 degrees Fahrenheit for about 30-35 minutes.
- Let it cool. Carefully flip the cake over onto a cooling rack and let it cool completely.
- Trim and crumble the cake. Using a knife, cut away the entire outer layer of the cake so only the moist insides remain. Then crumble the cake into a large bowl, making it as fine as possible.
- Add the frosting. Scoop about 2 tablespoons of chocolate fudge frosting into the bowl and mix it into the cake crumbs with clean hands.
- Roll the chocolate cake pops. Roll the cake crumbs into a ball and place it in the cake pop former, aka a meat baller, and compress it. This gets it to the right size. Then, to get rid of the line left by the cake pop former, roll the ball in your hands again.

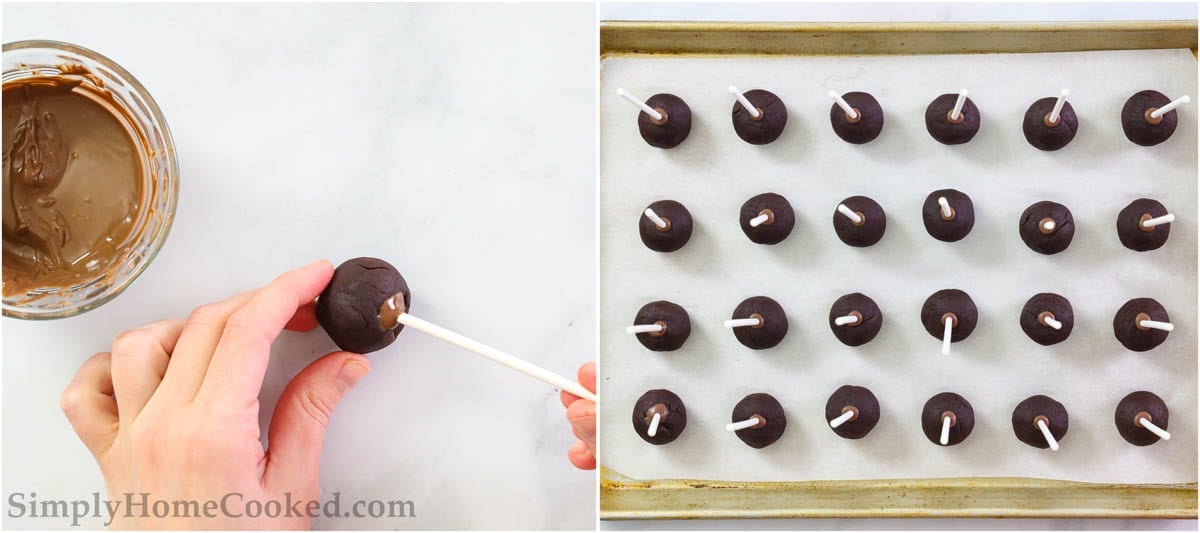
- Melt the chocolate candy melts. Place 1/4 cup of them in a small bowl and melt them in the microwave in 10-second intervals until melted.
- Attach the cake pop sticks. Now dip the end of each cake pop stick into the melted candy and insert it halfway into the cake ball. Then freeze the cake pops for about 15 minutes to help lock in the stick. Don’t freeze them any longer than that or it will affect the candy shell.
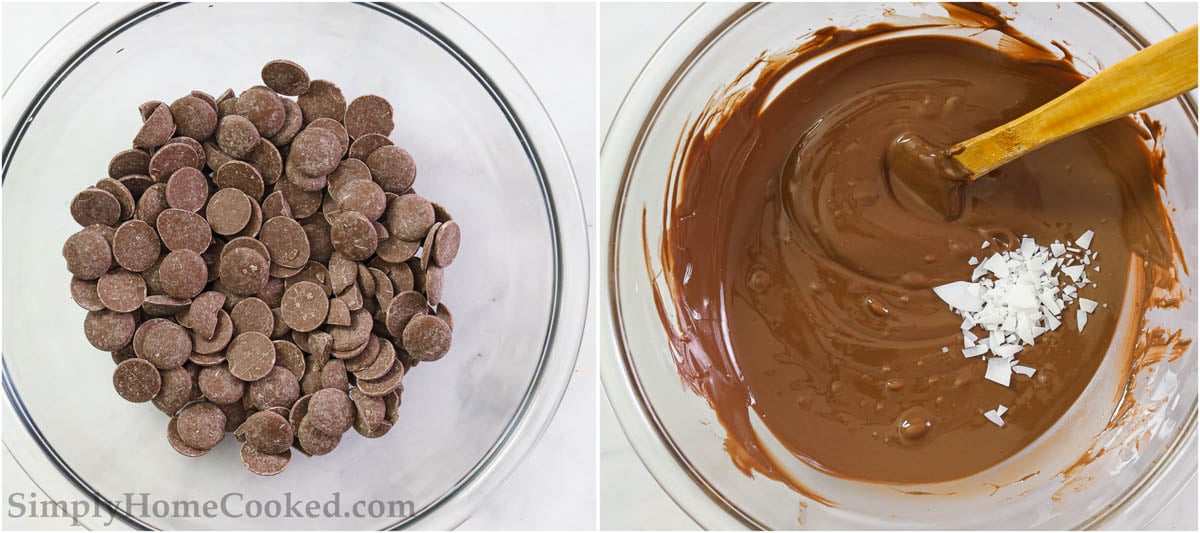
- Melt the rest of the chocolate candy. Place the rest of the chocolate candy melts in a large bowl and melt them. Then stir in 1 teaspoon of EZ thins dipping aid chips to thin out the candy melts.
Pro Tip: If you don’t have access to the EZ thins dipping aid, you can thin out the candy coating with an equal amount of coconut oil or vegetable oil.
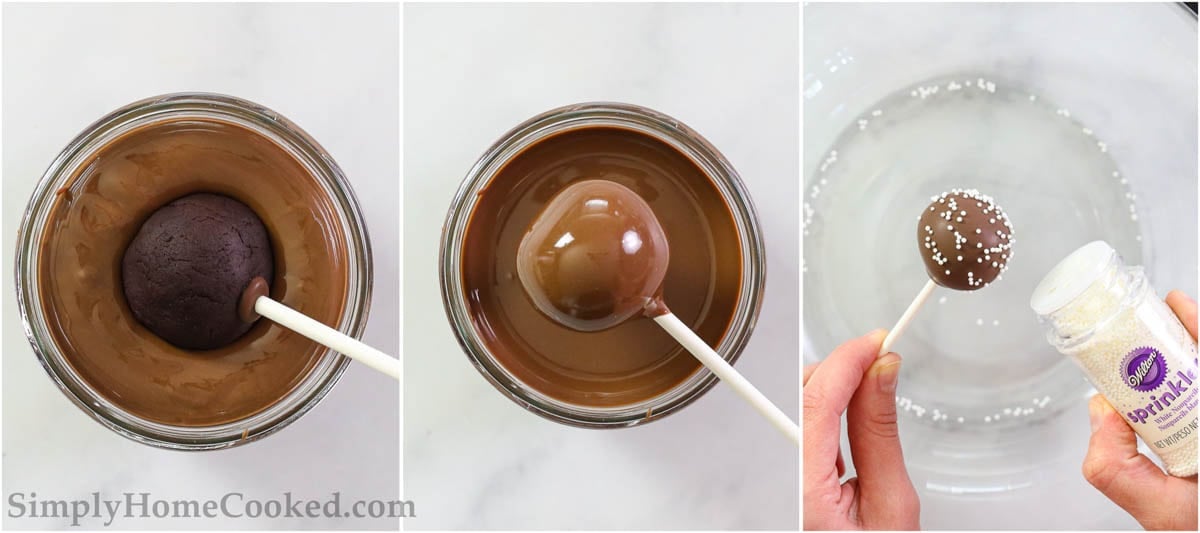
- Dip the cake pops. Pour the melted candy into a cup and dip the pops. Be careful not to swirl them around, just dip and pick them straight up to avoid the cake pop falling off the stick.
- Add the nonpareils. Hold the cake pop at a 45-degree angle and tap your wrist to get off any extra candy coating drips. Now, with a bowl below to catch any that drop, sprinkle on the white nonpareils.
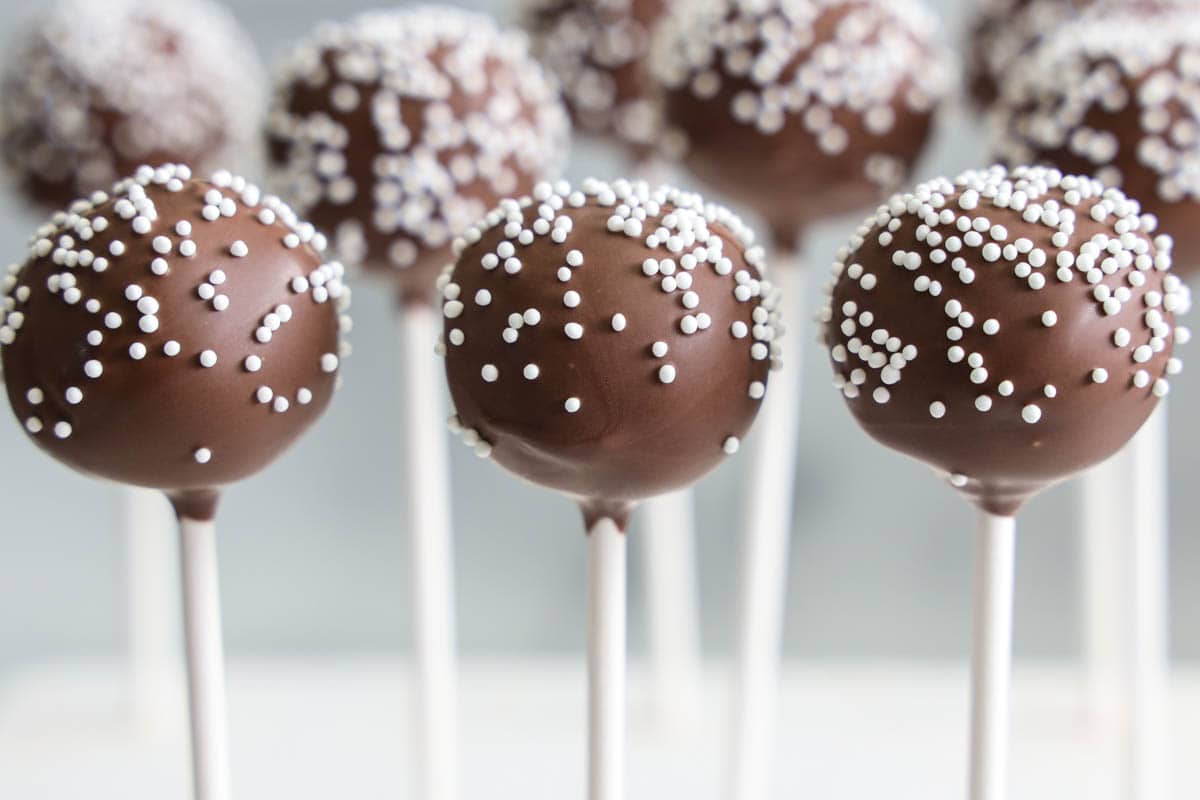
- Let the chocolate cake pops set. Place the cake pops into a styrofoam block and let them fully set for about 30 minutes. Then serve and enjoy.
Tips for making the best Chocolate Cake Pops
- Trim the cake– The outer areas of the cake are usually dry and these pieces can cause the cake pops to crumble and fall apart, so discard them.
- Make the crumbs fine- The finer the crumb, the easier it will be for the frosting to hold it together and make the cake pop stable.
- Re-roll the ball after using the cake pop former- This former is more for setting the size than for creating the ball because it leaves a fine line, which is a weak point that will cause the cake pop to fall apart. So re-roll the ball after forming it to make it more secure.
- Freeze the cake pop stick in the ball- Dipping the stick in melted candy, inserting it in the ball, and then freezing it will lock the stick in place, making dipping easier.
- Don’t exceed the 15 minutes for freezing- More than 15 minutes and the cake pops will become too cold and the chocolate will firm up too fast after dipping. The nonpareils will then not stick.
- Dip, don’t swirl- To avoid any mishaps, gently dip the chocolate cake pop, but don’t swirl it in the candy melt. Then hold it at a 45-degree angle and tap your wrist to get off any excess candy. Quickly sprinkle the nonpareils while the candy melt is still wet.
Flavor Variations to try
- Classic cake flavors- Such as vanilla, lemon, or yellow.
- German Chocolate Cake– Chocolate cake, coconut shreds, and chopped pecans
- Red Velvet Cake– Rich with a cream cheese frosting
- Salted Caramel- Sweet and salty
- Mint Chocolate- Andes candies give them a minty flavor
- Cookies and Cream- Such as these Oreo cake pops
How to Store Chocolate Cake Pops
You can store these Chocolate Cake Pops at room temperature for about a week, and up to 4 weeks in the refrigerator. Wrap each one first in plastic wrap and then in foil. Then place them in a lidded container to keep them from getting crushed.
Can these be made ahead of time?
Yes, these can be prepared ahead of time. You can make the cake balls and attach them to the cake pop stick, then store them in an airtight container in a single layer, with a paper towel lining the bottom. Keep them in the fridge for up to 5-7 days before you take them out to dip, sprinkle, and serve.
More delicious desserts to enjoy!
- Oreo Cake Pops (VIDEO)
- The Best Chocolate Donuts
- Red Velvet Cake Pops Recipe (VIDEO)
- Paleo Chocolate Fudge
- Vanilla Cake Pops- Starbucks Copycat (VIDEO)
Full Recipe Instructions
Chocolate Cake Pops
Ingredients
- 15 oz box chocolate cake mix
- 1/3 cup vegetable oil
- 3 eggs
- 1 1/4 cup water
- 2 tbsp Pillsbury creamy supreme chocolate fudge frosting
- 12 oz Wilton chocolate candy melts (brown) 1 bag
- 1 teaspoon melting aid
- 1 bottle white nonpareils
Instructions
- In a large bowl add 1 package of chocolate cake mix, 1 1/4 cup water, 1/3 cup vegetable oil, and 3 eggs.
- Using an electric hand mixer to combine all the ingredients together.
- Now spray a 9×13 inch baking pan with non-stick spray and pour the cake batter in.
- Bake at 350 degrees Fahrenheit for about 30-35 minutes.
- Now carefully flip the cake over onto a cooling rack and let it cool completely.
- Using a knife remove the entire outer layer of the cake. The outside of the cake tends to be pretty dry so you want to keep those dry pieces out or they might cause your cake pop to fall apart.
- Once the cake is trimmed, begin crumbling the cake into a large bowl. Try to get these crumbs to be as fine as possible.
- Next you’ll scoop about 2 tbsp of Pillsbury chocolate fudge frosting and mix it into the cake crumbs. (Use clean hands for this step).
- Now roll the cake crumbs into a ball. Then place it into a cake pop former also known as a meat baller and compress it.
- As you pull it out, you’ll see that there is a fine line that runs across the cake ball. This is a week point That will cause the cake pop to fall apart. The purpose of the cake pop former was mostly to get a perfect size down.
- So take the cake ball back into your hands and roll it out once more.
- Next, you’ll add about 1/4 cup of chocolate candy melts into a small bowl and melt it in the microwave in 10-second intervals until melted.
- Now dip the end of each cake pop stick into the melted candy and insert it into the cake ball about halfway through.
- Before you dip the cake pops into the melted candy you want to freeze the cake pops for about 15 minutes to help lock in the stick. Don’t freeze for more than 15 minutes or they will be too cold. When they are too cold the chocolate firms up too fast after dipping and the sprinkles will not stick to it.
- Now melt The rest of your chocolate candy melts in a large bowl and add stir in 1 teaspoon of dipping aid chips. This stuff really helps thin out the candy melts.
- Now pour the melted candy into a cup and begin dipping your cake pops.
- To ensure that your cake pops don’t fall off the stick, do not swirl it around in the candy melts. just dip and pick it straight up.
- Then hold the cake pop at a 45-degree angle and tap your wrist so all the extra candy coating drips off. Then quickly sprinkle on white nonpareils. Make sure you have a large bowl catching all of the nonpareils because they will fly everywhere.
- Place the cake pops into a styrofoam block to let them set full for about 30 minutes. Serve at room temperature.
Notes
- List of fool-proof tips for cake pop making
- How to store properly
- How to make them ahead of time
Nutrition
- BBQ Sauce - June 30, 2025
- Fruit Kabobs - June 25, 2025
- BBQ Chicken Thighs - June 16, 2025


Rosemary Paul says
I’m sorry I haven’t commented before to tell you just how great your recipe for chocolate cake pops is. We decided to have some close friends & cousins come on Christmas Eve for hot appetizers, a Charcuterie spread, basically just finger foods and these cake pops were perfect for the table! I even made the cookies smaller than normal so everyone could sample without getting too full. Eggnog & Mulled wine finished it off. I made red Velvet pops & white cake pops with the batter tinted with green food coloring the coating was white chocolate dip and Jimmies with the appropriate color on each pop. Even the adults loved them. I’m glad I made 2 batches!
I was asked a few times for the recipe and gave them your site address.
They were a big hit at Christmas and earlier in the year when I made pins colada pops!
Thank you for sharing this wonderful recipe with us.
I’m looking forward to reading through your recipes to see what else I can make.
Thanks again!
Dina says
Thank you so much for taking the time to write such a nice comment on my website! I really appreciate it! I am so glad that evryone loved these cake pops! I hope you find more delicious recipes on my site 🙂
Vicka says
You should have steps 13 and 14 reversed. Tell us to freeze first then dip them. They taste great.
Rosemary Paul says
You have to dip the sticks into the frosting first so the stick will stay in the cake pop. If you don’t dip the sticks, then when you try to dip the whole ball in step 14, the cake pops will fall off into the frosting!
I had somehow missed step 13 the 1st time I made these. I was doing them in batches of 6. So my 1st 6 pops fell into the liquid frosting which made me dump out the frosting for another use and put fresh chips into my melting pot. While they melted I rechecked the recipe here and saw I missed step 13, the dipping of the stick! I dipped the sticks for the next 6 and immediately stuck them into the balls.
One thing though. I didn’t have any dipping chips that thins out the dip. I used a tablespoon of shortening to the chips. The second time I made these balls in Pina Colada flavor (for a summer get-together pineapple cake mix w/a tsp of pineapple flavoring & white frosting w/½ tsp coconut flavoring candy oil & toasted coconut as nonpariels) I had once again forgotten the dipping chips and I was out of shortening! I dug into my candy making supplies and found my bag of edible wax chips. ½tsp and it was fine!
Patty R says
I made the recipe and it did not turn out as yours. The cake part was easy and turned out fine, however, the dipping chocolate was really thick. I did use milk chocolate chips and also added some oil to the chips as I melted because of the thickness of the dip. It was to no use because it was a disaster.
I really liked the cake part but I guess the chips were a bad choice for dipping. Could this have been my problem?
I wanted to make them for a gender reveal party but needed to practice. Now I know I need a lot more practice.
Thank you.
Patty R
Dina says
Hi Patty, I would not recommend using milk chocolate chips for dipping. These are best for baking in cookies, not melting. They have a lower melting point which causes them to seize up if slightly overheated. I would stick with melting wafers since they melt well and tend to have a thinner consistency.
Arel says
I tried the recipe, it’s really good.
Dina says
Thank you Arel! I am glad you enjoyed these chocolate cake pops!
April says
This recipe is amazing! Thanks for sharing😊
Dina says
Thank you April! I’m so glad you loved the chocolate cake pops!
gracie says
how many does it make?
Dina says
Hi Gracie 🙂 This recipe makes about 28 chocolate cake pops. I also have more information in the recipe card toward the bottom of the page. It has nutritional information, estimated time, and quantity. I hope that helps and I hope you love this recipe 🙂
Jessica Hurst says
When you say Equal amounts of coconut or vegetable oil do you mean equal to the chocolate melts or the amount of ez thin suggested?
simplyhomecooked says
When replacing the ez thins with the oil, you want to use the same amount of the oil as the ez thins. Hope that helps and I hope you love these chocolate cake pops 🙂
Jodi Reed says
Thanks for the great recipe! I made these for my husband’s birthday and they were amazing. I made a German chocolate cake version and topped them with shredded coconut and pecan pieces. You directions were very easy to follow. Thanks!!
simplyhomecooked says
I’m so happy to hear that Jodi! Glad that your husband was able to enjoy these chocolate cake pops on his birthday! Love the coconut and pecan addition 🙂 Thank you so much for taking the time to leave your feedback! I hope you find many more delicious recipes on my blog 🙂