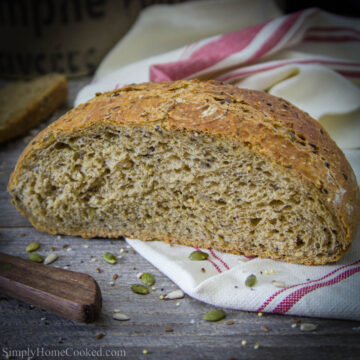
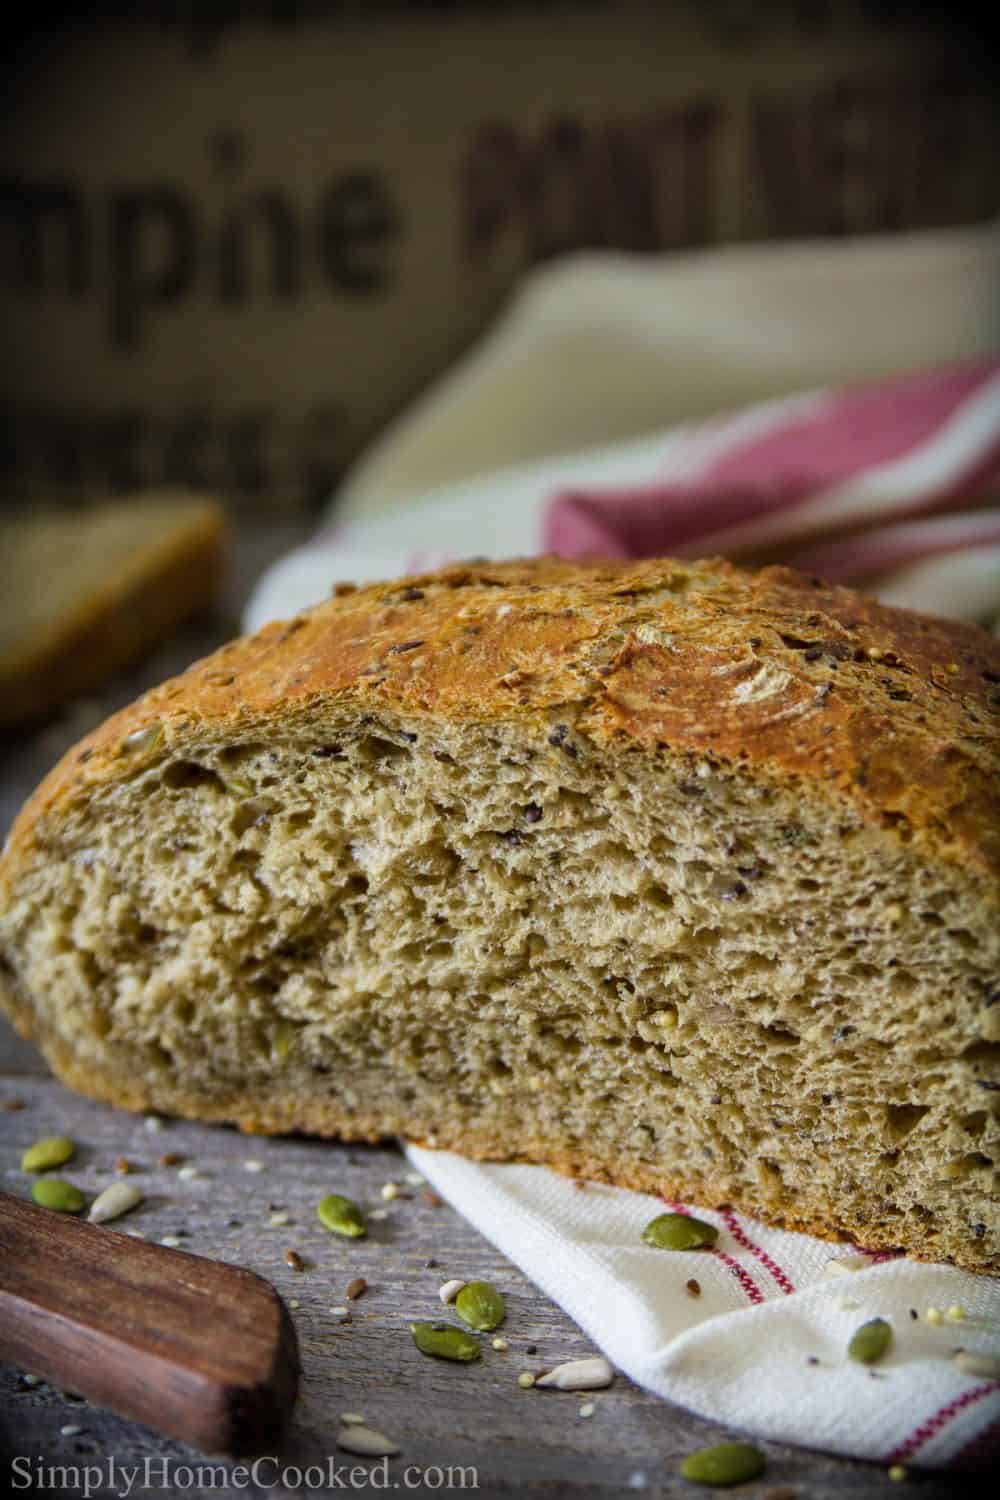
This overnight harvest bread recipe is packed with 4 different grains and 5 different seeds. The amazing crumb texture is guaranteed to please your palate!
Serve this warm, with melted butter and my hearty prime rib roast for a memorable and filling dinner.
This recipe was originally posted January 17, 2018, we’ve tweaked it a bit since then. This post may contain affiliate links. Read my disclosure policy here.
A Hearty Bread That’s Easy to Make
Quite a few people find Harvest Bread or any bread making slightly intimidating. This harvest bread is really not all that complicated.
The main reason people don’t dare attempt homemade bread is that it’s a lengthy process, and for a good reason. After the dough is kneaded, the long rising process is what allows a sufficient amount of carbon dioxide to make the bread light when it is baked. Therefore, this takes a little bit of time and patience. With these step by step photos, I hope bread making becomes less intimidating and more of a fun challenge.
My Favorite 4-Grain Bread Recipe
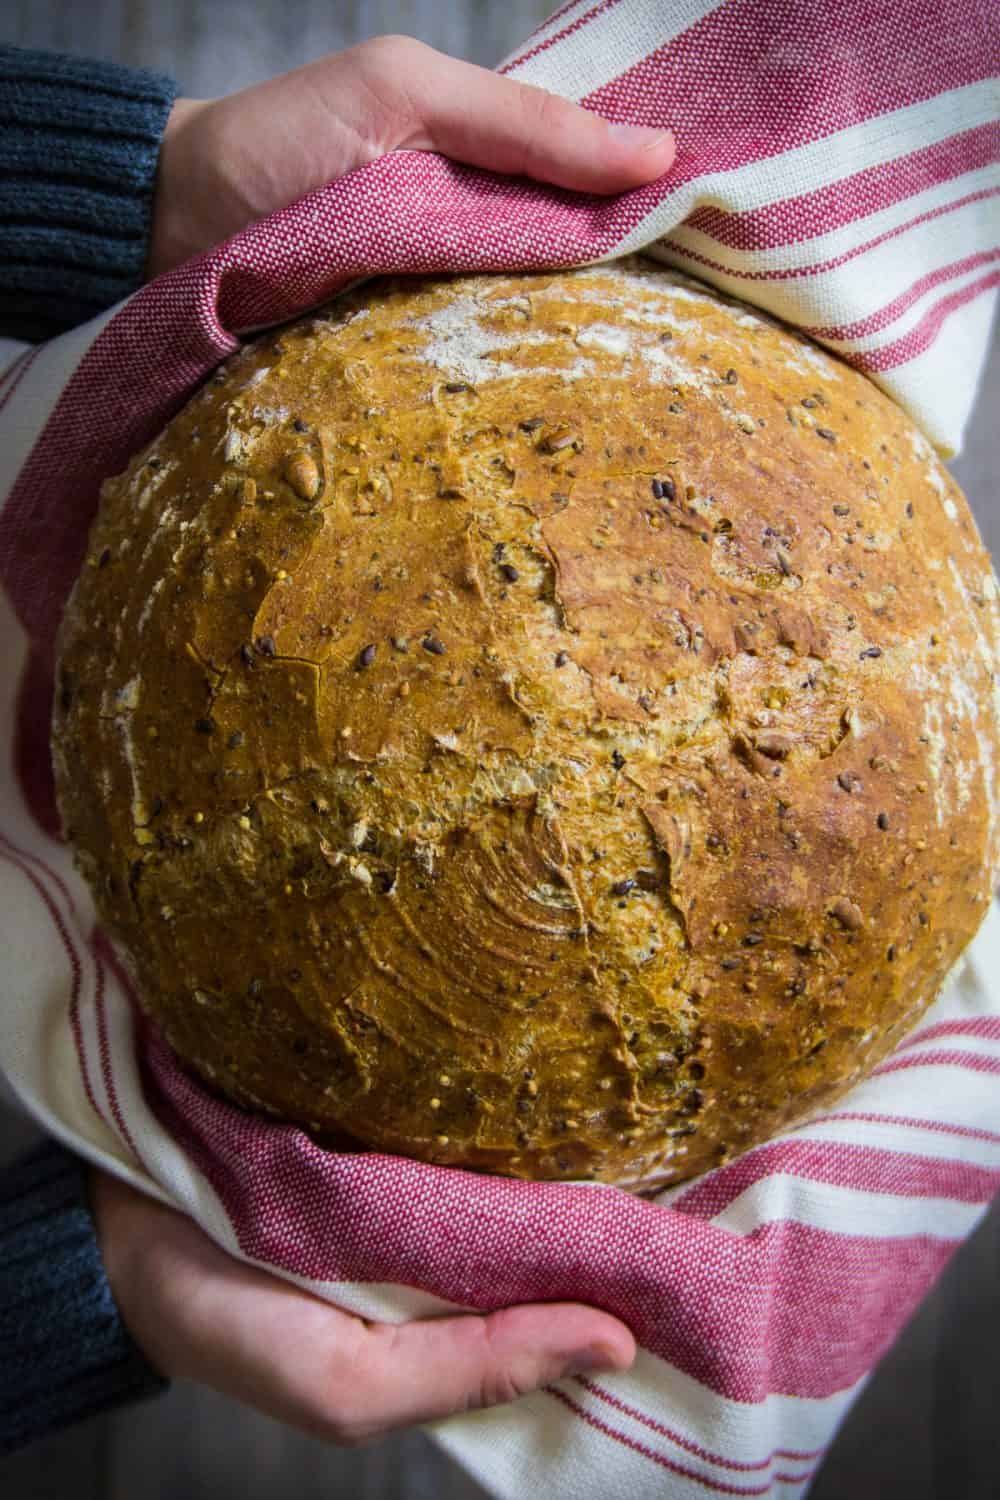
This harvest bread recipe is loaded with 4 different grains and 5 different seeds. Every bite has a perfect balance crunch and chewiness with hints of nutty flavor from the variety of seeds. When the bread is finished baking you’ll hear all those seeds crackling from the crunchy crust of the bread. Besides the wonderful crackles and pops, the aroma of freshly baked harvest bread that fills your home is something that no words can explain.
How to Make Harvest Bread
This is an overview of how to make this hearty bread. Skip on down to the recipe card for the complete instructions.
Ingredients
- Millet
- Flax seed
- Chia seeds
- Sunflower seeds
- Pumpkin seeds
- Sesame seeds
- Water
- Yeast
- Molasses
- Salt
- Rye flour
- Whole wheat flour
- Bread flour
- All-purpose unbleached flour
Directions
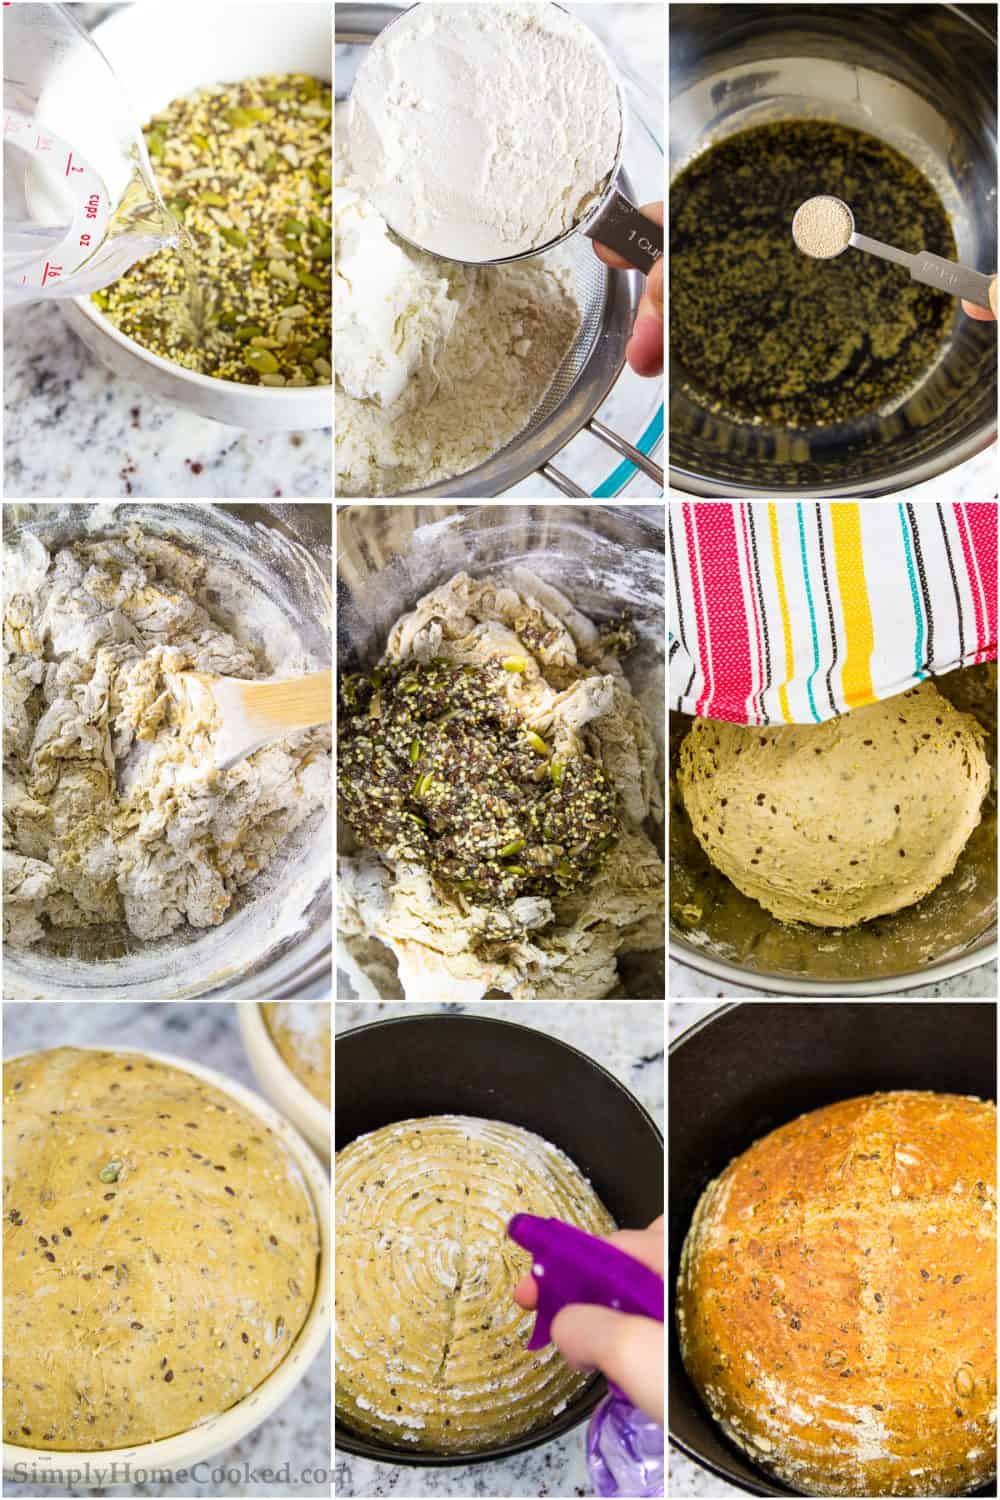
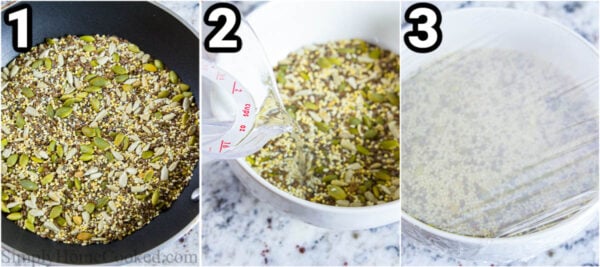
1. Place the millet, flax seed, chia seeds, sunflower seeds, pumpkin seeds, and sesame seeds in a pan. Heat the seeds over medium-high heat until you can hear the seeds crackling. Make sure to mix occasionally to prevent the seeds from burning on one side.
2. Remove the seeds from the hot pan and place them into a small bowl. Pour boiling water over the seeds or just enough to cover them. Then cover with plastic wrap and let the seeds cool.
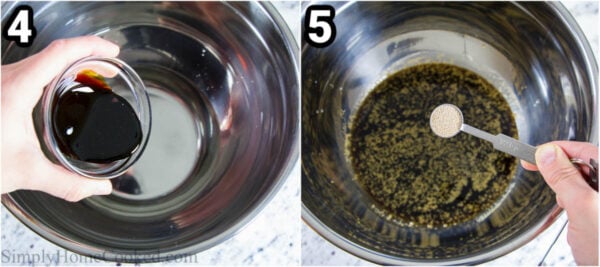
3. In a large mixing bowl, combine warm water (110 degrees Fahrenheit) with molasses.
4. Then evenly sprinkle yeast on top of the water and molasses. Wait until the yeast becomes slightly frothy.
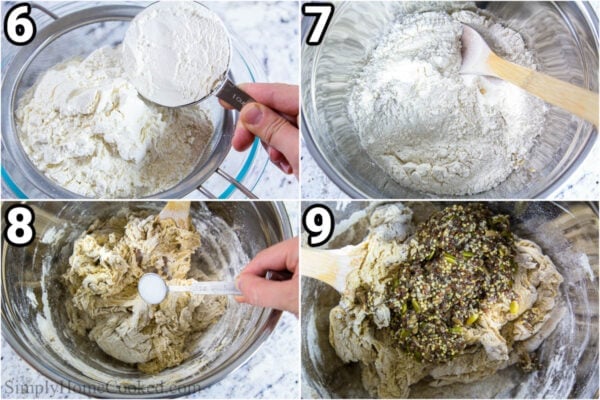
5. Sift salt, rye flour, whole wheat flour, bread flour, and all-purpose unbleached flour into a bowl. Then stir the dry ingredients so that all the different flours are well combined.
6. Add the dry ingredients to the wet and combine it with a wooden spoon until well incorporated.
7. Place the soaked seeds into the dough. If the seeds have any extra water on top, strain before you add it to the dough.
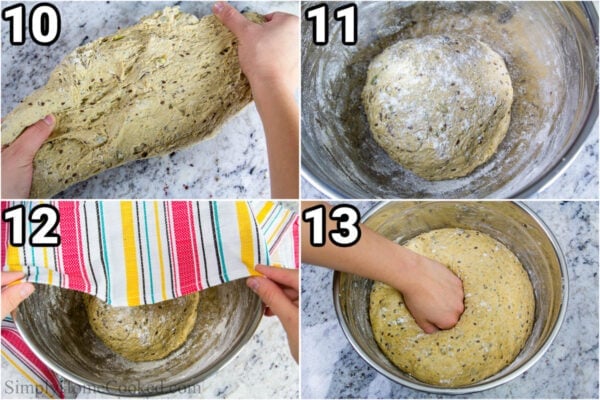
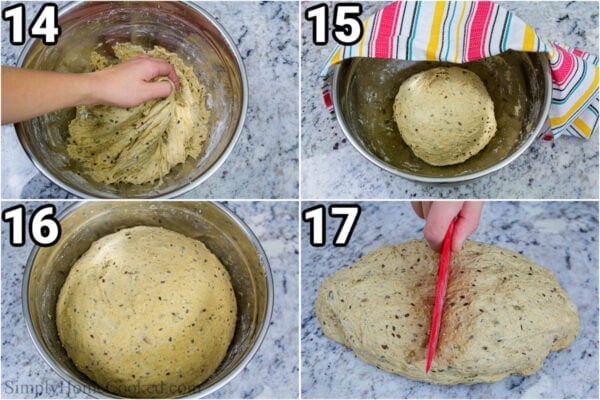
9. Begin working the seeds into the dough with your hands. I found that stretching the dough helps incorporate the seeds best. Once you don’t see any more patches of flour, stop kneading the dough.
10. Place the dough into a large bowl (no grease necessary). Sprinkle a small amount of flour on top and cover the dough with a kitchen towel. Then let it sit at room temperature for 1 hour and 30 minutes.
11. After 1 hour and 30 minutes go by, deflate the dough and shape is back into a ball with your hands. Cover with a kitchen towel again and let is sit at room temperature overnight or 8 hours.
12. After 8 hours have passed, deflate the dough once more and reshape it into a ball and place it back into the bowl. Cover with a kitchen towel and let it sit in a warm place until it doubles in size. To speed up this step, turn your oven onto the proof cycle and place it in your oven. If you don’t have a proof setting on your oven, turn your oven on to 300 degrees Fahrenheit for 2 minutes and turn it off. This should be just enough warmth to let the dough proof.
13. Remove the proofed dough onto a floured surface and divide it into halves.
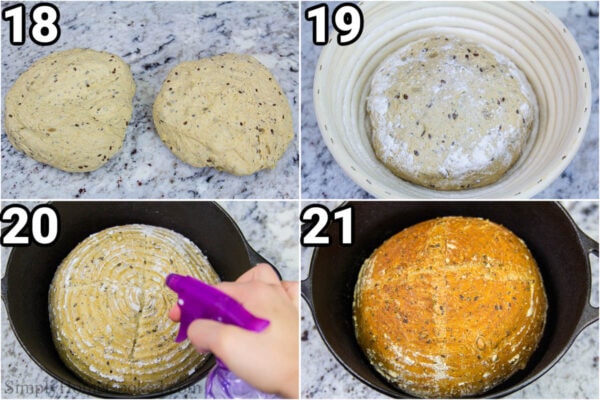
14. Shape each piece of dough into squares, then fold in each corner of the square towards the center.
15. Shape the dough into a smooth ball and place it into lightly floured 9-inch proofing baskets. Dust the dough with flour and cover with a kitchen towel. Let it proof in a warm place for 1 hour and 30 minutes or until it doubles in size.
16. Place a cast iron or Dutch oven pot (with lid) into the oven and let it heat up to 500 degrees Fahrenheit.
17. Once the oven reaches 500 degrees Fahrenheit remove the pot from the oven. Open the lid and dust the bottom of the pot with flour. Gently flip the proofed dough into the cast iron or Dutch oven pot.
18. (optional) Using a sharp blade make a few decorative slits into the top of the dough.
19. Using a spray bottle, lightly spray the bread dough with 3-4 sprays of warm water. Then place the hot lid on top and bake at 430 degrees Fahrenheit for 20 minutes.
Note: Most people place an oven-safe bowl filled with water in the oven to achieve that nice bread crust; I find that lightly spraying the bread with a spray bottle filled with warm water is an easier way to achieve the same results.
20. Then remove the lid from the pot and bake for an additional 15-20 minutes at the same temperature.
21. The moment the bread is baked, CAREFULLY remove the bread with a spatula and place it onto the cooling rack. Be very cautious as the cast iron will be extremely hot.
How to Store Homemade Bread
If they are unsliced, you can store the homemade bread unwrapped at room temperature. After you slice it, you’ll need to wrap the bread to prevent it from going stale.
You can either wrap it tightly in plastic wrap or in closed paper bags.
How long does bread keep?
Homemade bread only stays good for about 2-3 days, so eat it up or share it with family.
Full Recipe Instructions
Multi-Seed Bread Recipe
Equipment
Ingredients
- 2 Tbsp millet
- 2 Tbsp flax seed
- 2 Tbsp chia seeds
- 2 Tbsp sunflower seeds
- 2 Tbsp pumpkin seeds
- 2 Tbsp sesame seeds
- 2 cups water
- 2 tsp yeast
- 3 Tbsp molasses
- 2 tsp salt
- 1/2 cup rye flour
- 1/2 cup whole wheat flour
- 1 cup bread flour
- 3 1/2 cups all-purpose unbleached flour
Instructions
- Place the millet, flax seed, chia seeds, sunflower seeds, pumpkin seeds, and sesame seeds in a pan. Heat the seeds over medium-high heat for about 3-5 minutes or until you can hear the seeds crackling. Make sure to mix occasionally to prevent the seeds from burning on one side.
- Remove the seeds from the hot pan and place them into a small bowl. Pour 3/4 cup boiling water over the seeds or just enough to cover them. Then cover with plastic wrap and let the seeds cool.
- In a large mixing bowl, combine 2 cups warm water (110 degrees Fahrenheit) with 3 tbsp molasses.
- Then evenly sprinkle 2 tsp yeast on top of the water and molasses. Wait until the yeast becomes slightly frothy.
- Sift 2 tsp salt, 1/2 cup rye flour, 1/2 whole wheat flour, 1 cup bread flour, and 3 1/2 cups all-purpose unbleached flour into a bowl. Then stir the dry ingredients so that all the different flours are well combined.
- Add the dry ingredients to the wet and combine with a wooden spoon until well incorporated.
- Place the soaked seeds into the dough. If the seeds have any extra water on top, drain before you add it to the dough.
- Begin working the seeds into the dough with your hands. I found that stretching the dough helps incorporate the seeds best. Once you don’t see any more patches of flour, stop kneading the dough.
- Place the dough into a large bowl (no grease necessary). Sprinkle a small amount of flour on top and cover the dough with a kitchen towel. Then let it sit at room temperature for 1 hour and 30 minutes. (Keep between 68-70 degrees Fahrenheit).
- After 1 hour and 30 minutes go by, deflate the dough and shape it back into a ball with your hands. Cover with a kitchen towel again and let it sit at room temperature overnight or 8 hours.
- After 8 hours have passed, deflate the dough once more and reshape it into a ball and place it back into the bowl. Cover with a kitchen towel and let it sit in a warm place for 2 hours or until it doubles in size. To speed up this step, turn your oven onto the proof cycle and place it in your oven. If you don’t have a proof setting on your oven, turn your oven on to 300 degrees Fahrenheit for 2 minutes and turn it off. This should be just enough warmth to let the dough proof.
- Remove the proofed dough onto a floured surface and divide it into halves.
- Shape each piece of dough into squares, then fold in each corner of the square towards the center.
- Shape the dough into a smooth ball and place it into lightly floured 9-inch bread proofing baskets. Dust the dough with flour and cover it with a kitchen towel. Let it proof in a warm place for 1 hour and 30 minutes or until it doubles in size.
- Place a cast iron or Dutch oven pot (with lid) into the oven and let it heat up to 500 degrees Fahrenheit.
- Once the oven reaches 500 degrees Fahrenheit remove the pot from the oven. Open the lid and dust the bottom of the pot with flour. Gently flip the proofed dough into the cast iron or Dutch oven pot.
- (optional) Using a sharp blade make a few decorative slits into the top of the dough.
- Using a spray bottle, lightly spray the bread dough with 3-4 sprays of warm water. Then place the hot lid on top and bake at 430 degrees Fahrenheit for 20 minutes.
- Note: Most people place an oven-safe bowl filled with water in the oven to achieve that nice bread crust; I find that lightly spraying the bread with warm water is an easier way to achieve the same results.
- Then remove the lid from the pot and bake for an additional 15-20 minutes at the same temperature.
- The moment the bread is baked, CAREFULLY remove the bread with a spatula and place it onto the cooling rack. Be very cautious as the cast iron will be extremely hot.
Nutrition
Other Bread Recipes
If you love bread then try these:
- Easy Chicken Marsala Recipe - April 2, 2025
- Yukon Gold Mashed Potatoes - March 31, 2025
- Berry Chantilly Cake - March 25, 2025


Cat says
Maybe a silly question, but I haven’t worked with molasses much. 🙂 What kind of molasses do you use? At the store I’ve seen fancy molasses, blackstrap, and cooking – I’m guessing it would be the last one? Thanks!
Dina says
Hi Cat, great question! I love the Beer Rabbit brand. Just make sure that it says unsulphured on the bottle 🙂
Shelley says
Thank you so much for this recipe ~ my family & I love it!
Dina says
Thank you so much, Shelley! I am so thrilled to hear that you and your family enjoyed this bread recipe!
David Renken says
Thanks for the recipe! I made it for the first time last night and plan on continuing. I ended up adding some more flour as I think it was even more wet than no-knead dough. The roasted seeds made the home smell wonderful and gave a nice flavor to the bread. I’m not able to find Millet so I left it out but next time I’ll substitute oats. I’m going to increase the amount of sesame seeds a bunch,since I love that flavor, and the sunflower seeds some. Have you tried dipping the loaf in extra seeds just prior to placing it in the proofing basket?
Dina says
Thank you for the honest review, David! I appreciate your feedback. I have not tried dipping the bread into extra seeds but that sounds like a wonderful idea! I will have to try that next time I bake the bread 🙂
Brandy says
Should the dough be quite wet and sticky after making? Similar to a no knead bread? Or have I messed it up?
Dina says
Hi Brandy, yes the dough should be slightly sticky.
John Bell says
In the ingredients list of the Harvest Grain bread” whole wheat flour it shows as 1/2!
Can you please explain, as I so wish to try this recipe 🙏
Thank you in anticipation
Dina says
Hi John 🙂 Thank you for pointing that out to me. It is 1/2 cup of whole wheat flour. I have already fixed it in the recipe card. Thank you and I hope you love this harvest bread! Let me know how it goes 🙂
Shih-Chin Chen says
My wife and I followed this recipe to make a multigrain harvest bread. It was a big success even the very first time. The recipe is precise and easy to follow step-by-step. Thank you Dina for sharing your recipe!!
Dina says
Thank you so much for taking the time to write such a kind recipe review! I am so happy to hear you loved the bread recipe!
Bongomauka says
Great recipe. I halved the salt since we’re on a low sodium diet and still was delicious. Next time (and there will certainly be multiple next times) I’ll up the millet (love the texture it gives). BTW may be a stupid question but the listed sodium nutritional amount applies to a serving or a whole loaf or the total output of two loaves or if a serving, what size serving? Thanks for sharing another great recipe.
Dina says
I am so happy that you loved the bread! This recipe is definitely a keeper 🙂 In regards to the servings, it’s per slice. (about 9 slices per loaf).
Annette says
PPS: I might try ATK’s method and start with a cold oven. what do you think of that method? (I’ve baked 2 boulle in this roasting pan, separated by parchment, and it worked beautifully.)
simplyhomecooked says
Hi Annette, I wish I could help you but I have never tried this method with my Harvest grain bread so I really can’t say much until I try it for myself. I hope you give this recipe a try. Let me know how it goes 🙂
Annette says
PS: I’ve tried other recipes, but the loaves collapse. They go out, not up.
Annette says
This looks what I’ve been searching for also. I have a few questions. Do you weigh your ingredients? Do you have those weights? No sweat if you don’t. I can convert.
I’d like to make a large free form loaf. If I rise 2 lb. of formed dough in a couche for the time you recommend, do you think it would work? I have a large oval roasting pan that I can use to bake in (on the baking stone). I can line with foil if you think it would burn. Would love your best advice!
simplyhomecooked says
Hi Annette, I have never tried baking this bread without a dutch oven so I am not too sure. I have a feeling that it will spread out too much. I have only been able to do this with no-knead bread. Also, I don’t have the recipe in grams. So sorry 🙁
Well how nice says
I’ve been searching for the perfect multigrain bread recipe for YEARS and this is it! Crunchy crust but not too hard, chewy interior and delicious flavor. Don’t be intimidated by the long list of ingredients…it’s totally worth it. I found this recipe a little over a week ago and have made six loaves and have four more rising. Family and friends keep begging for them. Thank you for a wonderful, perfect recipe.
simplyhomecooked says
Oh WOW!! That is so awesome! I am so happy you found my recipe 🙂 thank you for all of your kind words. So sweet of you to leave such positive feedback.