These Chocolate Covered Dates are a sweet and elegant treat that you’re going to love. With lots of variations and only a few ingredients, this simple dessert is a winner.
If you love chocolate desserts, then you should try these scrumptious Chocolate Brandy Fig Bonbons and Chocolate Cake Pops.
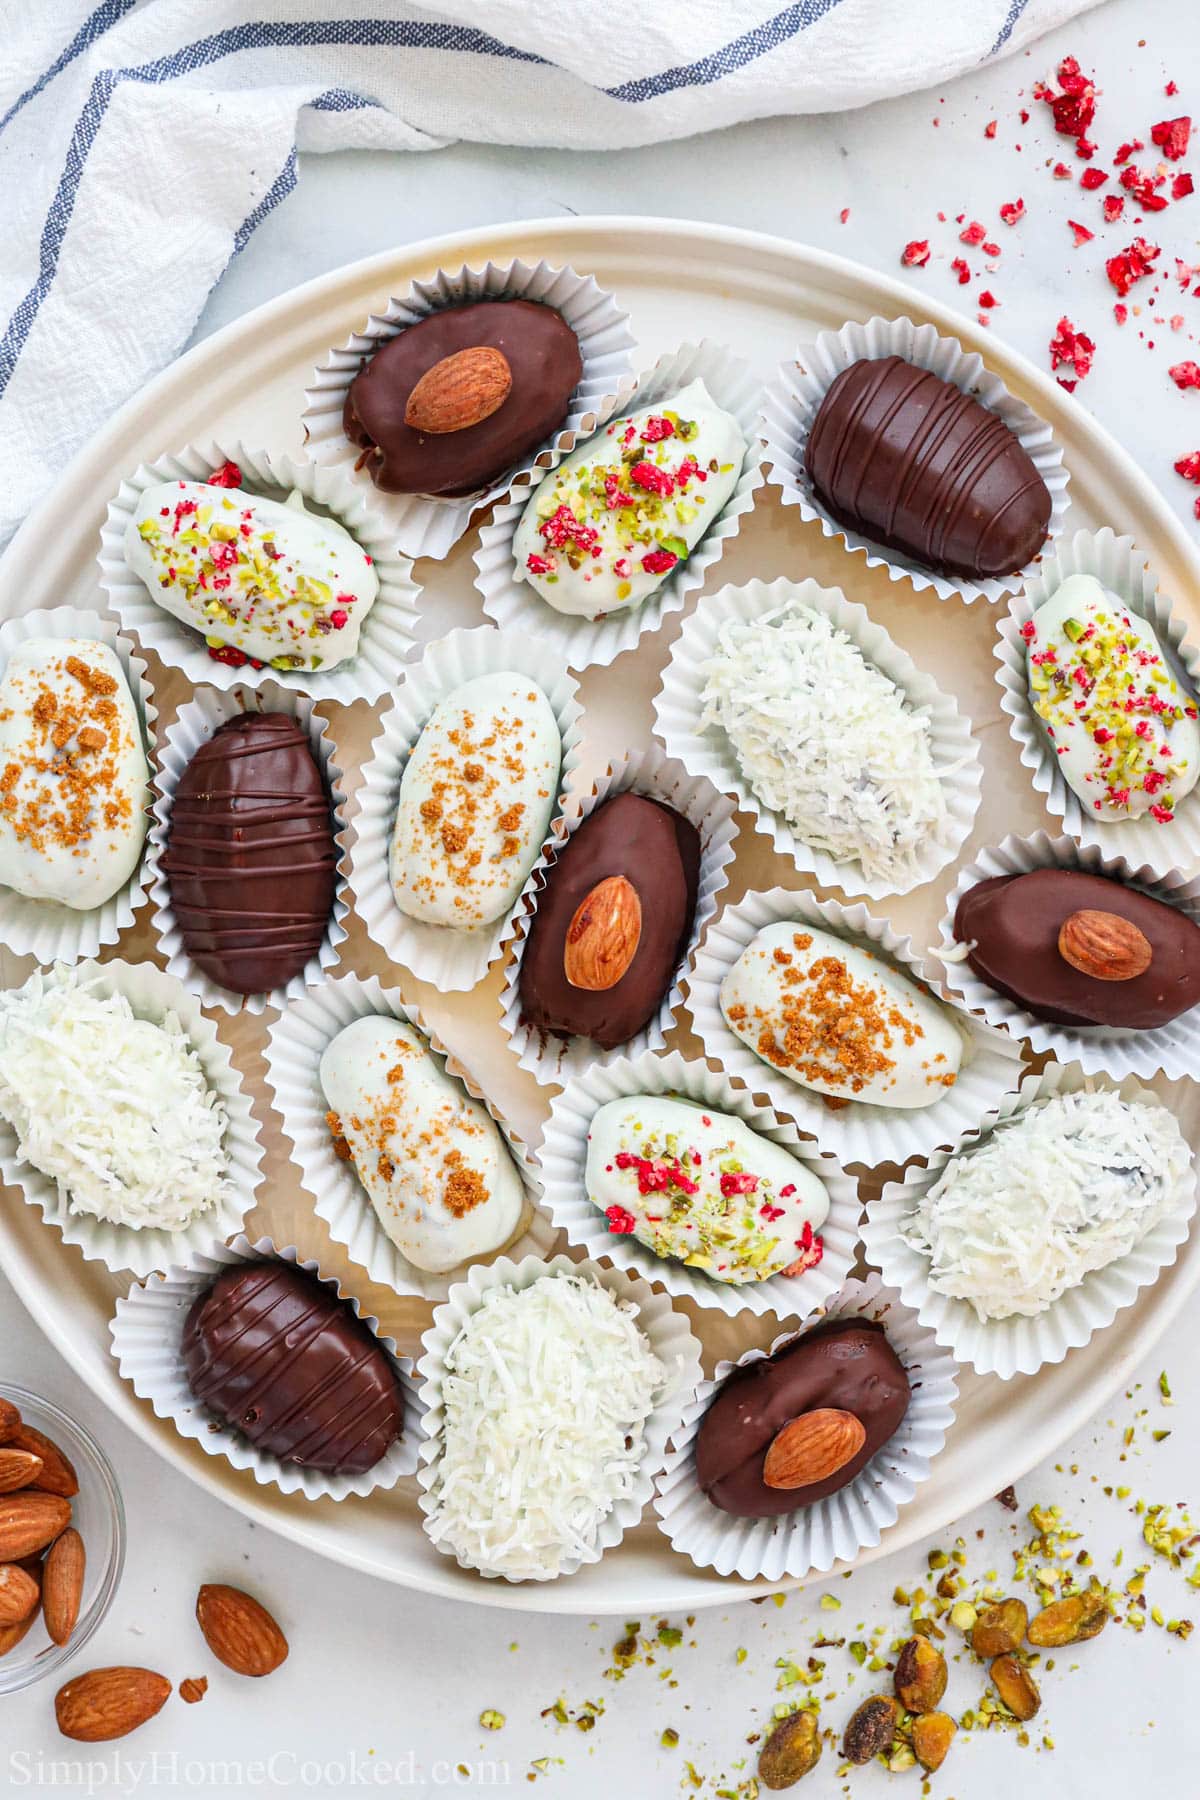
Table Of Contents
Recipe Details
I love these Chocolate Covered Dates because they are so tasty, gluten-free, and all-natural. With just 3 simple ingredients and a world of variations to try, this recipe is perfect for every occasion.
- TASTE: Sweet and salty, these Chocolate Covered Dates are so flavorful. The pairing of peanut butter and chocolate is always delicious, like a Snickers bar.
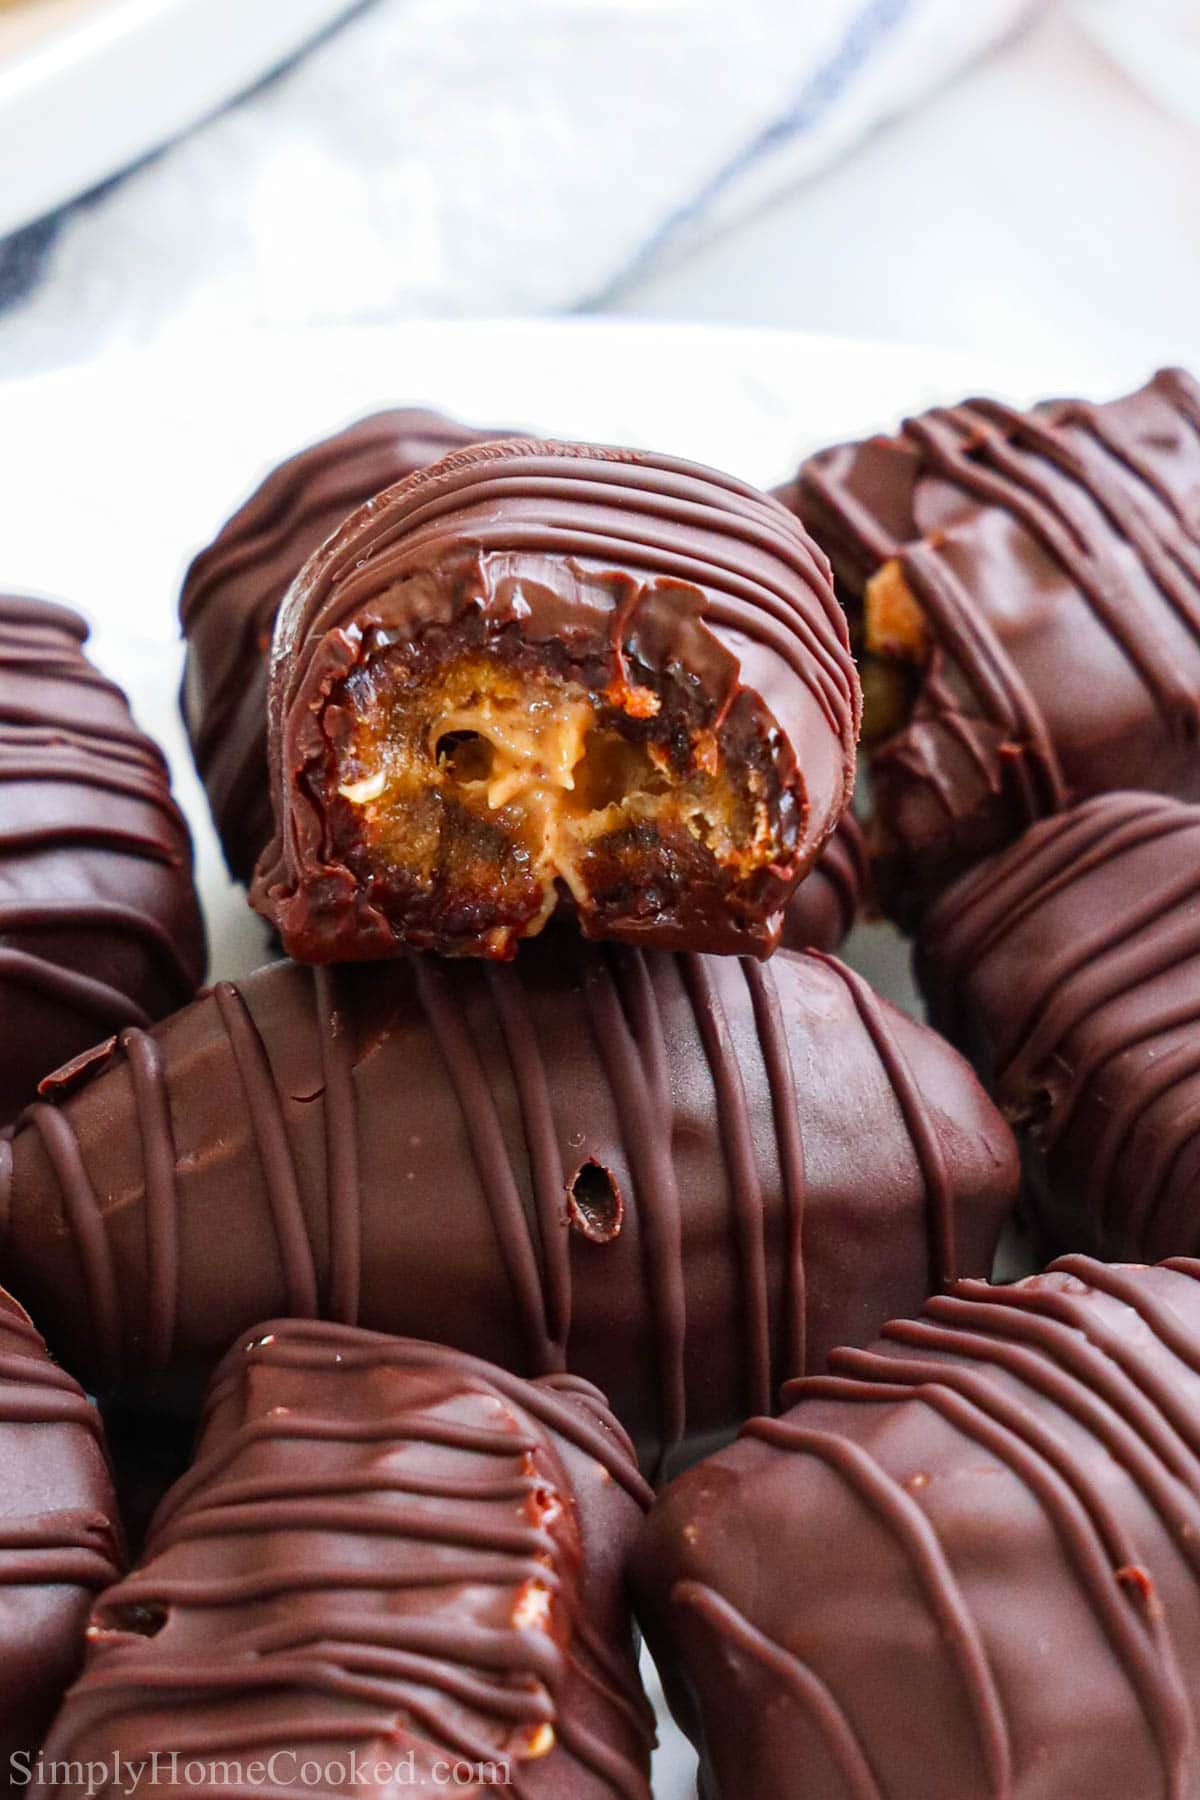
- TEXTURE: These dates are chewy and filled with creamy peanut butter. The chocolate shell is melt-in-your-mouth good.
- TIME: This recipe will take 35 minutes.
- EASE: This is so simple and easy to make. With no baking at all and minimal ingredients, these dates are a dessert you can whip up anytime for guests.
What You’ll Need
Ingredient Notes
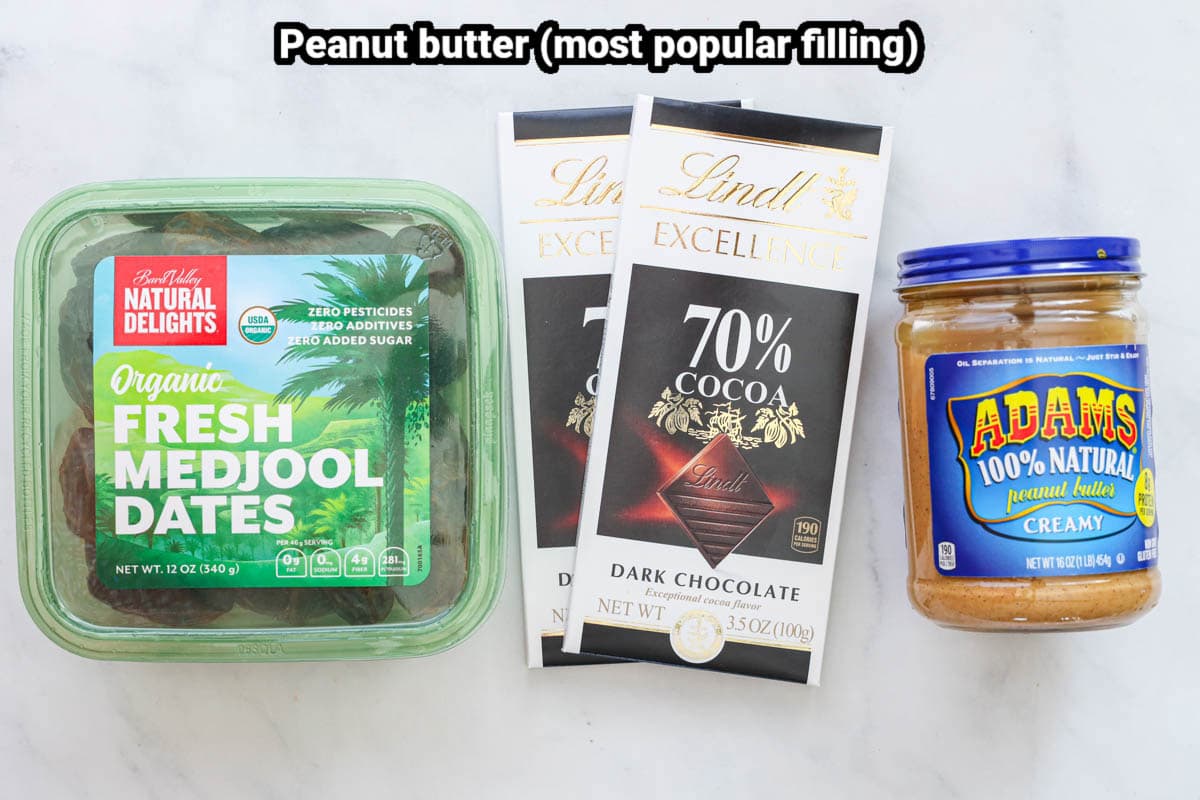
- Dates- Fresh dates with or without pits work here. If you get the ones with pits, you can carefully remove the pit with a simple slit down the middle.
- Chocolate- Dark chocolate is good in this recipe because the slight bitterness balances out the sweetness of the date.
- Peanut butter- Creamy is best since the chunky would leave hard bits in your filling. Natural peanut butter is also preferred since it has no added sugar, but any type of nut butter or seed butter would work. Almond butter is an acceptable substitute as well.
Add-ins and Substitutions
- Add aromatics- You can make these Chocolate Covered Dates smell and taste even more amazing by using lavender or orange zest to brighten them up.
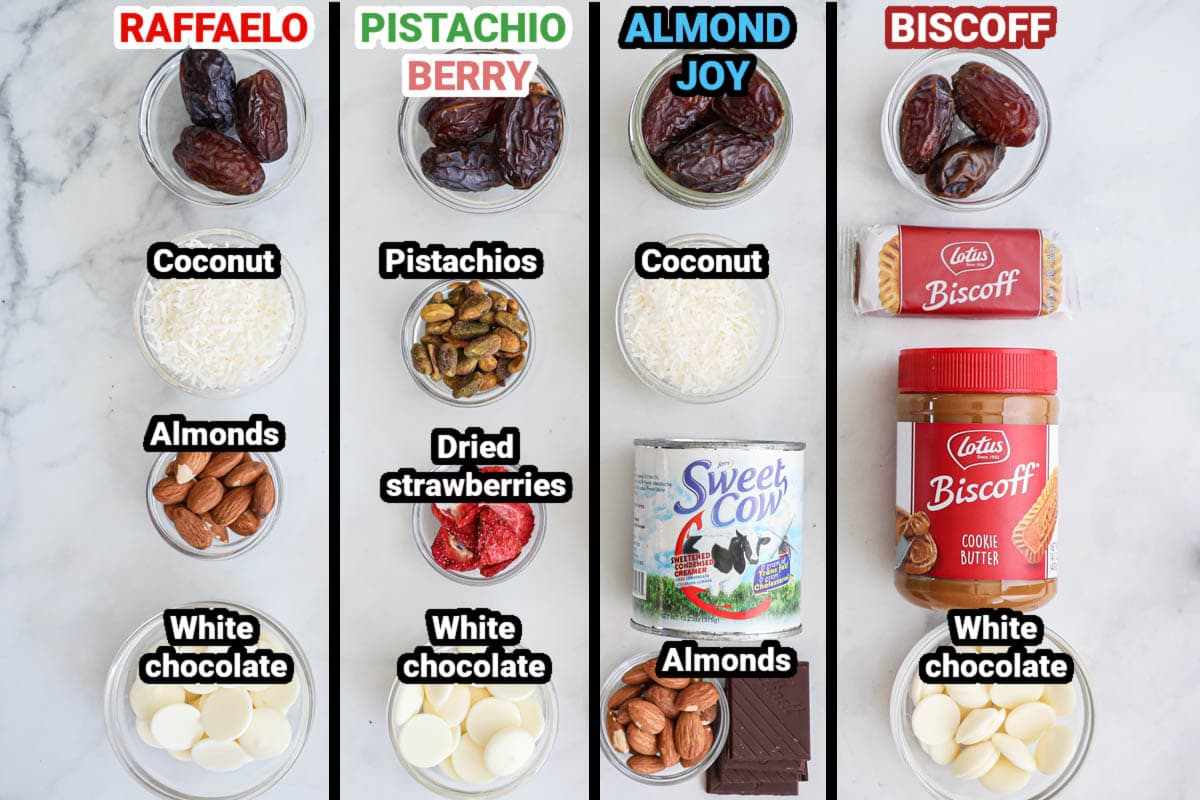
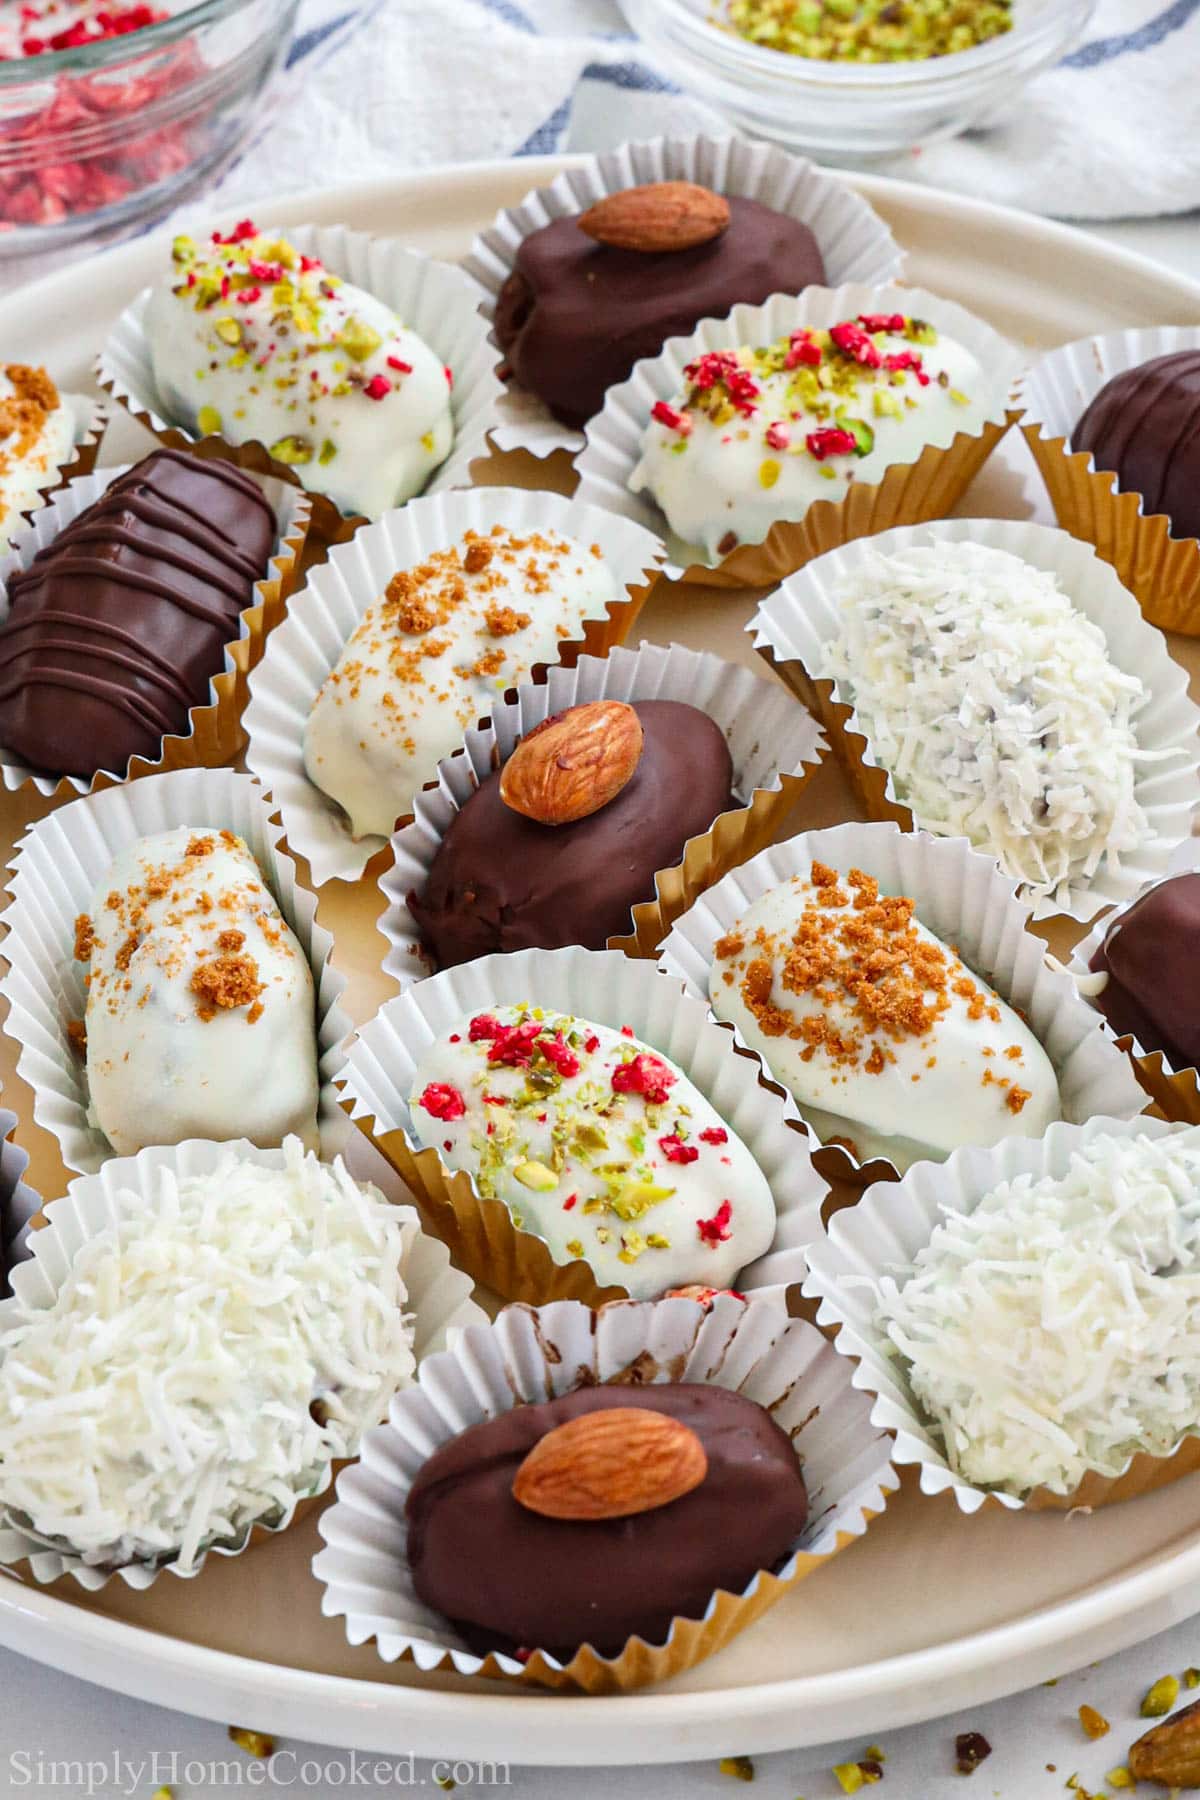
- Use another flavor profile- From Raffaelo and pistachio berry to Almond Joy and Biscoff, there are so many flavor variations to try. Fill and sprinkle your favorite things on these dates.
- Substitute other chocolates- You can use white chocolate chips, milk chocolate, semi-sweet chocolate, or even vegan chocolate. Chocolate with sea salt is also great.
- Stuff them with cheese- Goat cheese and cream cheese are great fillings for these dates. The creamy, savory flavor is balanced by the sweetness.
How to Make Chocolate Covered Dates
- Pit the dates. Make a slit into each Medjool date and remove the pit.
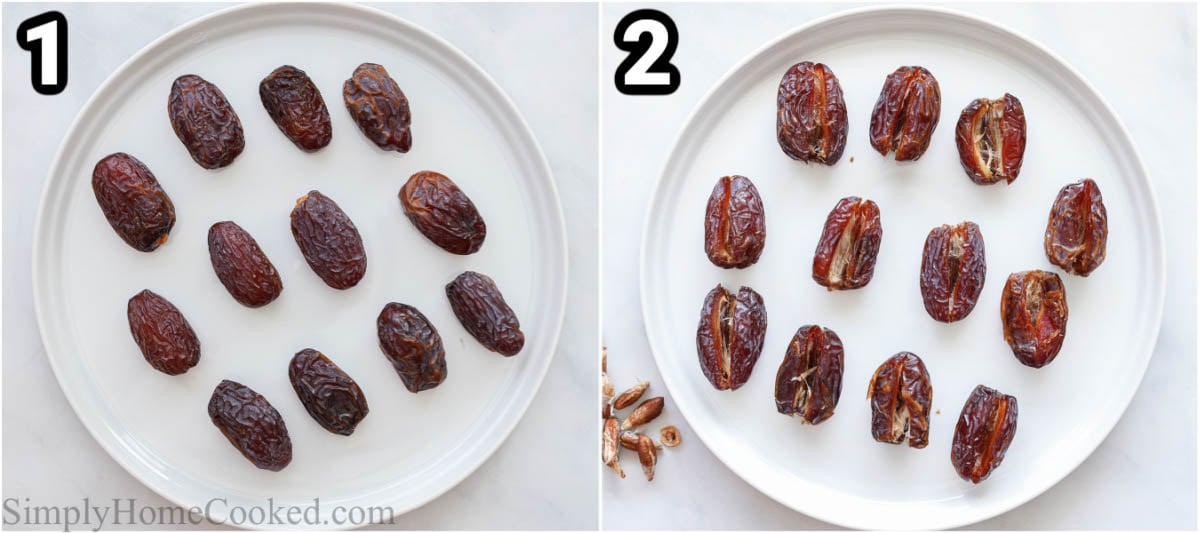
- Add filling. Now fill the center of each date with your filling of choice (I used peanut butter here).
- Close them. Secure the two split-open sides of the date using a toothpick, making sure to leave one side of the toothpick a little bit longer.
Pro Tip: Make sure the toothpick sticks out a bit longer on one side. You will use the longer end to help hold the date when dipping it in chocolate.
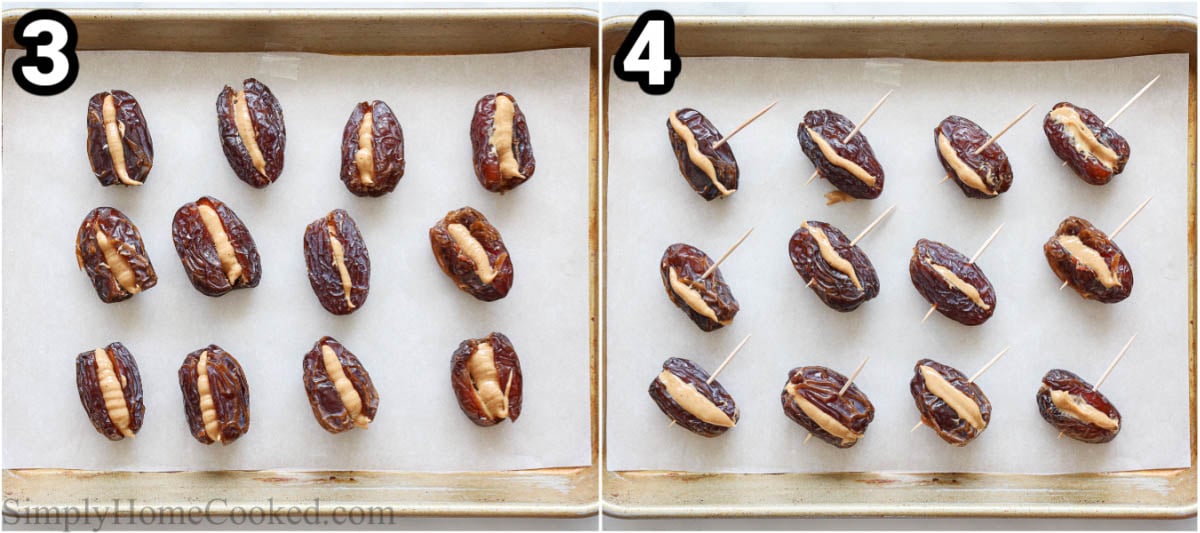
- Freeze. Now place the filled dates on a baking sheet lined with parchment paper. Freeze for about 10-15 minutes.
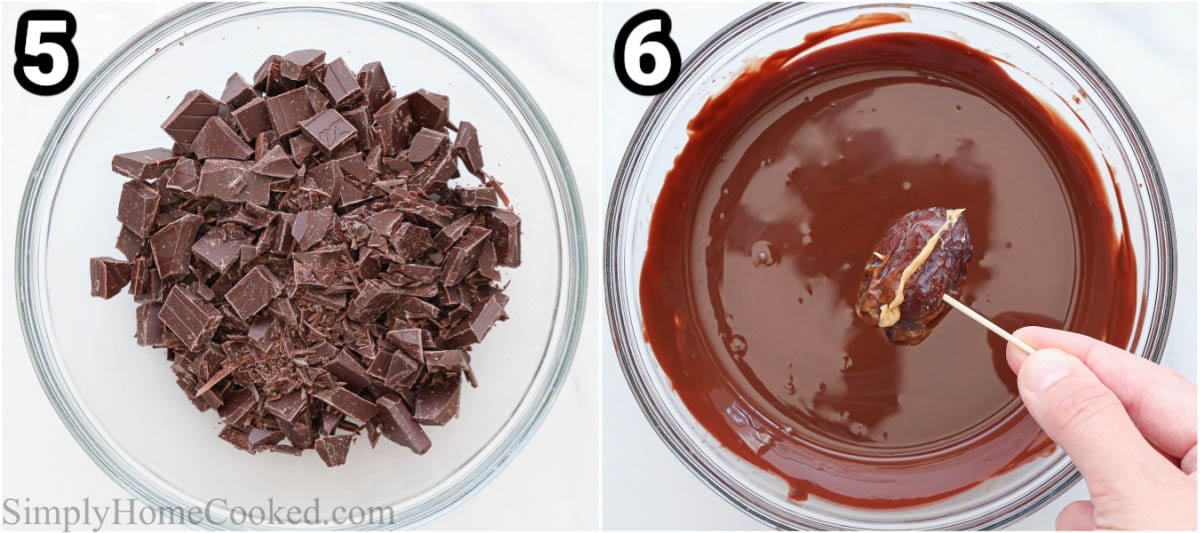
- Dip the dates into melted chocolate. Now melt the dark chocolate in the microwave-safe bowl, being careful not to scorch it. Then carefully dip the frozen dates into the melted chocolate, using a spoon to help fully coat the dates. Tap off any extra on the side of the bowl and quickly transfer it to a baking sheet lined with parchment paper.
- Let them set. Place the Chocolate Covered Dates in the refrigerator to set. Keep them refrigerated until ready to serve.
Recipe Tips
- Pipe your filling- So as not to overfill the dates, pipe a thin stream of any liquidy fillings into the pitted date. This keeps it cleaner and easier to close.
- Only freeze liquidy fillings- The freezing step is only necessary if you need to harden a runny filling, such as condensed milk or cashew butter. If you use nuts as the filling, you do not need to freeze them.
- Chop the chocolate- If you use chocolate bars, chop them into smaller uniform pieces. This will help them melt faster and more evenly.
- Don’t scorch the chocolate- If possible use the “melt chocolate” setting on your microwave to avoid scorching the chocolate. Or microwave in 15-second intervals.
FAQs
If you find that your melted chocolate isn’t hardening, the temperature may be too high. If you are setting them at room temp, keep it between 65-68 degrees Fahrenheit. Or set them in the refrigerator for even cooling.
Chocolate covered dates should be stored somewhere cold so the chocolate doesn’t melt. They can be kept in the fridge for a week, or the freezer for 3 months, in an airtight container.
Serving Suggestions
These Chocolate Covered Dates are perfect as a sweet snack or a dessert after a meal. You can also serve them with cakes and cookies, too.
- Main dishes: Enjoy these after a delicious meal of Pork Crown Roast, Panko Crusted Salmon, Lemon Chicken Piccata, or Cast Iron Ribeye Steak.
- Cakes: Serve these chocolate dates with a slice of Tiramisu Cake (VIDEO), Coffee Chocolate Mousse, No Bake Mini Cheesecakes (VIDEO), or Chocolate Lava Cake (Video).
- Cookies: Enjoy them alongside some Chewy Peanut Butter Oatmeal Cookies, White Chocolate Macadamia Nut Cookies, Chewy Nutella Cookies, or Chocolate Meringue Cookies.
- Beverages: Pair these stuffed dates with a hot tea or coffee, or try them with a Pumpkin Spice Latte, Caramel Frappuccino (Starbucks Copycat), or Hot Chocolate.
Make This Recipe in Advance
Make ahead: Pipe in the filling for these dates ahead of time and store them in the fridge. You can cover them with chocolate on the day you plan to serve them. Or fully prepare them and store them in the fridge until serving time.
Storing: Store any leftover Chocolate Covered Dates in the refrigerator in an airtight container. They will last for up to a week.
Freeze: You can freeze these in a freezer-safe container for up to 3 months. Thaw in the fridge overnight before serving.
More Decadent Desserts!
Watch Video Recipe Here
Full Recipe Instructions
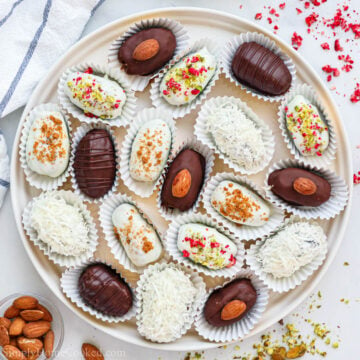
Chocolate Covered Dates
Equipment
- 12 toothpicks
Ingredients
- 12 Medjool dates
- 1/4 cup Creamy Peanut butter filling
- 1 1/2 cups dark chocolate 70% melted
Instructions
- Make a slit into each Medjool date and remove the seed.
- Now fill the center of the date with your filling of choice (I used peanut butter in the photos) see the bottom of the recipe card for all filling/flavor combinations.
- Now secure the two split-open sides of the date using a toothpick, making sure to leave one side of the toothpick a little bit longer. You will use the longer end of the toothpick to help hold the date when dipping it in chocolate.
- Now place the filled dates on a baking sheet line with parchment paper. Freeze for about 10-15 minutes. Note: The freezing step is only necessary if you need to harden a runny filling. If you use nuts as the filling, you do not need to freeze them.
- Now melt the dark chocolate in the microwave-safe bowl. If possible use the “melt chocolate” setting on your microwave to avoid scorching the chocolate. Or microwave in 15-second intervals if you do not have this option on your microwave.
- Now carefully dip the frozen dates into the melted chocolate. I find that it helps to use a spoon to help fully coat the dates. Tap off any extra chocolate on the side of the bowl and quickly transfer it onto a baking sheet lined with parchment paper.
- Place in the refrigerator to set. Keep refrigerated until ready to serve.
Notes
 Rafaello
- Roasted salted Almonds (filling)
- White chocolate (for dipping)
- Coconut flakes (to coat after dipping)
- Coconut flakes + Condensed milk (filling)
- Dark chocolate (for dipping)
- Almond (on top for decor)
- Whole Pistachios (filling)
- White chocolate (for dipping)
- Chopped Freeze dried strawberries (topping)
- Finely chopped pistachios (topping)
- Biscoff cookie butter (filling)
- Melted White chocolate (for dipping)
- Biscoff cookies
- Pipe your filling- So as not to overfill the dates, pipe a thin stream of any liquidy fillings into the pitted date. This keeps it cleaner and easier to close.
- Only freeze liquidy fillings- The freezing step is only necessary if you need to harden a runny filling, such as condensed milk or cashew butter. If you use nuts as the filling, you do not need to freeze them.
- Chop the chocolate- If you use chocolate bars, chop them into smaller uniform pieces. This will help them melt faster and more evenly.
- Don’t scorch the chocolate- If possible use the “melt chocolate” setting on your microwave to avoid scorching the chocolate. Or microwave in 15-second intervals.
Nutrition
- Sparkling Fruit Punch Recipe - July 10, 2025
- BBQ Sauce - June 30, 2025
- Fruit Kabobs - June 25, 2025




hanifa says
curious about the coconut ones
what the measurements on the coconut and condensed milk?
Dina says
Hi, I actually didn’t measure. I just eyes it and mixed enough of coconut and condensed milk to make a thick paste.
Lia says
O q é aquele vermelho q tem encima do doce?
Nasreen Rauf says
Hello what size cases did you use to put the chocolate covered dates in please
Dina says
Hi, I used mini muffin/cupcake liners.