This Sourdough Bread Recipe is not as hard as you think. Let me walk you through how to make the perfect loaf, with a crackly crust and chewy crumb.
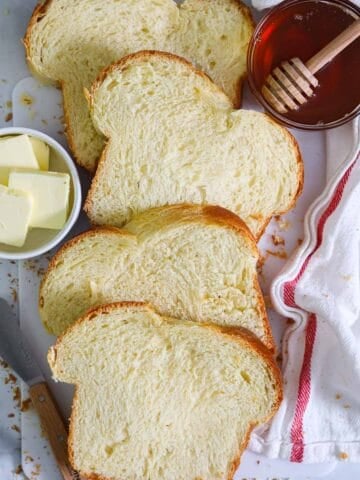
If you love fresh homemade bread, then you should try this amazing Focaccia Bread recipe or Buttery Brioche Bread recipe.
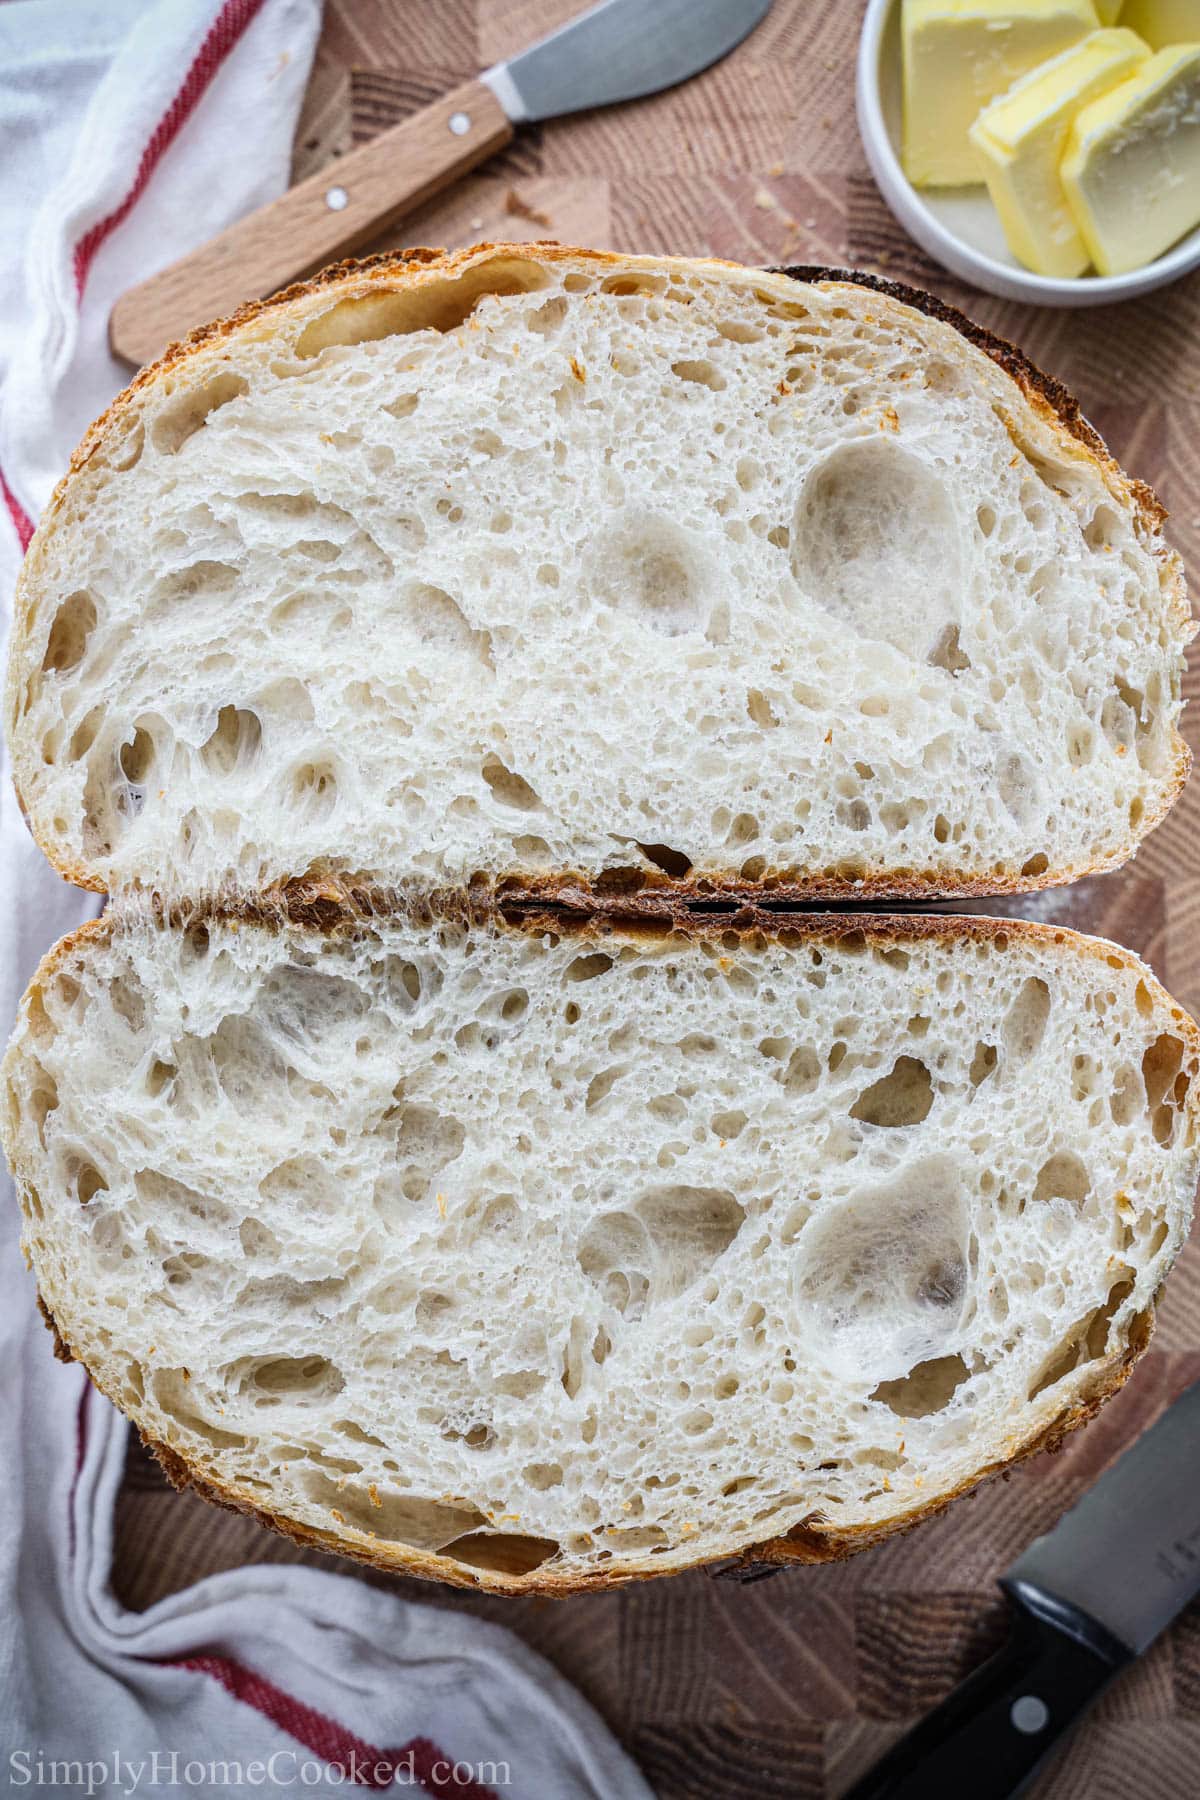
Table Of Contents
Sourdough Bread Recipe Details
I can’t get enough of the flavor in this Sourdough Bread Recipe. And I just love how great it makes my house smell as it bakes. I’m sure you’re going to love this classic loaf as much as I do!
- TASTE: This bread has a deliciously mild tangy taste that’s unique to sourdough. The yeasty loaf pairs well with salty and sweet flavors.
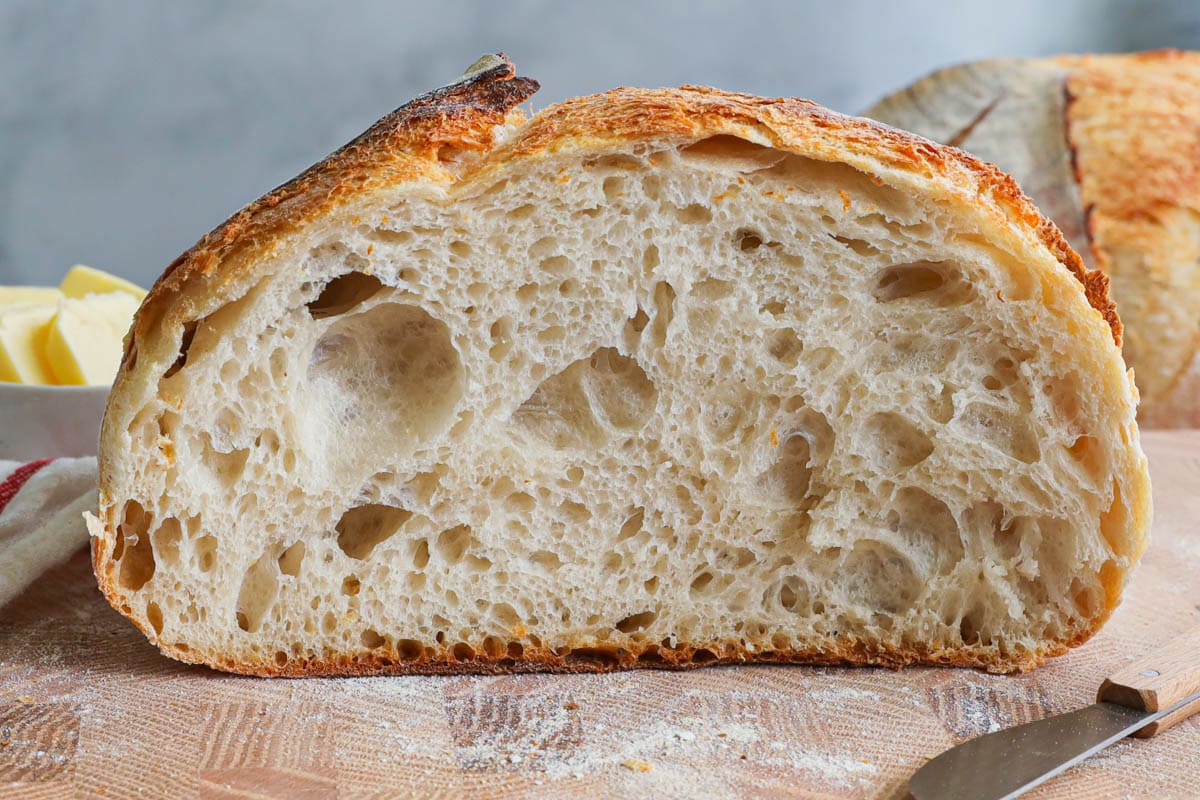
- TEXTURE: You’ll love the hard and crackly crust on the outside of the sourdough, while the inside is chewy and springy.
- TIME: This recipe will take some time at just over 16 hours. But it’s worth it!
- EASE: If you follow along with my step-by-step instructions and images, this homemade sourdough recipe will come off without a hitch.
What You’ll Need
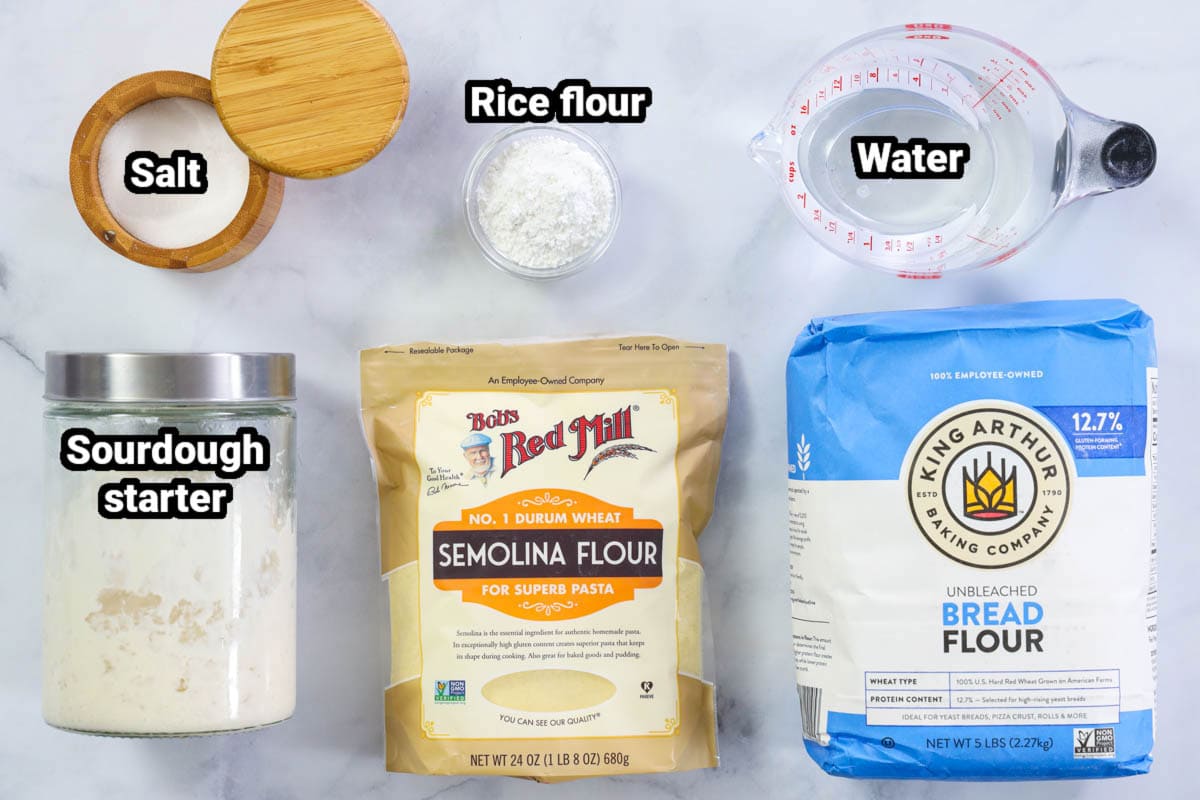
Ingredient Notes
- Sourdough starter- I purchased mine from Ballerina Farm’s website. This is a mix of lactic acid bacteria and wild yeast that feeds on carbs in the flour and water added to it to create a tangy loaf of sourdough bread.
- Bread flour– This type of flour has more protein in it than others, so it can produce more gluten, making bread chewy and springy.
- Water- This moistens the dough and feeds the sourdough starter to make your bread. Make sure it’s warm enough, between 105 and 110 degrees.
- Salt- This adds important flavor to the bread. Fine granules are best.
- Flours for dusting- We’ll use Rice Flour and Semolina Flour for dusting the loaf and proofing basket so the dough doesn’t stick.
- Dutch oven pot- This cast iron pot helps the Sourdough Bread create its hard outer crust. It can go right into the oven for baking.
- Kitchen scale– This will be a big help in keeping your measurements exact. Using weight is a more accurate way of measuring ingredients.
- Proofing basket– While you can use a bowl and towel, this is helpful for proofing the bread before baking. Either way works though.
- Blade– You’ll need this to score the top of the loaf before baking. This is important for helping the bread expand in a controlled way.
Add-ins and Substitutions
- Substitute whole grain bread flour- Instead of white bread flour, use whole wheat flour for a tangier, more sour taste in your loaf.
- Add seeds and nuts- You can incorporate anise, allspice, chopped walnuts, pepitas, chia seeds, or sesame seeds into your dough before baking.
- Make it with dry milk powder- For a softer texture and added flavor, mix some dry milk powder into the dough.
- Add herbs- Try this Sourdough Bread recipe with some fresh or dried chives, rosemary, dill, or marjoram.
How to Make Sourdough Bread
- Feed the starter. About 4-8 hours before you begin, feed the sourdough starter. You’ll want it to double in size. Mix the starter with the water in a mason jar, then add the bread flour. Mix until no more patches of flour are visible. Cover with plastic wrap.
Pro Tip: If you prefer your bread less sour, keep the starter in the fridge. It will slow down the fermentation and create a very mildly sour flavor in the bread.
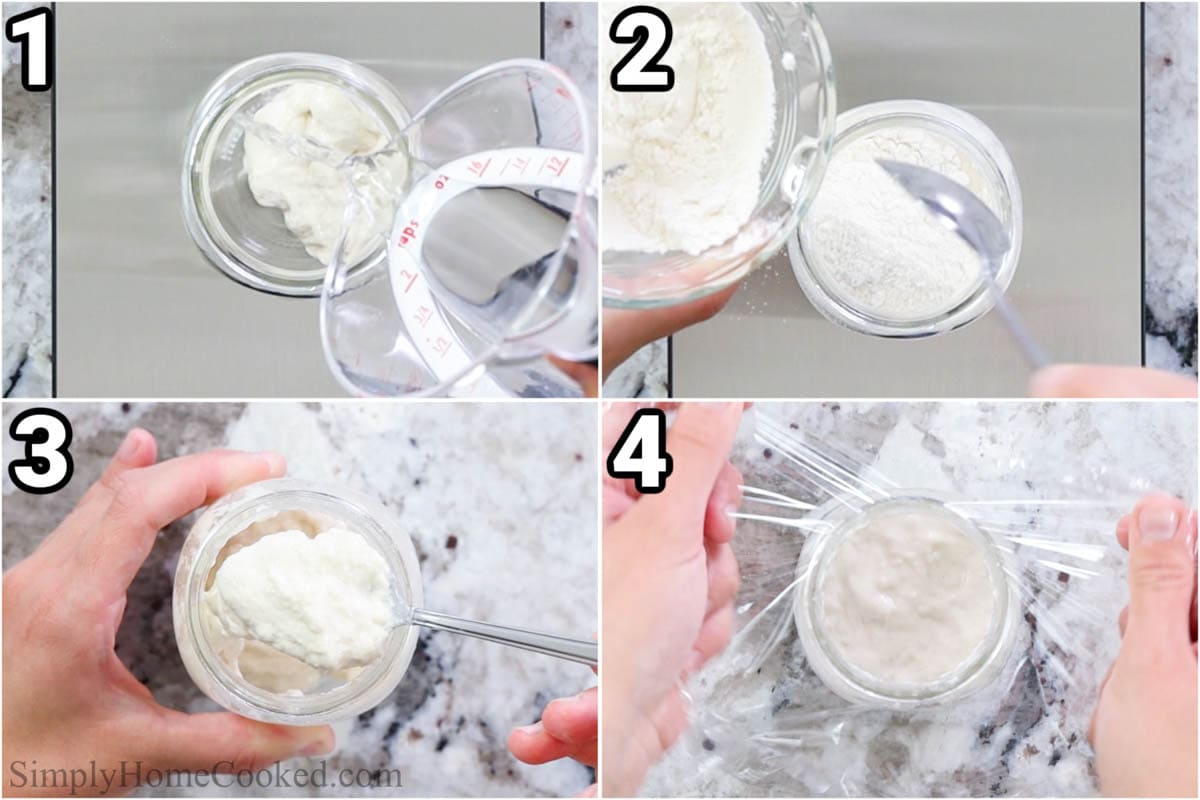
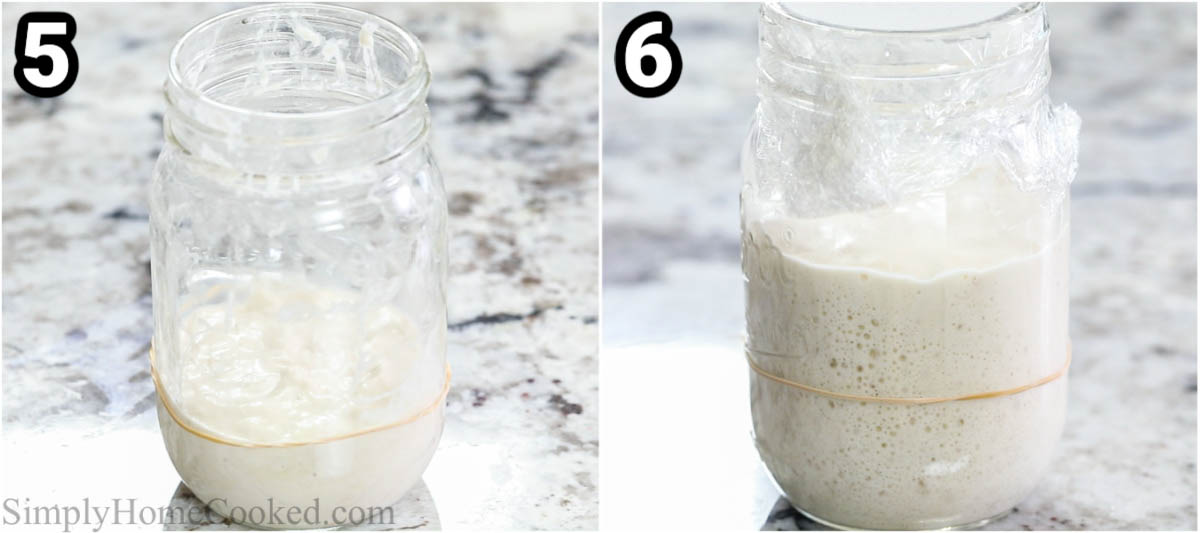
- Let it double. Allow the starter to sit at room temperature until it activates and doubles in size. It should look very bubbly at this point.
Pro Tip: To determine if the sourdough starter has doubled, I usually place a rubber band around the mason jar where the starter stops to gauge its growth.
- Add the ingredients together. In a large bowl, mix the warm water and active starter together, then add the salt and bread flour. I love using a dough whisk for this part.
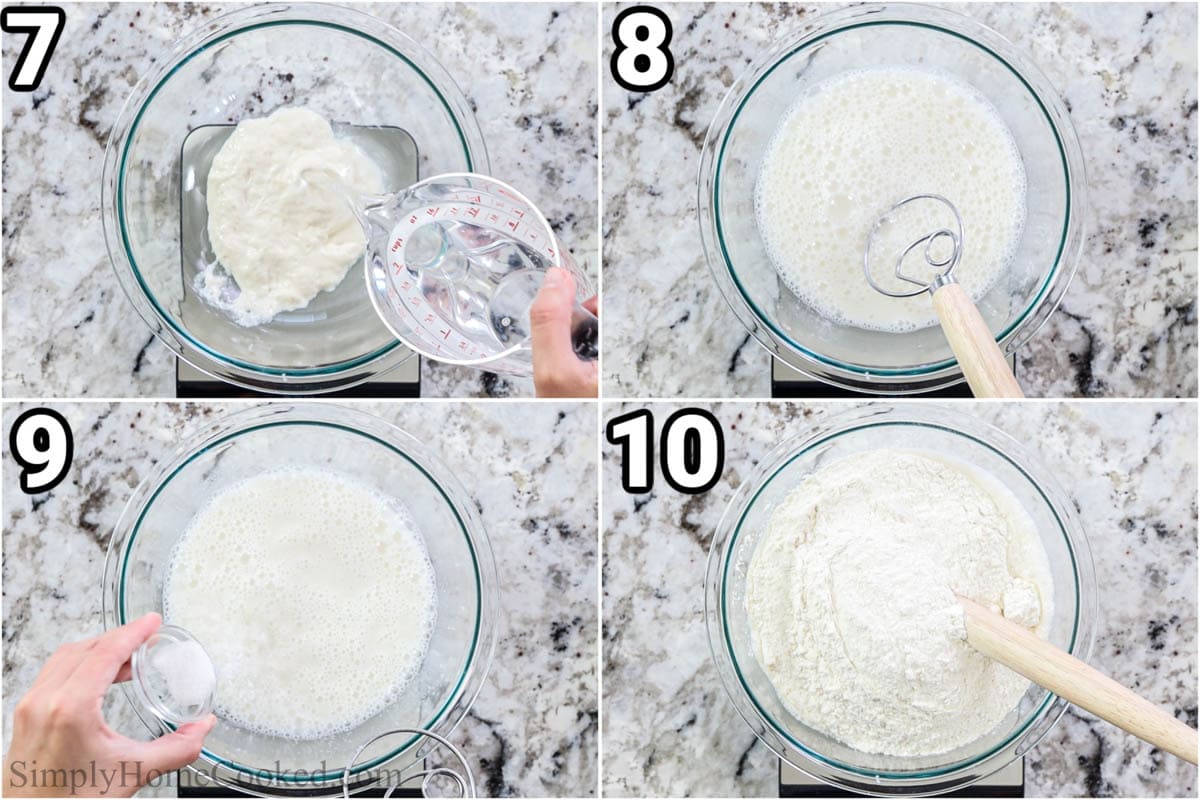
- Proof the dough. Cover it with plastic wrap and let the dough rest for 30 minutes in a warm place, or in your oven on the proof setting.
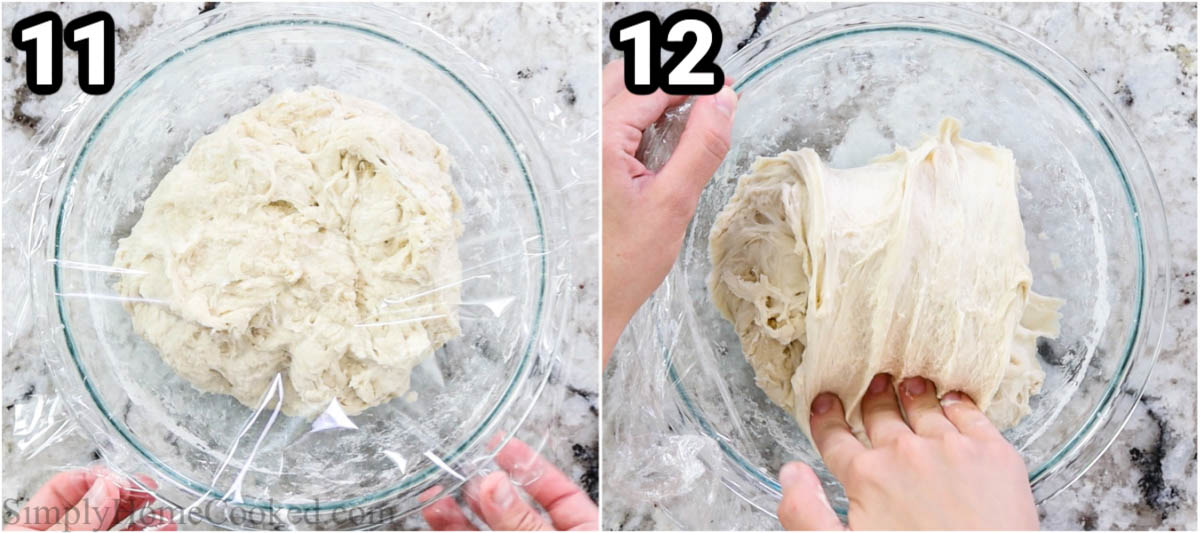
- Stretch the sourdough bread dough. Without removing the dough from the bowl, pull the top into the center, then the left side into the center, then the bottom, and finally the right side (basically, pull in all the sides). Then cover the bowl with plastic wrap and let it rest for 30 more minutes at room temperature.
- Stretch the dough some more. After the 30 minutes have passed, repeat the same stretching process 5 more times with 30 minutes in between, totaling 6 stretches.
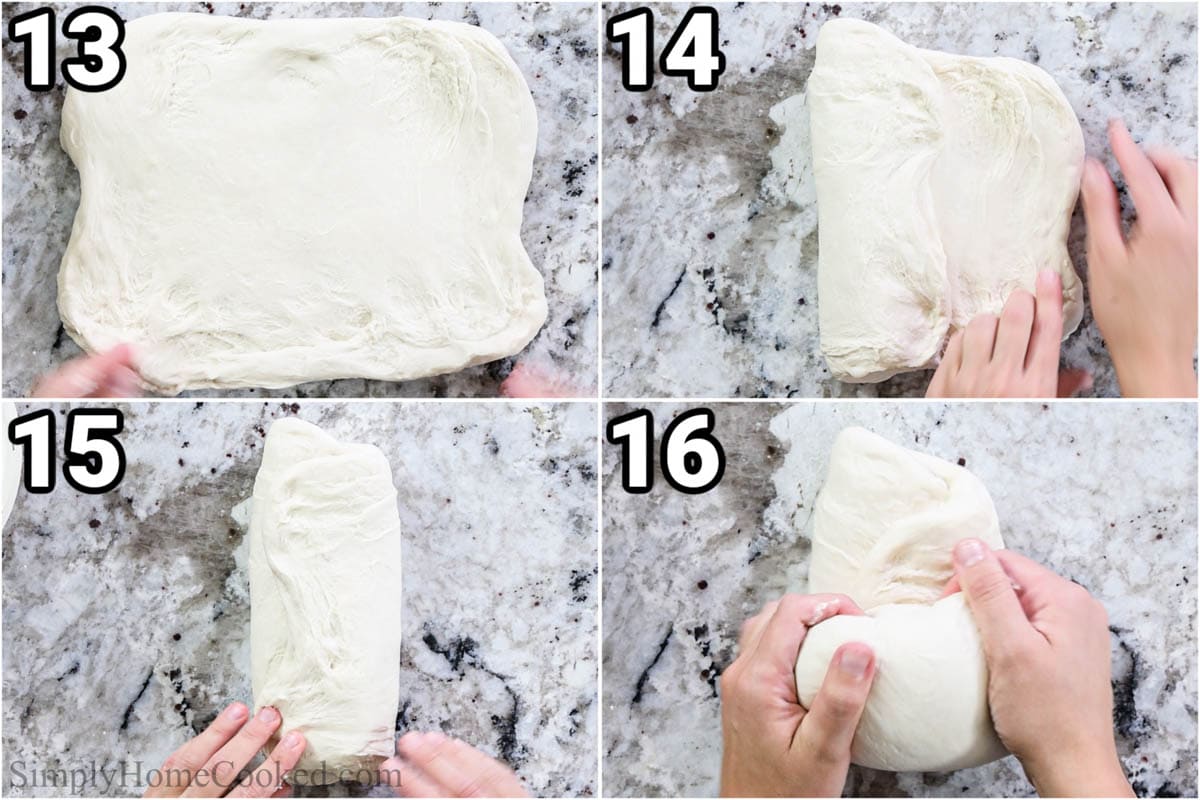
- Fold and shape the dough. After the last stretch, place the dough on a clean work surface or counter and stretch it into a small rectangle. Now, fold it into thirds and roll it up so the seam is on the inside. Then use your hands to shape the dough into a round ball by turning it on your work surface multiple times.
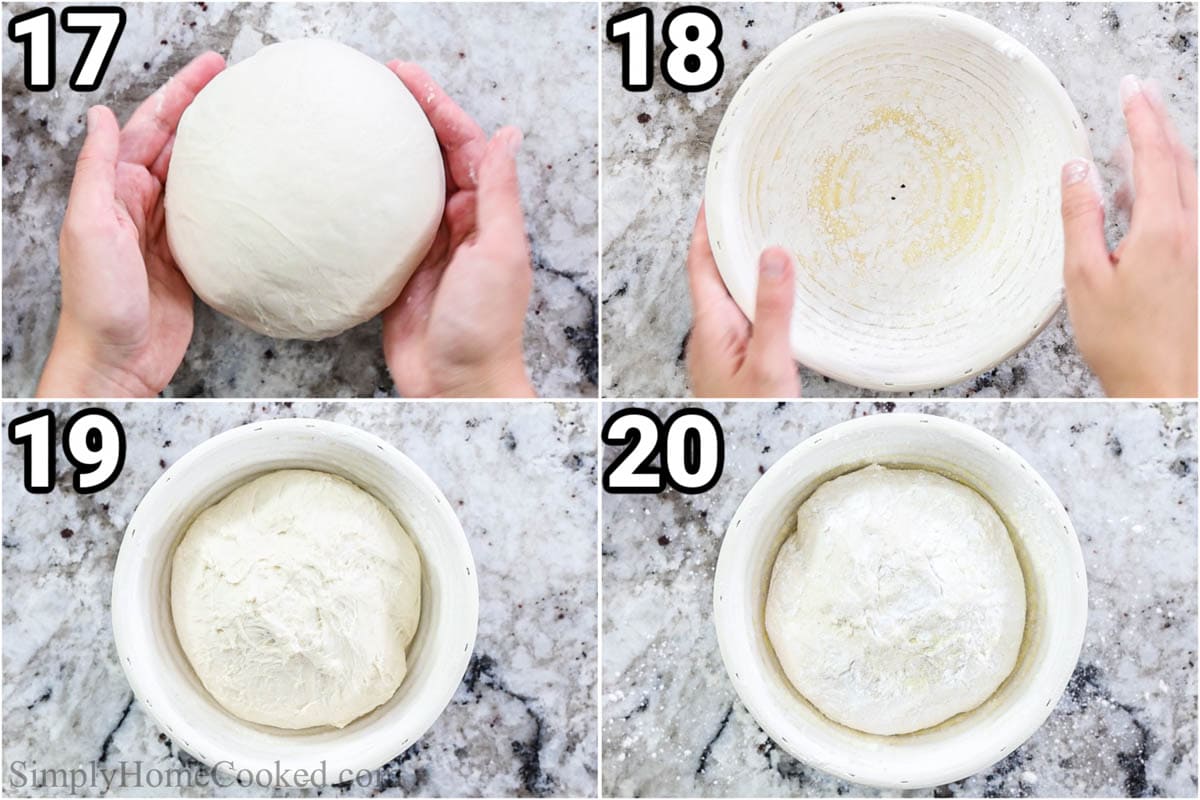
- Chill it in the refrigerator. Now thoroughly dust your bread-proofing basket with some rice flour and semolina flour, but not bread flour as it will make the dough stick to the basket. Place the dough into the bread-proofing basket, seam side down, and dust with a little more semolina and rice flour. Then cover and chill in the fridge for 8 hours or overnight.
Pro Tip: If you are using new bread-proofing baskets, make sure to spray them down with water and apply a generous amount of rice flour and let them dry for about 1 hour before using.
- Let the dough come to room temperature. In the morning, take the bread dough out of the fridge and let the bread dough rise and come to room temperature for about 3 hours.
- Score the bread. Place an empty Dutch oven pot (with lid) in the oven and let it preheat to 450 degrees Fahrenheit. Then flip the bread dough onto a sheet of parchment paper and use a blade or sharp knife to make a few slits or designs on top of the dough. Scoring it will control where the air will expand.
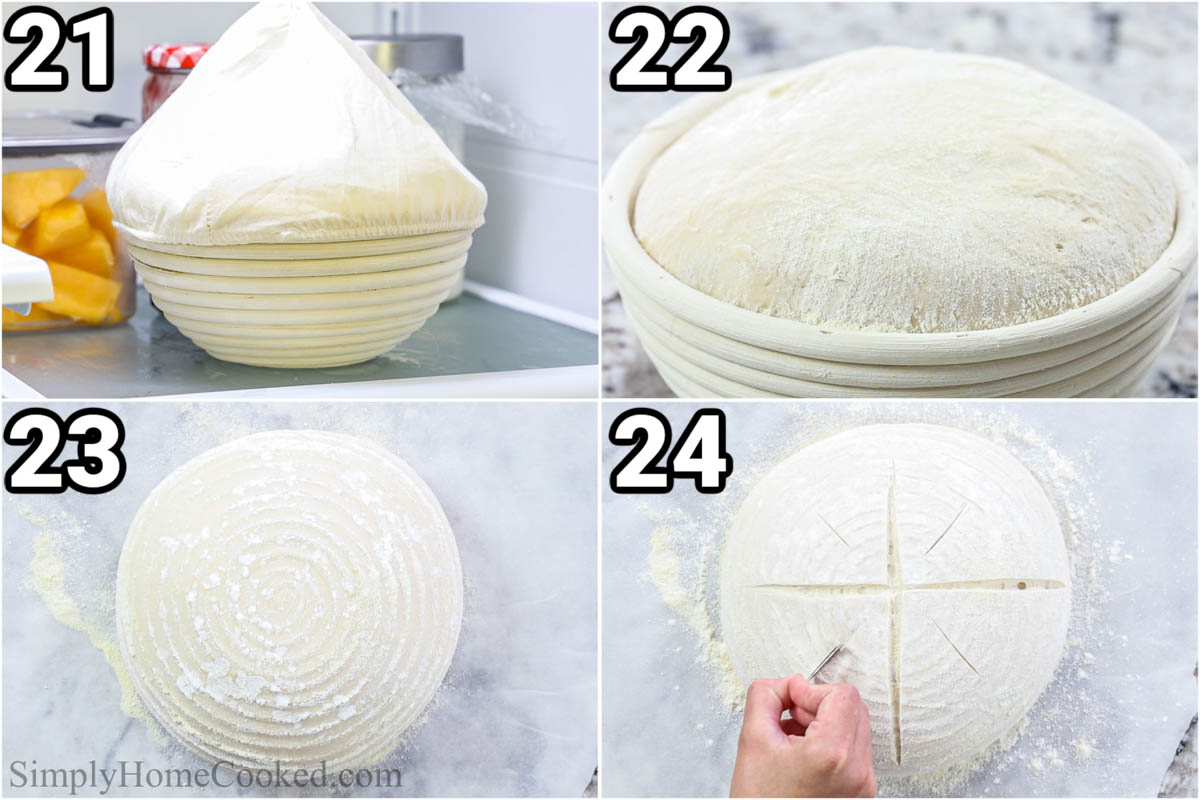
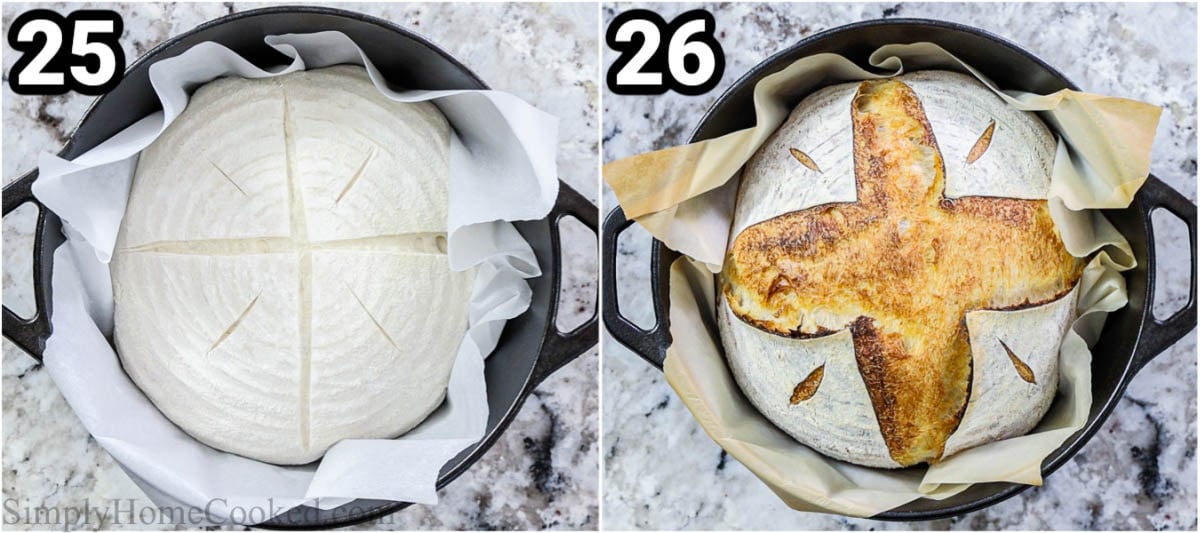
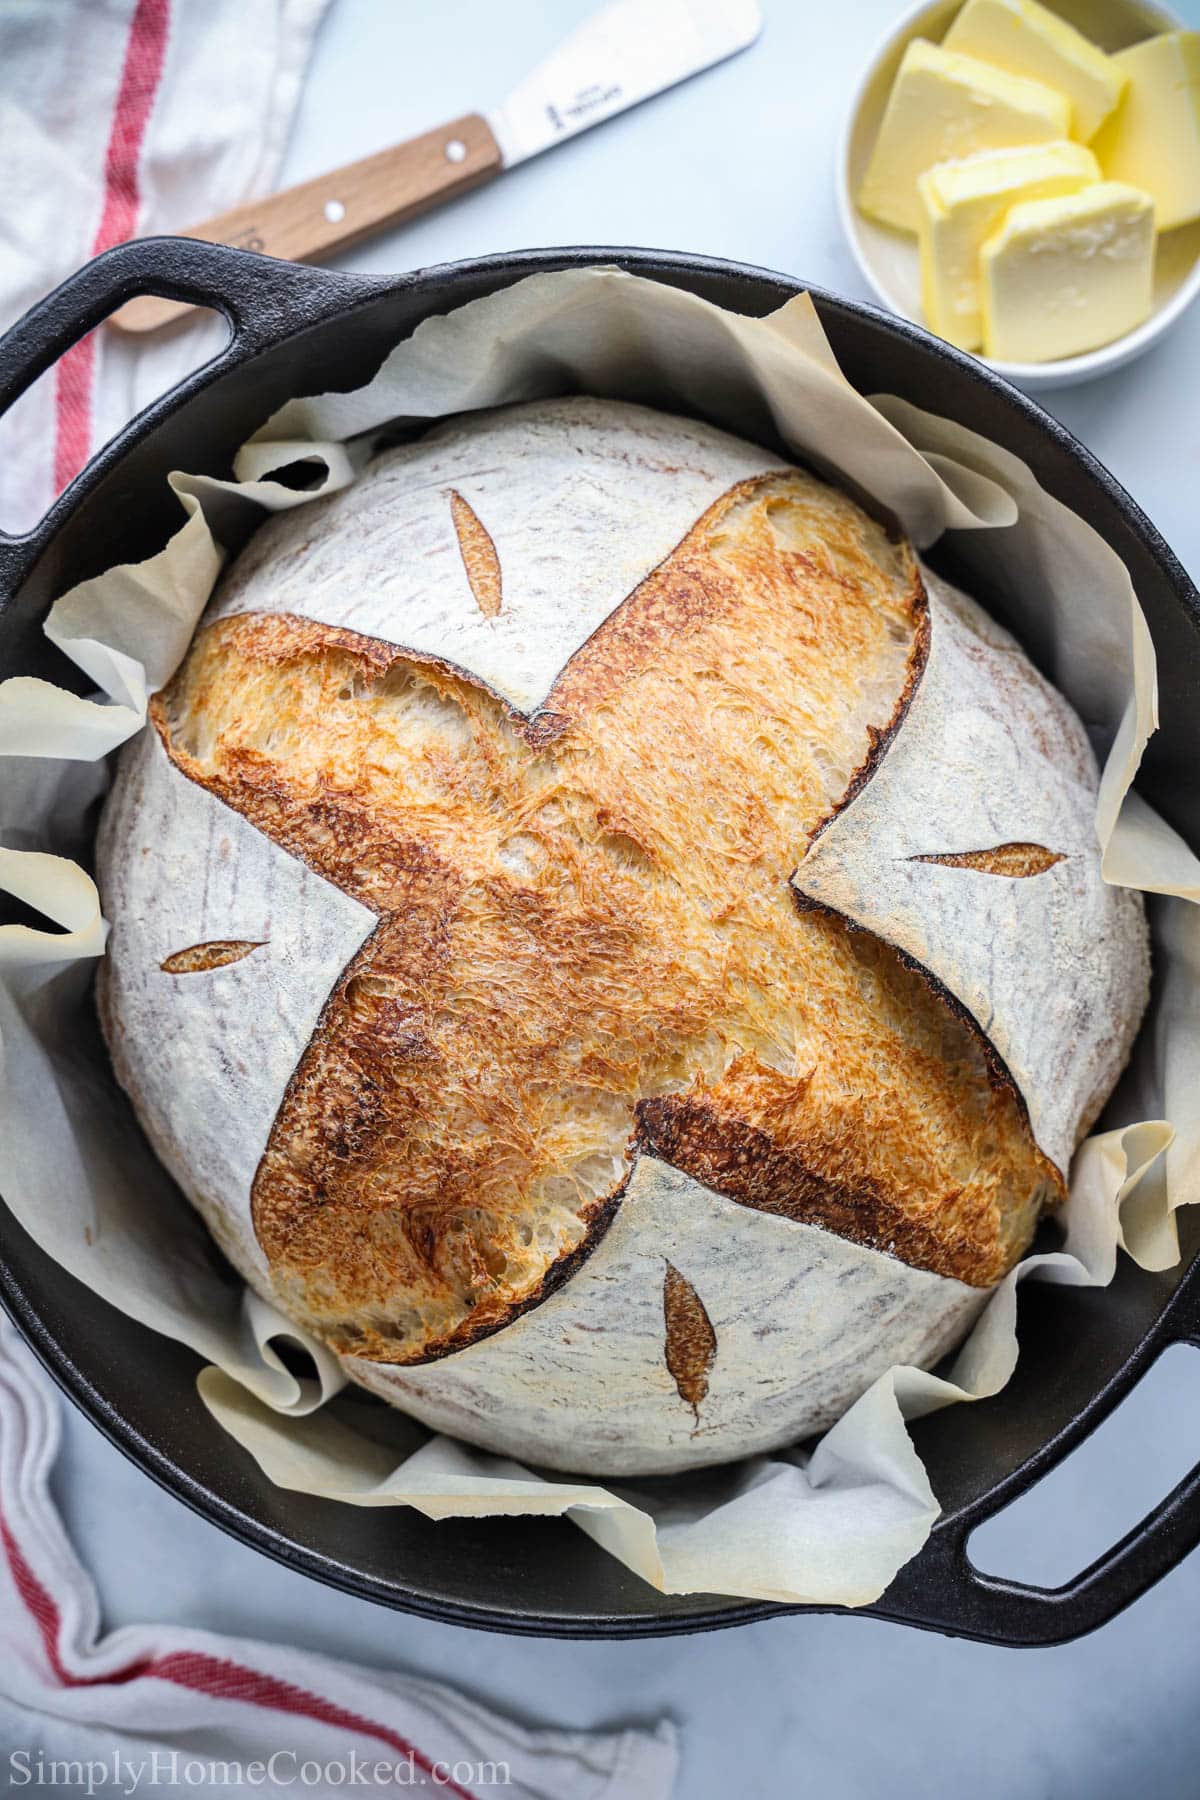
- Bake. Then carefully place it inside the hot Dutch oven pot and put the hot lid on top. Bake it covered for 30 minutes, then uncovered for 15-20 minutes. Let it cool before slicing.
Recipe Tips
- Use a kitchen scale- Weight measurements are more accurate than volume because you can overpack the measuring cup with flour. Use a kitchen scale to get the amounts perfect.
- Make double- If you want to bake 2 loaves, you’ll need to feed double the amount of starter, so 100g each of water, flour, and starter
- Do not skip the stretching– This is very important for sourdough. With each dough stretch, you will notice it getting stronger and stronger. Building the strength of the dough will help it hold its shape when it bakes.
- Use a proofing basket alternative- If you do not have a proofing basket, you can line a glass bowl with a kitchen towel and dust it with rice flour and semolina instead.
FAQs
Sourdough is actually a pretty healthy bread choice. Made with no sugar, it contains a lot of vitamins and minerals, like iron, folate, b12, magnesium, calcium, and so much more. This is a great choice for your morning toast or lunchtime sandwich.
The secret lies in the sourdough starter. This bread doesn’t use commercial yeast to make it rise, but rather the fermentation that happens when the starter is mixed with bread flour and water. This also gives it its signature tangy flavor and extra chewy texture.
Serving Suggestions
This Sourdough Bread Recipe is so versatile. You can eat it on its own or use it for sandwiches, soups, or as a side to different meats. Here are some delicious ideas to try.
- Meats: Serve slices or hunks of this delicious loaf of bread alongside Braised Beef Short Ribs (VIDEO), Smoked Chicken Thighs, and Beef Stew.
- Sandwiches: Use this Sourdough Bread for sandwiches like this Grilled Cheese Sandwich, Grilled Caprese Sandwich, or Breakfast Sandwich.
- Soups: Dip it into bowls of tasty Copycat Panera Bread Broccoli Cheddar Soup, Tortellini Soup, Baked Potato Soup, or Easy French Onion Soup.
- Toppings: Spread butter, homemade Strawberry Jam (no pectin), Nutella, or Chocolate Ganache on a toasted slice for a sweet or savory breakfast.
Make This Recipe in Advance
Make ahead: You can make this dough a day ahead by placing it in the fridge while it’s rising. When you take it out, let it come to room temperature to finish its rise before continuing with the recipe and baking it.
Storing: Store any leftover Sourdough Bread by wrapping it in plastic wrap and keeping it at room temperature. It should remain soft for up to 5 days.
Freeze: You can also freeze the loaf by slicing it in half and placing it in a gallon-sized ziplock bag and then putting it in a freezer. It should last for 3 months. Defrost overnight in the fridge.
More Delicious Breads!
Watch Video Recipe Here
Full Recipe Instructions
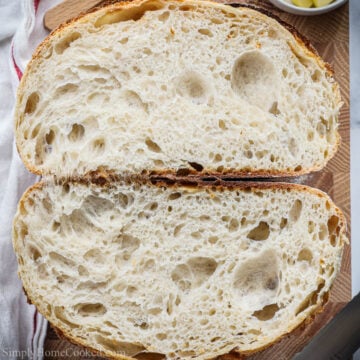
Sourdough Bread Recipe
Equipment
- 1 Blade
Ingredients
- 350 g water 105° F
- 100 g active Sourdough starter
- 600 g bread flour
- 12 g salt
- Rice flour for dusting
- Semolina flour for dusting
Instructions
- Feed starter 4-8 hours before using. I purchased mine from Ballerina Farm. The time it takes to rise will depend on how warm your house is. You want it to double in size. Use a kitchen scale to feed the starter in a mason jar by mixing 50g starter and 50g warm water and mix using a wooden spoon to loosen it up. Then add 50g of bread flour and mix until no more patches of flour are visible. Cover with plastic wrap and let it sit at room temperature until it activates and doubles in size. I usually place a rubber band around the mason where the starter stops to gauge the growth. The starter should look very bubbly at this point. (Tip: if you want to bake 2 loaves, you’ll need to feed double the amount of starter. So 100g of each water, flour, and starter).
- In a bowl, mix 350g warm water no higher than (110°F) with 100g of active starter. Then add 12g salt and mix in 600g bread flour. I love using a dough whisk and scraper for this step.
- It will look shaggy and dry and that’s ok. Cover with plastic wrap and rest for 30 mins in a warm place. I like to use the proof setting on my oven for this step.
- Now begin the stretching process. Without removing the dough from the bowl, pull the top into the center, then the left side into the center. Then the bottom and right sides into the center. So pretty much pull in all the sides of the dough. Then cover with plastic wrap and let it rest for 30 more minutes at room temperature.
- After the 30 minutes have passed, repeat the same stretching process 5 more times with 30 minutes in between. So a total of 6 stretches. Do not skip the stretching. This is very important for sourdough. With each stretch, you will notice the dough getting stronger and stronger. Building the strength of the dough will help hold its shape when it bakes.
- After the last stretch, place the dough on a clean work surface and stretch it into a small rectangle (doesn’t matter how big). Now, fold it into 3rds and roll it up so the seam is on the inside. Then use your hands to shape the dough into a round ball by turning it on your work surface multiple times.
- Now thoroughly dust your bread-proofing basket with about 1 Tbsp of rice flour and 1 Tbsp semolina flour. Note: dusting with bread flour will not work. The dough will stick to the bread basket. Place the dough into the bread-proofing basket and dust with a little more semolina and rice flour. Then cover and chill the fridge for 8 hours or overnight. Tip: if you do not have a proofing basket you can line a glass bowl with a kitchen towel and dust it with rice flour and semolina.
- In the morning, take the bread dough out of the fridge and let it come to room temperature for about 3 hours.
- Place an empty Dutch oven pot (with lid) in the oven and let it preheat to 450 degrees Fahrenheit.
- Carefully flip the bread dough onto a sheet of parchment paper. Use a blade to make a few slits or designs on top of the bread Scoring the bread will control where the air will expand. Then place it inside the hot Dutch oven pot and put the hot lid on top. Be careful, it will be very hot.
- Bake it covered for 30 minutes, then uncovered for 15-20 minutes. Let the baked bread cool before slicing.
Notes
- If you prefer your bread less sour, keep the starter in the fridge. It will slow down the fermentation and create a very mildly sour flavor in the bread.
- If you are using new bread-proofing baskets, make sure to spray them down with water and apply a generous amount of rice flour and let them dry for about 1 hour before using.
- Use a kitchen scale- Weight measurements are more accurate than volume because you can overpack the measuring cup with flour. Use a kitchen scale to get the amounts perfect.
- Make double- If you want to bake 2 loaves, you’ll need to feed double the amount of starter, so 100g each of water, flour, and starter
- Do not skip the stretching– This is very important for sourdough. With each dough stretch, you will notice it getting stronger and stronger. Building the strength of the dough will help it hold its shape when it bakes.
- Use a proofing basket alternative- If you do not have a proofing basket, you can line a glass bowl with a kitchen towel and dust it with rice flour and semolina instead.
- How to freeze sourdough bread- Slice it in half and place it in a gallon-sized ziplock bag and then put it in the freezer. It should last for 3 months. Defrost overnight in the fridge.
- Cast Iron Ribeye Steak - January 14, 2025
- The Best Brioche Donuts Recipe - December 17, 2024
- Garlic Cheese Bread - December 11, 2024



Irina says
This is the best recipe I have found so far, and I am so glad I took your advice and used Ballerina Farm starter. I have a question, though – how do you store your starter if you don’t use it every day? I tend to bake twice a week, and I wasn’t sure if I needed to refrigerate it or just continue feeding it. Also – what is the feeding ratio you use?
Thanks!
Dina says
Hi Irina, I just keep my starter in the fridge and feed just enough for the recipe. I actually place the discard back into the jar and place it back in the fridge. After a while the starter will become a little weaker. Then it will need to be fully fed about twice to bring it back to its originally strength. My methods are not traditional lol. I just hate throwing away the discard. It just feels like such a waste. I hope that helps! 🙂
Irina says
Thank you, yes, this helps a lot!!!!
Pauline Peterson says
This recipe creates incredible bread! I only did 5 stretches before the final shaping to save time as I had to go somewhere, and it turned out perfect. Thank you!
Dina says
Pauline, I am so thrilled to hear that you enjoyed this recipe! Thank you for taking the time to wrote your kind feedback 🙂
Marci says
Absolutely delicious! I’m new to sourdough bread baking and your recipe was super easy! Thank you so much!
Dina says
Yay! I am so happy to hear you loved this sourdough recipe so much! Sourdough can be a bit challenging so I am glad that you gave is a chance and it worked out delicious for you! I appreciate your feedback Marci! I hope you find more recipes to try from my food blog. 🙂
Sue says
I want to try your recipe but have a few questions. I usually cold poof my bread for 24-32 hrs. I love the more sour taste. Can I leave in refrigerator longer than overnight or can I shape, let sit on counter for 2 hours and then refrigerate for 24 hrs? If so can I bake taking right out of refrigerator?. TIA
Irina Johnson says
I have been trying different recipes over the last year and was ready to give up until I found your recipe – this is the one that won – thank you!!! Question on the starter – I purchased mine through Ballerina Farm also, but her feeding instructions left me confused – it seems like you’ll never have enough starter if you keep discarding everything except 30 g of starter – how do you feed yours?
Dina says
Hi Irina, I am so happy you found my recipe!! 🙂 I actually didn’t follow the instructions on the ballerina farm package. I just add whatever is left, back in the jar and keep it in the fridge until next time.
Alan Autin says
I’ll be trying your recipe today but correct me if I’m wrong, your hydration levels is less that 60% while most recipes have hydration levels that exceed 70% and as much as 80%. Your thoughts?
Dina says
Hi Alan, I haven’t done an extensive amount of experimenting on different amounts of hydration. This is the ratio that worked well for me and my family so I kept it. Different brands of flour also play a roll in this. I hope that helps clarify. If you give this sourdough bread a try let me know how it turns out. Thanks.
Jennifer says
Need clarification: am I making the dough into the rectangle right after the 6th stretch and fold, or 30 minutes after the 6th s&f?
Thanks! Can’t wait to try this. I’ve been doing the “lazy sourdough” recipe I found on YouTube with no stretch and folds but it’s very dense. I’m hoping this is more airy.
Dina says
Hi Jennifer, great question. You would do the rectangle 30 minutes after the 6th stretch and fold. I hope you love this easy version! Let me know how it turns out!
Amelia E Campbell says
I am needing instructions on using your recipe in my bread machine.
Dina says
Hi Amelia, sourdough bread requires a process of stretching and folding between staggered time stamps. I am afraid this is something a bred machine cannot replicate. So I don’t think you can make this recipe in a bread machine.
Joy says
Mine is looking very dry how can I fix it…using fresh milled flour and doubled the recipe …help not very good at this
Dina says
Hi Joy, I used King Arthur bread flour for this recipe. I know that fresh milled flour can be very different so it may take a few tries to get the ratios down. Next time, you may need to add a little more water. I hope that helps!
Tammy says
Oh my, is all i can say. People were scaring me how hard it is to bake sourdough bread. I googled so many recipes, and watched so many videos till I ran into this one! The EASIEST and the best TASTING bread EVER!!! So simple and so so not complicated. Thank you so much for posting this!
Dina says
Wow Tammy!! That’s amazing! I am happy that you stumbled upon my recipe 🙂 Thank you for taking the time to write your kind feedback!
Amy J North says
I want to double this to fit a 13″ covered pullman pan. Do you have any suggestions that might help? Is 1200 grams of flour too much for that pan?
Dina says
Hi Amy, I am afraid that a double batch might not fit in a 13 inch pan.
Steve Luby says
Just starting my sourdough journey. For a couple of months been making yeast bread which I will continue. Watched your video on YouTube and of all other videos I watched your recipe seemed the best to me. My question is what size Dutch Oven do you use? I have a 6 quart.
Dina says
Hi Steve, I am so glad you found my sourdough bread recipe on YouTube! I use a 5 quart but a 6 quart will work too 🙂
Diana Cheremnykh says
I have tried so many sourdough bread recipes and this one was the one I succeeded! This recipe makes the softest, chewy inside perfect for sandwiches! If you follow the recipe step by step and have a healthy active starter this recipe will work out perfect. Thank you Dina for a simplified sourdough recipe I can make a few times a week!
Dina says
You are very welcome Diana! 🙂 It makes me so happy that this sourdough recipe turned out so perfectly for you! Glad to hear that this recipe will be a family favorite! Thank you so much for your support and feedback! I hope you find more recipes to enjoy from my blog! 🙂
Geneva says
Hi,
I just tried your recipe because it looked promising. Unfortunately, it turned out as usual – after throwing the cake out of the bowl, it started dripping 🙁 The dough always comes out overgrown at this stage. In addition, I added a bit of fresh yeast and I have my own perennial starter. I’m sad because I only get bread whose dough is poured into a baking tray.
Dina says
Hi Geneva, I am sorry to hear that the recipe didn’t turn out as expected. I would love to help you troubleshoot. Would you be able to give me a few more details as to what went wrong? Sorry, I am just a little bit confused.
Geneva says
Everything went well untill a step number 23 (like in the picture). The dough started to dripp and it was hard even to cut it. Maybe addition 10 grams of fresh yest caused that bread grew too fast and i shoud have put it in the oven much earlier? I just don’t know when is a good moment to flip the bread dough because i think i definitely did it too late.
Thank U very much for some tips.
Dina says
Hi Geneva, I think adding yeast to a sourdough recipe probably caused it to do that. I would not recommend adding yeast to sourdough.
Diana says
I can’t wait to try your recipe. I make English muffins all the time but have never tried bread. My only confusion is the towel. Don’t know exactly what you mean by a raised towel. Thanks for sharing your recipe.
Dina says
Hi Diana 🙂 I hope you love this sourdough bread recipe! Sorry if I confused you! 🙂 I meant to say a towel with a raised pattern. Smooth towels tend to stick a little bit more. I hope that helps clarify. Let me know how it goes! 🙂
Voula says
Can you use spelt flour in this recipe
Dina says
Hi, great question! I have not tested this recipe with spelt flour so I am not too sure.
Sarah says
Hi,
What is the size of your Dutch oven pot? I wonder if the 5-quart is enough for the receipe?
Dina says
Hi Sarah, yes a 5-quart will work. That is the same size that I used 🙂
jessica says
Can I leave my dough on the kitchen countertop overnight instead of placing it in the fridge? Thanks
Dina says
Hi Jessica, you can let it rise on the counter top but it will only take a few hours. I would not let it sit at room temperature overnight. The dough will over-proof and deflate, resulting in a dense loaf.
jessica says
So if I want to bake the bread the same day in the evening I’ll just do it after stretch #6? Or do I need to give the dough a few hours for proofing?
Dina says
Hi Jessica, after the 6th stretch, you will need to give the dough a few hours to proof. Then it’s ready to bake. If you plan to make it the same day, make sure to start the process earlier in the day and utilize the bread-proof setting on your oven to speed things up. I hope that helps!
jessica says
Do you usually wash the bread-proofing basket after using it? Or it’s fine to leave it as is till the next time I make a loaf of bread? Thanks
Dina says
Hi Jessica 🙂 I don’t wash my bread baskets. I just dust out all the flour and store it. I hope that helps and I hope you love this recipe! Let me know how it goes! 🙂
Olga Migashkin says
I will have to try this recipe! But what I really need is a knife to cut the bread – any recommendations?
Dina says
Hi Olga, one of my favorite knife brands is Global. Here is a link to their serrated bread knife.
Alla says
Wow. Thank you Dina. This recipe turned out perfect on my first try.
The sheer amount of flour I’ve wasted trying to make sourdough bread experimenting many different recipes. I’m overjoyed with the results.
Dina says
Hi Alla, that is so awesome to hear! It really makes me so happy when people love my recipes! So happy that you love my sourdough bread recipe over other recipes! Thank you so much for taking the time to leave your feedback! I hope you find more recipes to enjoy from my food blog! 🙂