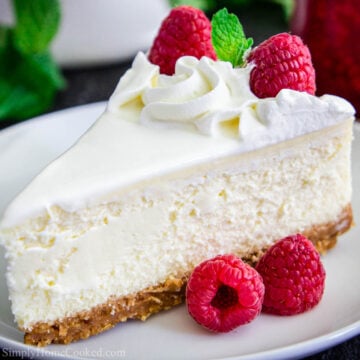
This fool-proof New York Style Cheesecake recipe is super creamy, rich, and easy to make! Learn all the secrets to achieve a perfectly smooth cheesecake every time – with no water bath!
If you love cheesecake, then you should try this Easy Oreo Cheesecake (VIDEO) and Pumpkin Cheesecake (VIDEO).
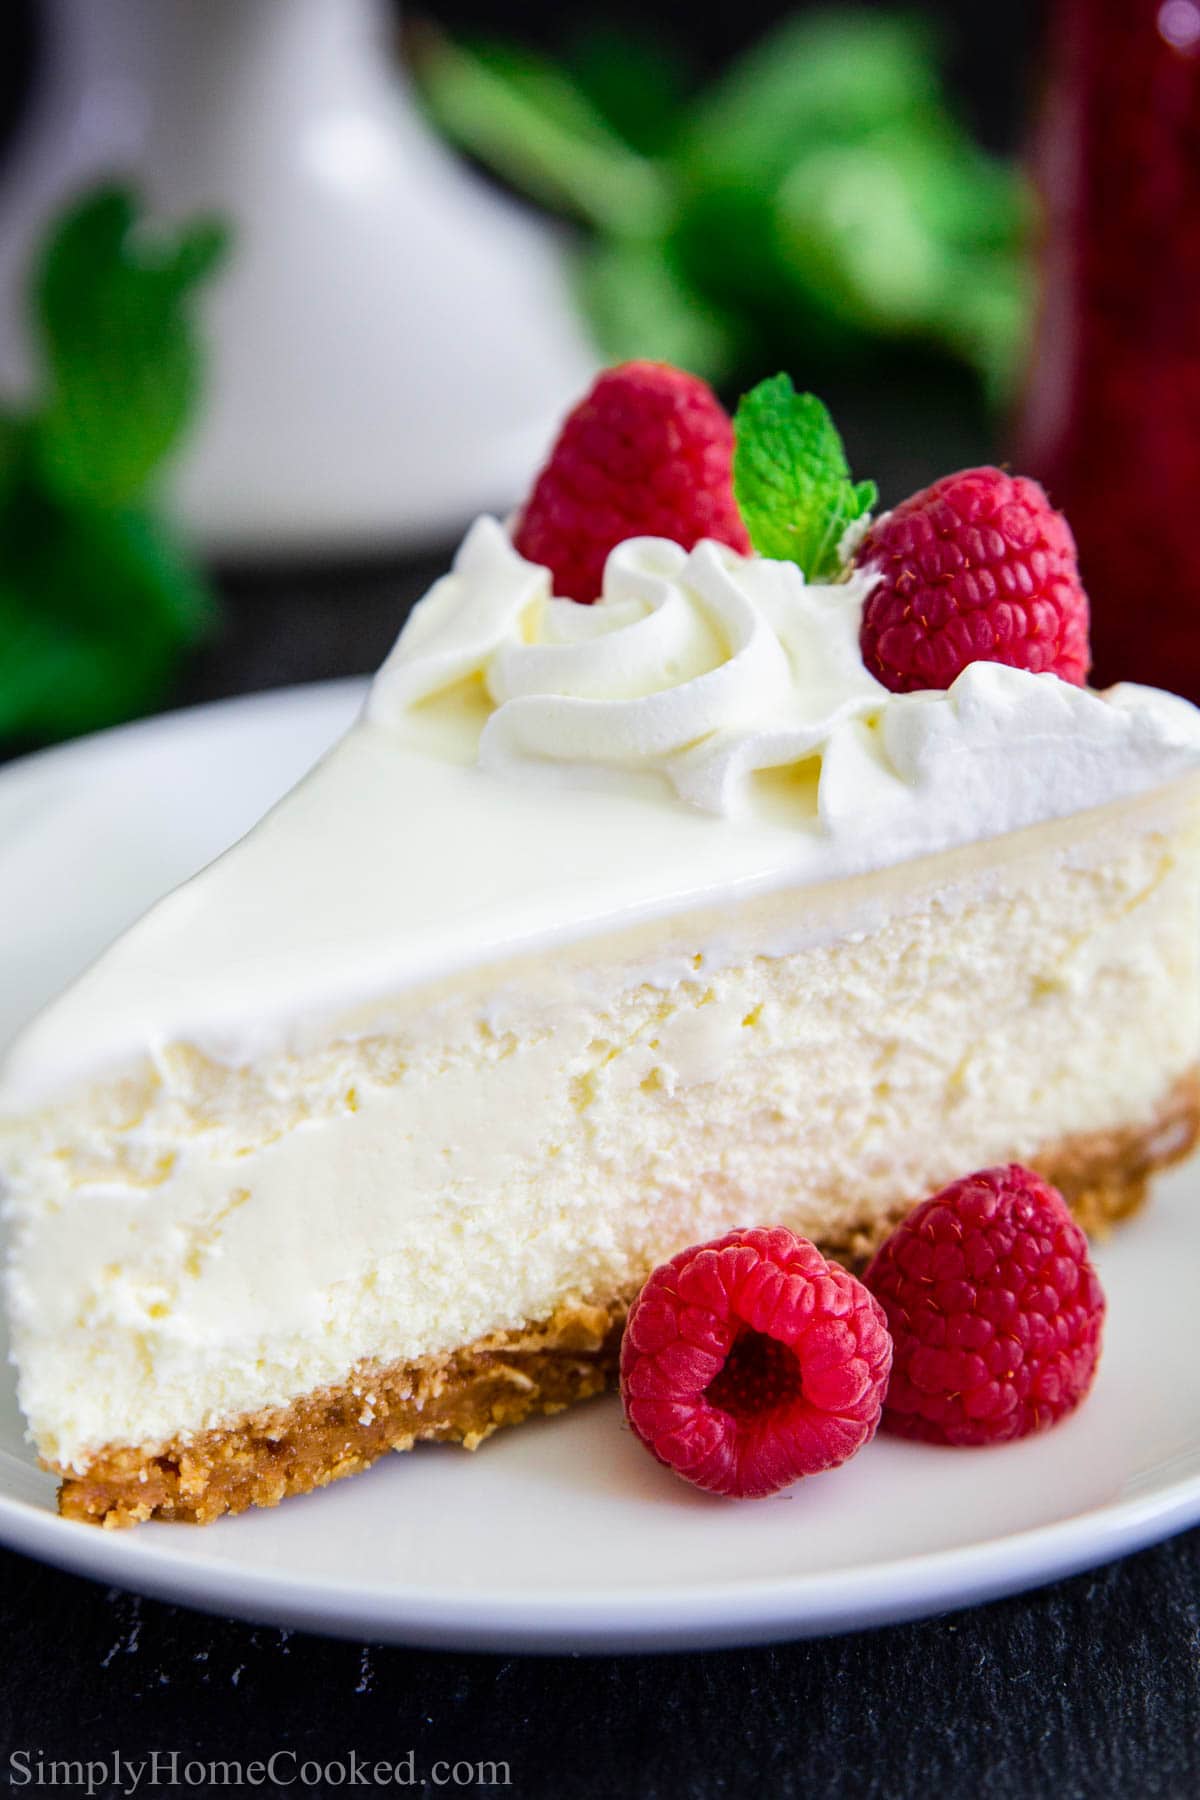
Table Of Contents
Recipe Details
I love this New York Style Cheesecake recipe! It makes the perfect dessert for family and friends, and it’s also easy to dress up for special occasions.
- TASTE: Sweet and tangy, this dessert uses cream cheese and sour cream for its full flavor. The graham cracker crust is made with rich butter and brown sugar.
- TEXTURE: This cheesecake is dense, smooth, and extremely creamy with a crust that adds just a touch of crunch.
- TIME: This New York Style Cheesecake takes a total of 7 hours, but there is only 30 minutes of active prep time.
- EASE: This recipe is not hard to make and most of the time will be spent cooking and cooling it. These images and step-by-step instructions will walk you through it.
What You’ll Need
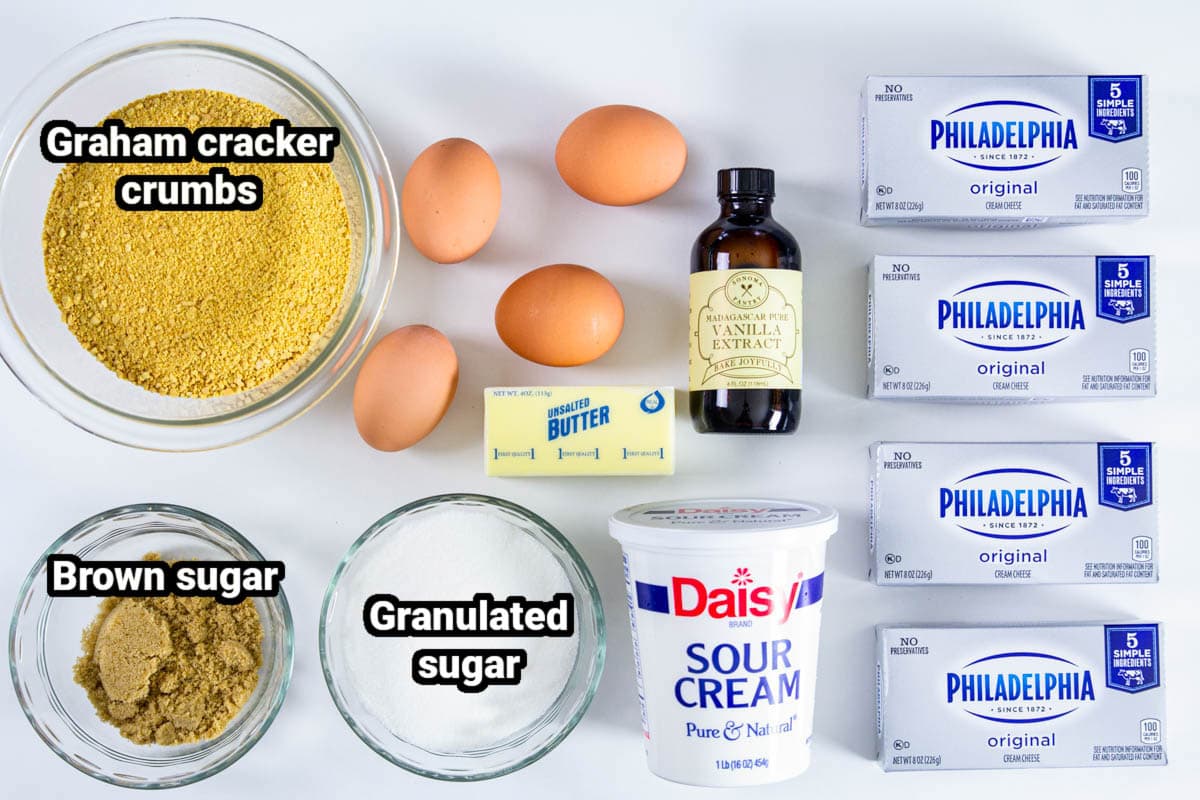
Ingredient Notes
- Graham crackers- These are crumbled to make the pie crust. You can break them up by hand or use a food processor for a more thorough and even crumbling.
- Butter- Melted butter holds the crumbs together just enough to form the crust. It also adds nice flavor.
- Cream cheese- This ingredient is what makes this a New York Style Cheesecake. The dense, thick cream cheese makes the filling extra creamy.
- Sugar- Both brown and granulated sugar are used to sweeten the crust, filling, and sour cream topping.
- Eggs- Use room temperature eggs to give your cheesecake a thick, smooth texture. As they bake, they act as a thickening agent and the yolk emulsifies for extra smoothness.
- Sour cream- This tangy ingredient gives the cheesecake its perfectly white exterior and a sweet and tangy flavor in both the topping and filling.
Add-ins and Substitutions
- Add chocolate- You can make this a chocolatey dessert with the addition of melted chocolate in the cheesecake filling and chocolate graham crackers used in the crust.
- Make a lighter version- You can make this lighter by using a lower fat cream cheese and substituting plain Greek yogurt for the sour cream.
- Add fruit- Adding the zest of an orange, lemon, or lime, as well as extract gives this New York Style Cheesecake a fruity flavor. Top it with fresh fruit or pie filling, like this Blueberry Pie Filling.
- Substitute dairy-free ingredients- You can make this recipe without dairy by using plant-based sour cream, butter, and cream cheese, which are found in most grocery stores.
How to Make New York Style Cheesecake
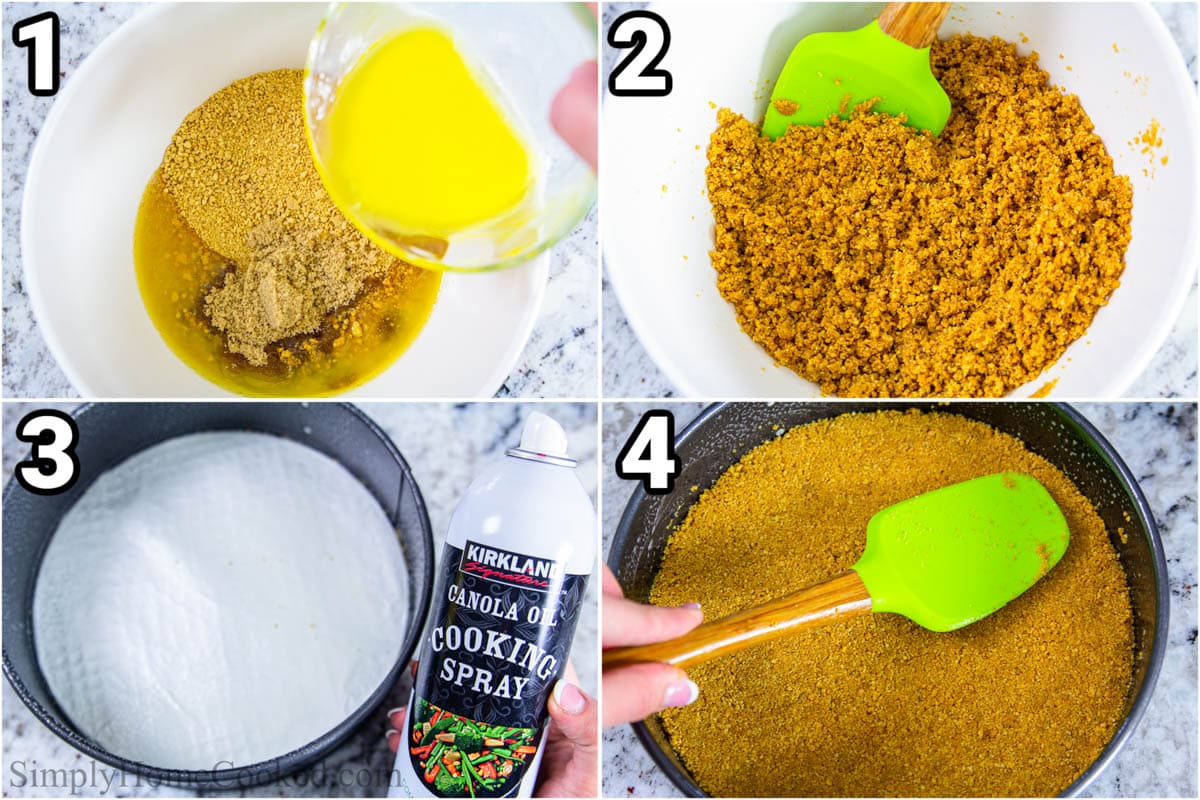
- Make the crust. First, combine the graham cracker crumbs, brown sugar, and melted butter in a bowl. Then place them into a 9-inch springform pan that is lined with non-stick foil and sprayed with nonstick spray.
- Bake it. Press it down into the pan and bake for 10 minutes at 350 degrees Fahrenheit to set it.
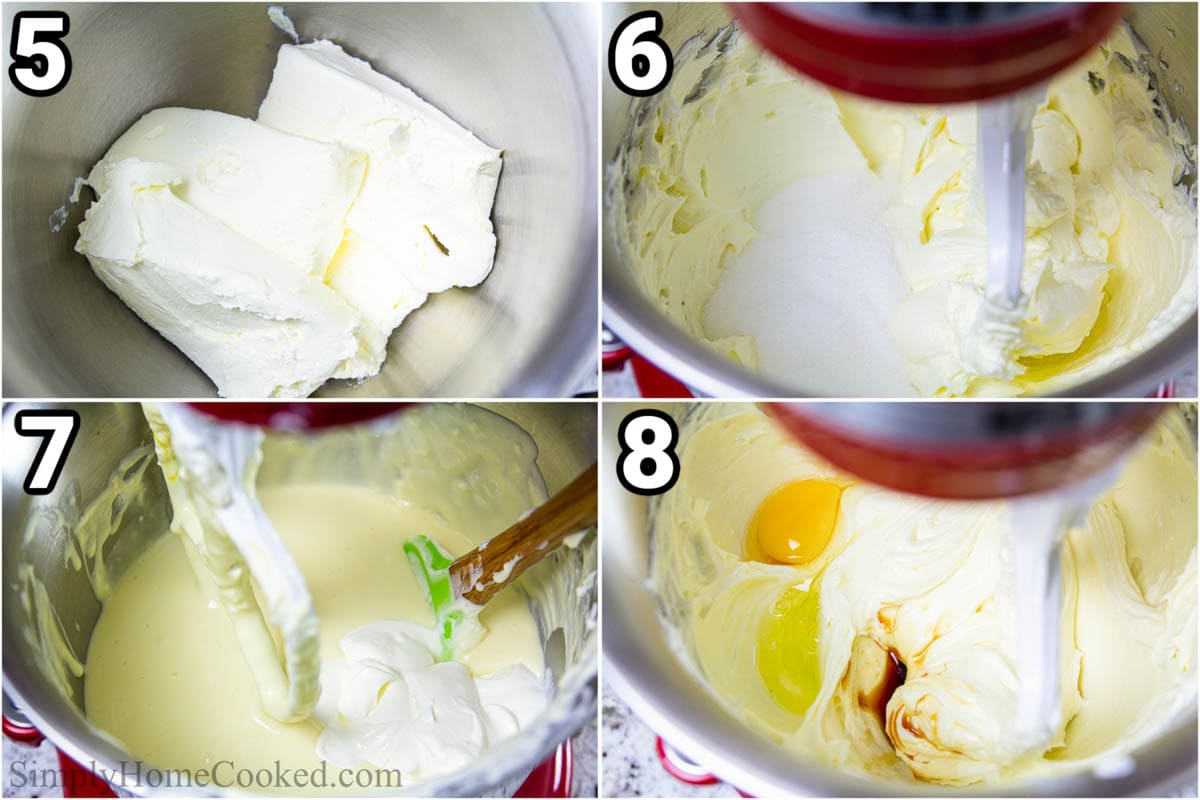
- Mix the cream cheese with the sugar. Blend the softened cream cheese and sugar on high speed in the bowl of your stand mixer until no lumps appear. You will need to use the paddle attachment or float beater for this part.
- Add the rest of the filling ingredients. Now add the vanilla extract and sour cream. Then add one room temperature egg at a time, beating each one at low speed before adding the next.
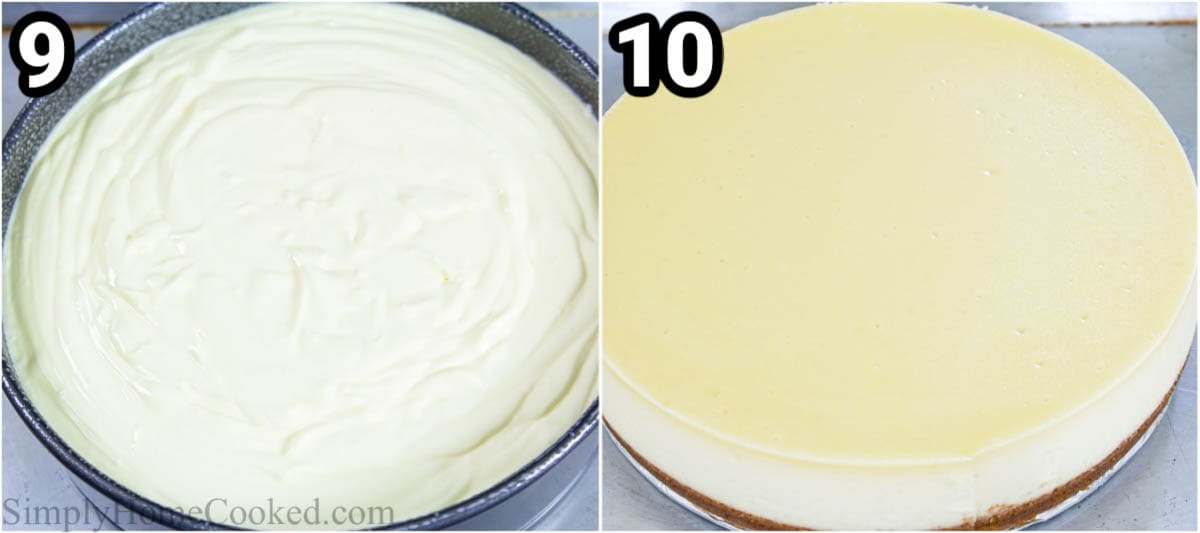
- Add the filling and bake. Pour the cheesecake filling on top of the baked graham cracker crust. Bake at 350 Fahrenheit for 15 minutes. Then drop the oven temperature to 250 degrees Fahrenheit and bake for another 1 hour and 30 minutes. Let the cheesecake sit in the turned-off oven until it is completely cooled down. Refrigerate for 4 hours.
Pro Tip: The key to getting that perfectly white, store-bought cheesecake look is low oven temperature. You have to be patient as you slowly lower the temp, then let it cool in the oven naturally. Trust me, it’s worth it!
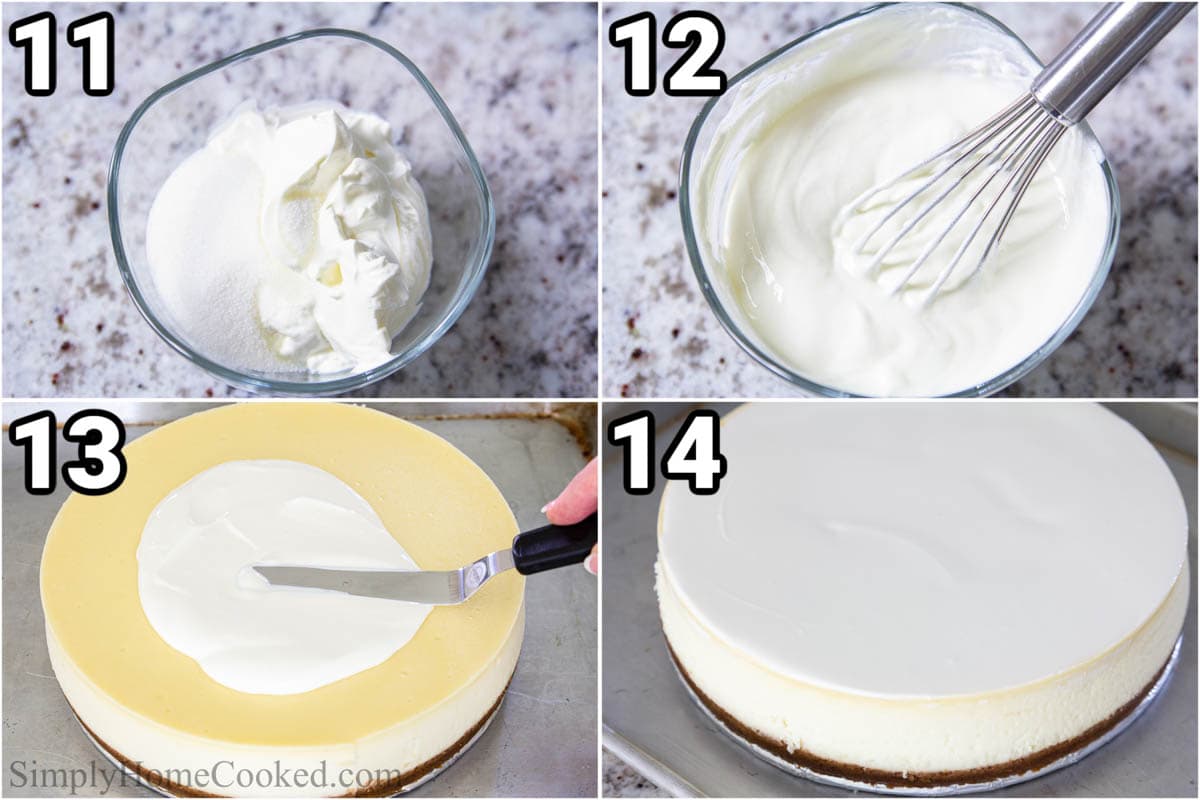
- Spread the topping. Combine the sour cream and sugar and spread a smooth, even layer on top of the cooled cheesecake. Then refrigerate another 4 hours before serving.
Recipe Tips
- Use room temperature eggs and cream cheese- Using room temperature ingredients is a must. Otherwise, you’ll have clumps no matter how well you beat them. Let them come to room temp naturally because microwaving will leave an uneven consistency.
- Don’t overbeat the eggs- This is one of the biggest reasons why cheesecakes crack. When adding the eggs, you want to add 1 egg at a time on low speed, not adding the next until there aren’t any more yellow streaks in the batter. You can even whisk them separately first. This will reduce the amount of air incorporated into the batter, which makes it crack while baking.
- Never open the oven door early- I know it’s tempting to peek, but never open the oven door when a cheesecake is baking or cooling. The sudden changes in temperate will cause it to collapse.
- Use nonstick foil and cooking spray – This step isn’t crucial but it sure makes life a lot easier when the cheesecake slides right off of the foil.
FAQs
Unlike regular cheesecake that uses heavy cream and sour cream in the filling, New York Style Cheesecake uses cream cheese. Therefore, it has a dense and heavy texture while regular cheesecake is creamy and silky because of its thinner batter.
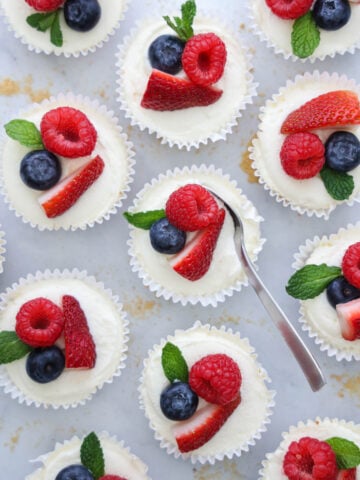
Both are delicious, but the difference is in the texture. Cheesecakes that are baked use eggs, which give them a thicker texture. No-bake cheesecakes are softer and lighter, almost like mousse. You can compare for yourself with this New York Style Cheesecake and these No-Bake Mini Cheesecakes (VIDEO). They’re both utterly scrumptious!
Serving Suggestions
This New York Style Cheesecake is rich and delicious, the perfect addition to the dessert table at any party. Here are some yummy ways to serve it.
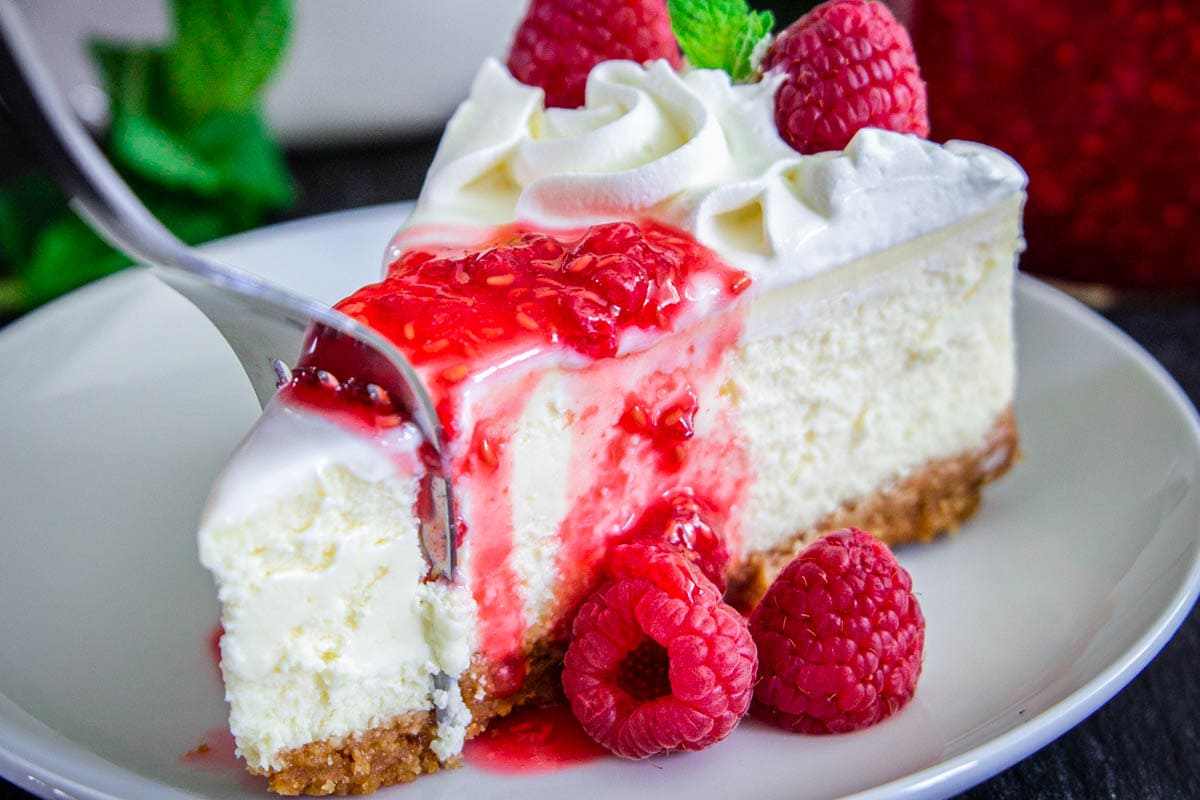
- Toppings: Top a slice with some chocolate shavings, Chocolate Ganache, Chantilly Cream, Simple Cherry Pie Filling, fresh fruit, or Fresh Raspberry Sauce.
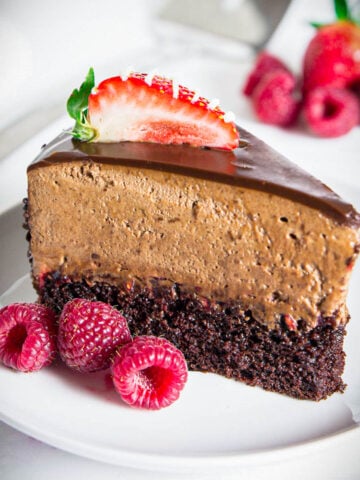
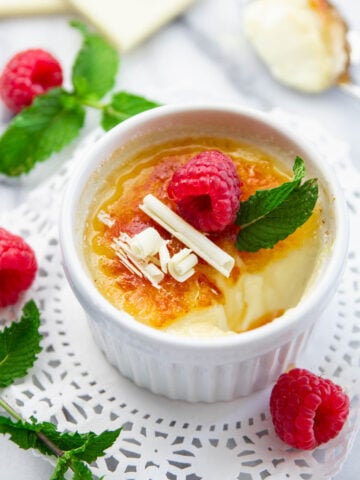
- Chocolate: Pair this dessert with Chocolate Pot De Creme, Coffee Chocolate Mousse, Chocolate Lava Cake (Video), White Chocolate Creme Brulee, or a mug of Hot Chocolate.
- Cakes: Serve it alongside Honey Raspberry Cake, Nutella Cake, Tiramisu Cake (VIDEO), or Gingerbread Cake.
- Cookies: Enjoy your New York Style Cheesecake with some White Chocolate Macadamia Nut Cookies, Double Chocolate Cookies (VIDEO), Almond Joy Cookies, or Chocolate Thumbprint Cookies.
Make This Recipe in Advance
Make ahead: You can make this cheesecake ahead of time and leave it in the fridge until you’re ready to serve. Cover it loosely with foil and plastic wrap to keep the edges from drying out.
Storing: Store this New York Style Cheesecake in the refrigerator in an airtight container or covered loosely with foil and plastic wrap for up to 7 days.
Freeze: Cheesecakes freeze very well! Freeze the baked and cooled cheesecake uncovered for about 2 hours, then wrap it with a layer of cling wrap and a layer of aluminum foil. Place it back in the freezer and keep frozen for up to 1 month. Thaw in the refrigerator overnight.
More Delicious Desserts!
Full Recipe Instructions
New York Style Cheesecake
Equipment
Ingredients
Crust
- 2 cups graham cracker crumbs
- 1/4 cup golden brown sugar
- 8 Tbsp unsalted butter (1 stick melted)
Cheesecake
- 32 oz cream cheese, softened 4 (8 oz) packages
- 1 cup granulated sugar
- 1 tsp vanilla
- 4 eggs room temperature
- 1 cup sour cream
Sour cream topping
- 1 cup sour cream
- 2 tbsp granulated sugar
Instructions
- In a bowl, combine 2 cups graham cracker crumbs, 1/4 cup brown sugar, and 6 Tbsp melted butter. Mix until the butter is fully incorporated.
- Line the bottom of a 9-inch springform pan with nonstick foil and spray with nonstick spray. Then fill with the graham cracker crumbs. Press and compact the bottom of the pan with graham cracker crumbs using your hands. You can either press it into one thick layer or you can press some of the crumbs up the sides of the springform.
- To set the crust, place it on a baking sheet and bake at 350 degrees Fahrenheit for 10 minutes. Remove from the oven and let the crust cool. Spray a little more cooking spray to the sides of the springform pan so that the cheesecake will come off easier after it's baked. In the bowl of a stand mixer, blend 4 (8-oz) packages of softened cream cheese and 1 cup of sugar on medium-high speed until no clumps appear. You will need to use the paddle attachment for this part.
- Then mix in 1 tsp vanilla extract and 1 cup sour cream. Now drop the speed to the lowest setting and add the room temperature eggs 1 at a time, beating each egg at low speed, making sure each egg is blended before adding the next. Be sure not to over mix. Over-mixing will cause the incorporated air to crack the cheesecake during baking. Scrape the sides of the mixer during this process to incorporate any cream cheese that has stuck to the side of the bowl.
- Pour the cream cheese filling into the greased spring form pan. Grip the sides of the springform and shake it a little to smooth out the top.
- Bake the cheesecake at 350 Fahrenheit for 15 minutes. Then drop the oven temperature to 250 degrees Fahrenheit and bake for another 1 hour and 30 minutes. Do not open the oven at all, or else it can crack in the middle from the sudden temperature change. Once it’s done, let the cheesecake sit in the turned off oven until it is fully cooled down (about 4 hours)
- Mix 1 cup sour cream with 2 tbsp sugar and evenly spread onto the cheesecake. Then refrigerate for 4 hours before eating.
- Once the cheesecake is cooled, spread the sour cream mixture on top. Then place in the fridge for at least another 4 hours. Serve chilled with fresh raspberry sauce on top.
Notes
- Use room temperature eggs and cream cheese- Using room temperature ingredients is a must. Otherwise, you’ll have clumps no matter how well you beat them. Let them come to room temp naturally because microwaving will leave an uneven consistency.
- Don’t overbeat the eggs- This is one of the biggest reasons why cheesecakes crack. When adding the eggs, you want to add 1 egg at a time on low speed, not adding the next until there aren’t any more yellow streaks in the batter. You can even whisk them separately first. This will reduce the amount of air incorporated into the batter, which makes it crack while baking.
- Never open the oven door early- I know it’s tempting to peek, but never open the oven door when a cheesecake is baking or cooling. The sudden changes in temperate will cause it to collapse.
- Use nonstick foil and cooking spray – This step isn’t crucial but it sure makes life a lot easier when the cheesecake slides right off of the foil.
Nutrition
This new york style cheesecake recipe was originally published on June 15, 2018, it has been updated since.
- Easy Guacamole Recipe - April 24, 2025
- Chopped Caprese Salad - April 21, 2025
- Strawberry Nutella Puff Pastry - April 17, 2025


Sara says
Can this be frozen for eating at a later time?
Dina says
Hi Sara 🙂 Yes cheesecakes can be frozen. Just make sure you let it fully cool down before you freeze it. Also, you want to place it in an airtight container or wrap it really well. I hope that helps. Let me know how this cheesecake turns out! 🙂
Uncomplicated says
This Recipe does look easy. I’ve never made cheese cake. I’ve eaten both cracked and uncracked. They taste the exact same. So why does everyone fuss over the crack? Also, does it absolutely have to be put in a spring form? I don’t see why?
Dina says
Hi, the reason behind the springform is that it will be a lot easier to remove the cooled cake vs a regular cake pan.
Susan Kronick says
I made this cheesecake yesterday…this is the ONLY recipe I will ever use again..PERFECTION…I had been using an identical recipe, but my baking times were off…I had been using the 425 degrees for 10 minutes and 225 for 1 hr…the high heat caused the butter in my crust to leak making a mess in the oven..and the center was a tad undercooked for my liking…I followed this recipe and prep to a TEE…I did use my Oreo cookie/butter crust..and like this recipe recommends, I whisked my eggs in a cup before adding them to the batter, and after a brief mix on low..hand stirred the eggs. After the baking time was complete, I kept in turned off oven and kept cake in for 1 1/2-2 hrs..I live in hot south Florida, so I didn’t need to keep in oven an additional 2 hours..then I placed it on counter for one hour and then into fridge…and the best part NO CRACKS!!!!!!! NO CRACKS AT ALL…we actually had the cheesecake this morning for brunch, couldn’t wait till after dinner to try it…THE BEST cheesecake recipe and baking times are perfect!!!!!!!
Dina says
WOW! That is incredible Susan! I love hearing reviews like this! Your comment totally made my day! Thank you so much for the kind feedback 🙂
Nicole Molina says
Dina is the best! I love all her recipes because comes out exactly like in her videos 👏🏻thank you so much for sharing God bless you
Dina says
Thank you so much Nicole! I really appreciate you taking the time to write your kind words 🙂
Jalana says
Can this recipe be used for 4inch cheesecakes? How many would it make and would it be the same cooking time?
Dina says
Hi Jalana, I have never tried using this cheesecake recipe for that. It would be hard to say the quantity and the bake time since I have not tried doing that myself. If you give it a try let me know how it goes! 🙂
Patricia says
I dont have a stand up mixer to make the cheese cake recipe I have just a electric mixer do I need a stand up mixer for this recipe?
Dina says
Hi Patricia, you can still make this cheesecake using an electric handheld mixer. Just make sure not to overmix the eggs, or the cheesecake might crack due to much-incorporated air. I hope that helps! 🙂
Christina says
So delicious!! Always love your recipes Dina!
Dina says
Hi Christina 🙂 That is so awesome to hear! It really makes me so happy when people love my recipes 🙂 Thank you so much for taking the time to leave your feedback, It really helps me a lot! I hope you continue to find recipes to enjoy on my blog 🙂
Jalana says
I have made your pumpkin cheesecake and this one… both were a hit in my family…especially the pumpkin 🙂 (which by the way was my first ever cheesecake and your instructions made it sooo easy). Do you have a key lime cheesecake recipe?
Dina says
Wow, Jalana! That is so awesome. I am so happy that my instructions were clear and easy to follow. This made my day! ☺️ I actually do not have a key lime cheesecake but I will add it to my list of recipes to make. 😉
Michelle says
Very good! Easy! I omitted the topping at had it how it was and it was delicious with a wonderful creamy texture.
simplyhomecooked says
Thank you so much, Michelle! Very happy to hear you loved the flavor and texture of this New York cheesecake! Thank you so much for taking the time to leave your feedback 🙂
Becca says
Okay I’ve never felt the need to review a recipe, but WOW! I’ve always had issues with cheesecake and I really hate the extra effort with a water bath (that never seemed to work for me). I followed your recipe exactly and my cheesecake came out BEAUTIFUL! Super super easy AND no need for a water bath is top tier for me !!!
simplyhomecooked says
Wow! You are too kind Becca! So happy to hear that this cheesecake recipe worked out so well for you and that it was easy to follow 🙂 Thank you so much for your awesome review and I hope you find many more delicious recipes on my food blog 🙂
leslie says
i followed the directions to a tee. (350 for 15 minutes, 250 for 1.5 hours, leave in oven til cooled)
the cheesecake came out totally brown on top….almost like leather.
i’m sickened.
simplyhomecooked says
Hi Leslie, I am sorry to hear that. It should not turn brown like that. By any chance, did you bake the cheesecake on the top rack?
Supriya Kutty says
I never made cheesecake before, neither baked nor no-bake, because I thought it had to be a complicated endeavor. After the holidays I had a couple of bricks of cream cheese leftover and Googled “Cheesecake” and found your recipe. I am SO happy I found your recipe which was invaluable. I found your recipe and directions to be so easy and, most importantly, it was soooo delicious! My family LOVED it!!! Unfortunately (joking), they now want me to make it all the time. Lol! Thank you and God bless you!
simplyhomecooked says
Wow, what an awesome review! Thank you so much for taking the time to write so much positive feedback about this cheesecake recipe. It means so much to me Supriya 🙂
V says
Wow. Thank you for the step-by-step tutorial for this cheesecake. It makes it so much easier for a foolproof recipe. Cannot wait to try it!!
simplyhomecooked says
Thank you V! These cheesecake making tips have helped me so much over the years. No more cracked or caved cheesecakes here 😉
Julia says
Such gorgeous images to showcase this truly stunning cheesecake, Dina! I’ve never made a New York style cheesecake before but your detailed instructions are so easy to follow. Thank you for sharing!
simplyhomecooked says
My pleasure Julia! It took me so long to finally develop a foolproof cheesecake recipe. This one is a keeper 😉
NT says
Wow, the photos are just wow! Let me tell you, I am always scared to make a cheesecake and you have won me over. Everyone knows that New York Cheesecakes are bomb!
simplyhomecooked says
NT, once you try this method of a foolproof cheesecake, you’ll never be intimidated by baking a cheesecake ever again!
Katie says
My cheesecake always cracks and I always get nervous about making it. But your recipe looks absolutely perfect. I appreciate the helpful tips, especially about cracking 🙂
simplyhomecooked says
Thank you, Katie! it took me so long to figure out a way to prevent cheesecake from cracking. This method is pure gold, works every time!
Igor says
This cheesecake looks amazing. I just have a question do you line the bottom of the pan or the sides? Also just wondering why line the pan with foil?
simplyhomecooked says
Thank you, Igor! I line only the bottom of the springform pan with non-stick foil so the cheesecake slides off more easily. I spray the sides with nonstick spray also. I see no need inlining the entire pan if you aren’t using the water bath method.I hope that helps 🙂
Lena says
Ohhhh!!! 👍🏻👏🏻💓😱 this cheesecake is no joke!!!-beyond smooth and creamy…My sister Jessica made it for us when she was visiting me in FL, and my hubby and I were just in complete awe! I have never had a better cheesecake!!!! Absolutely PERFECT! Thank you for another awesome recipe!! 👏🏻🥰 simple and DELICIOUS!
simplyhomecooked says
Lena thank you for taking the time to write such a nice review! 🙂 Love hearing awesome feedback like this!
Katy | Her Cup of Joy says
This cheesecake looks so smooth, just perfect! I’m surprised you didn’t use a water bath, I’m always nervous to make cheesecake because I don’t like dealing with the water bath. I’ll have to try this next weekend for my birthday 🙂
simplyhomecooked says
Thank yo Katy! I can’t wait for you to try it 🙂 Happy early birthday!
Tanya says
This cheesecake looks stunning! Can’t wait to try it. I just have one question regarding baking temperature. I have a convection (fan circulating oven) and I’m just wondering at what temperature should I bake this cheesecake?
simplyhomecooked says
Thank you Tanya! I would keep the oven temperature the same 🙂